



Contents: Removal ⬇ Installation ⬇
Removal
1. Drain the coolant into a pre-prepared container (for more details, see the relevant section in this chapter).
2. Remove the air filter housing assembly (for more details, see the corresponding section in the chapter "Intake and exhaust system").
3. Unscrew the mounting screws (arrows) shown in the figure below.
4. Loosen the mounting clamp (2) and remove the air duct pipe (1), as shown in the figure below.
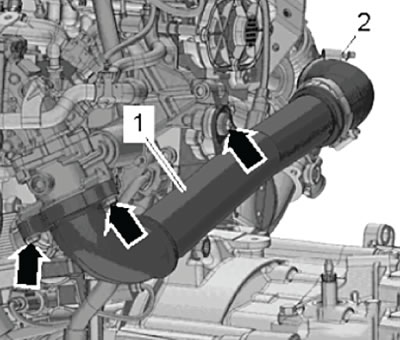
Models with CRKB engine
5. Unscrew the fastening screws on the right and left sides (arrows), as shown in the figure below.
6. Remove the lower part of the air intake (1) as shown in the figure below.
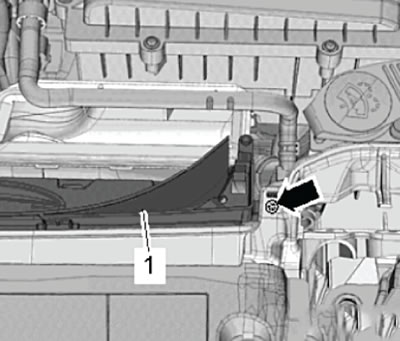
Continued for all models
7. Unlock the lock using a suitable screwdriver in the direction of arrow B as shown in the figure below.
8. Turn in the direction of arrow A and disconnect the connection (1) shown in the figure below.
9. Remove the thermostat assembly.
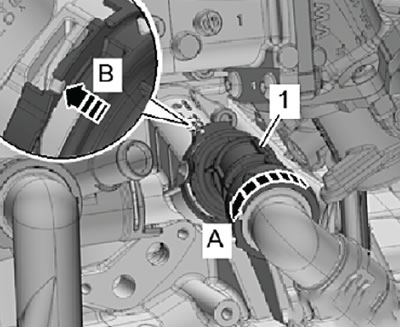
Installation
Installation is carried out in the reverse order of removal.
Note: O-rings must always be replaced after disassembly.
1. Clean and wash all surfaces where the sealing rings will be installed.
2. Wet the sealing rings with fresh coolant.
3. Align the thermostat posts (2) with the notches in the thermostat housing (arrows), then install the thermostat into the housing.
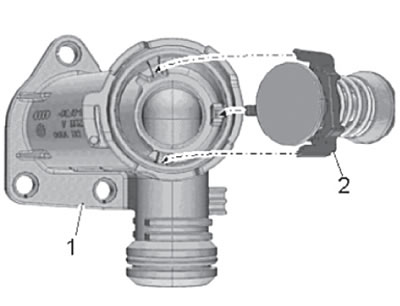
4. Fill the cooling system with fresh coolant.