
Note: See Warnings given in Chapter 1 of this section before starting work.
Removing
1. Drain the liquid from the cooling system (see section 1). If the antifreeze cannot be replaced, collect the drained coolant in a clean container.
2. The thermostat is housed in a housing on the transmission-facing end of the intake manifold.
3. The hoses can be left attached to the thermostat housing cover if they (or housing cover) are not replaceable. Otherwise, loosen the clamps and detach the cooling system hoses from thermostat housing (see photo).
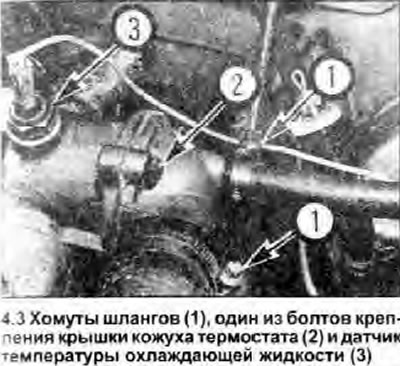
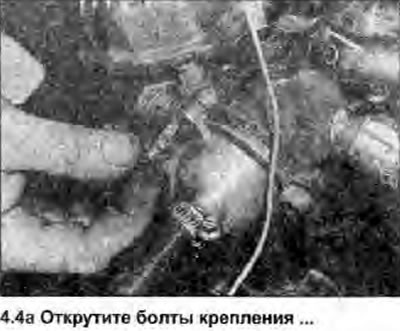
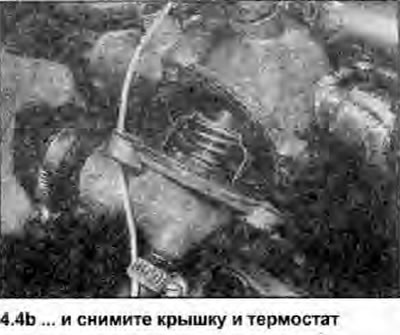
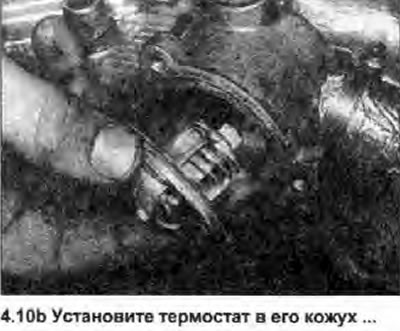
4. Turn off bolts of a cover of a casing remove a cover. If the cover does not separate from the casing, gently wring it out. Be careful not to damage the sealing surfaces - they are made of soft aluminium. Note how the component is oriented in the working position and remove the thermostat (see photo).
 |  |
Health check
5. Inspect the thermostat to ensure that all riveted or welded joints are secure and intact. Also check that the thermostatic valve stem is in working position and moves freely.
6. If during inspection it was found that at room temperature the thermostat remains open, the component is defective and must be replaced.
7. To check if the thermostat is closed at room temperature, hang the component from a piece of wire or twine in a container of cold water and immerse the thermometer in the same container. Make sure the thermostat is not touching the sides of the container.
8. Heat the water and set the temperature at which the thermostat starts to open. Compare this value with the 'n's given in Specification. Keep heating the water until the thermostat opens completely: the temperature at which this should happen is indicated on the component itself. Remove the thermostat and measure the maximum valve lift (thermostat fully open), then let the thermostat cool down and make sure it closes completely. If the thermostat fully opens temperature exceeds 100°C, it will not be possible to perform the second part of the above procedure in a normal open container.
9. If the thermostat does not work as described, gets stuck in one of the positions or does not open at the specified Specifications temperature, replace it.
Installation
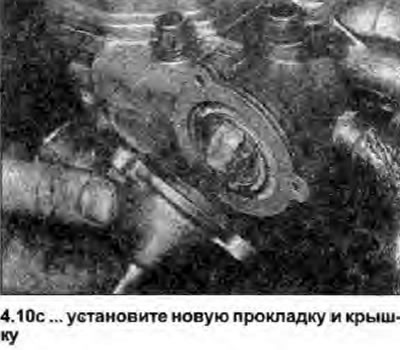
10. Install in the reverse order of removal paying attention to the following (see photo):
- a) Before installing the thermostat, thoroughly clean the contact surfaces of the component housing and its cover.
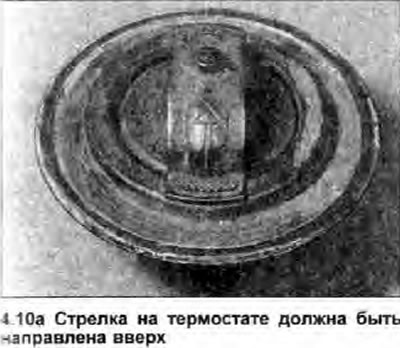
- b) Correctly orient the thermostat when installing it in the casing (the arrow should be pointing up).
- c) Use a new cover gasket, lightly lubricating it with sealant.
- d) Tighten the thermostat cover bolts with a tightening torque specified specifications.
- e) Make sure the cooling system hose clamps are positioned so. that they are not touching other components, then clamp them securely.
- f) Fill the cooling system (see section 1).
- g) Finally, make sure that all connections and joints of the thermostat casing are tight.
 |  |
 |