



Contents: Components ⬇ Removal and installation ⬇
Components
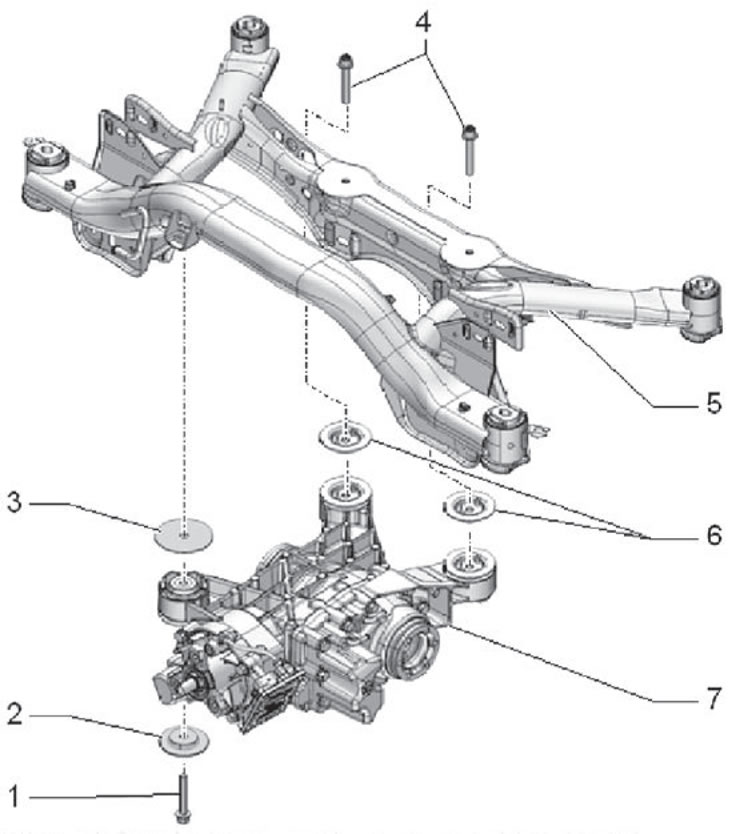
1. Fastening bolt, tightening torque 60 Nm + 180 degrees; 2. Lock washer; 3. Support plate; 4. Fastening bolt, tightening torque 60 Nm + 180 degrees; 5. Rear suspension subframe assembly; 6. Lock washer; 7. Rear final drive assembly.
Removal and installation
Note:
- Be extremely careful not to damage the exhaust system connectors.
- The connecting elements of the exhaust system must not be twisted or bent more than 10 degrees.
1. Remove the rear muffler assembly.
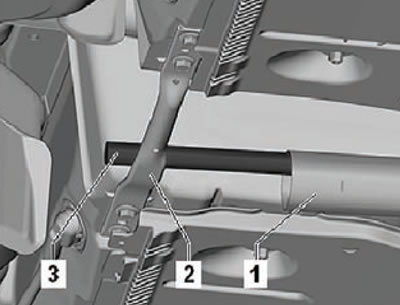
2. Insert a pipe or suitable tool (3) into the central part of the exhaust system (1) and hang it on the crossbar (2) as shown in the figure below.
3. Remove the rear suspension springs (for more details, see the relevant section in the chapter "Chassis").
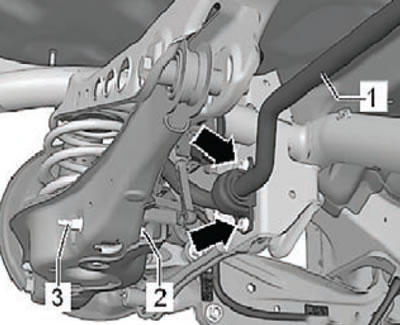
4. Remove the anti-roll bar assembly (for more details, see the corresponding section in the chapter "Chassis").
5. Unscrew the bolts securing the drive shafts to the rear final drive.
- At this stage, just unscrew the drive shaft mounting bolts and leave the drive shafts installed.
- When removing and installing, it is necessary to disconnect the drive shafts from the main gear.
6. Check and ensure that the flange of the cardan shaft and the flange of the rear axle coupling are marked with alignment marks (arrows).
If there are no marks, it is necessary to apply installation marks with a permanent marker.
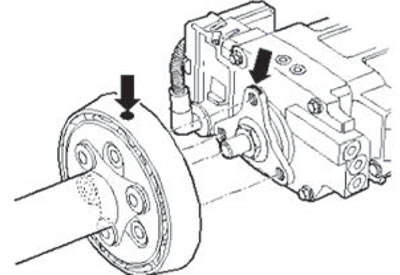
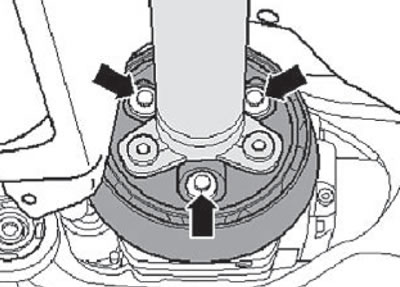
7. Unscrew the mounting bolts (arrows) of the propeller shaft to the rear final drive flange, as shown in the figure below.
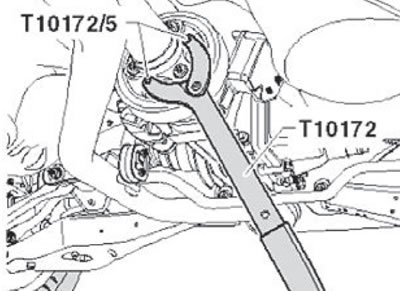
8. When loosening the mounting bolts, hold the cardan shaft from turning using a special device T10172A or T10172 with an adapter T10172/5.
Disconnect the driveshaft assembly from the rear final drive.
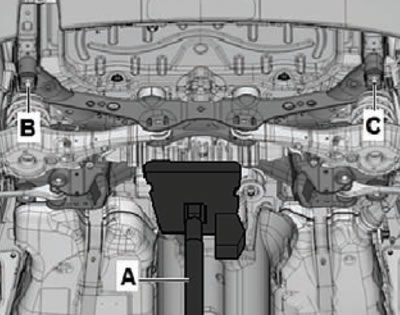
9. Support the rear final drive assembly with a hydraulic jack (A) as shown in the figure below.
Place a suitable block of wood between the hydraulic jack support and the rear final drive.
10. Remove mounting bolts B and C shown in the figure below.
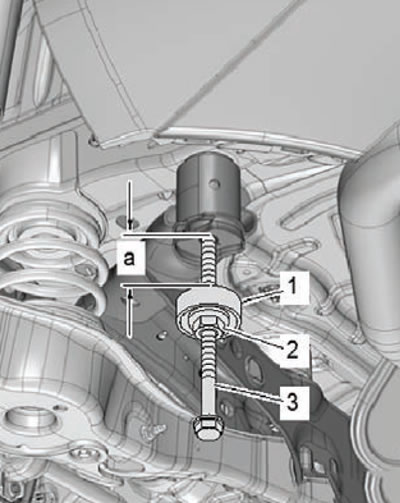
11. Screw the MP5-401/2 guide with the MP5-401/3 nut together with the MP5-402 device into the hole in the rear part of the rear suspension subframe, as shown in the figure below.
The special device must be screwed 15 mm into the hole in the rear of the subframe.
12. Turn the nut (2) of the special device MP5-401 so that the rear part of the subframe is lowered by 40 mm (distance a).
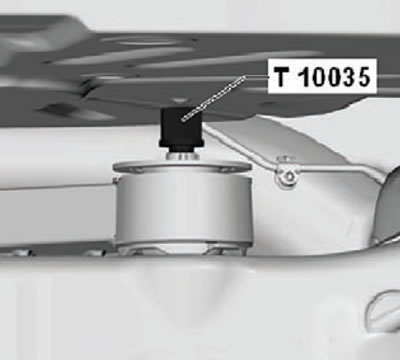
13. Loosen the rear main gear mounting bolts using the special T10035 head.
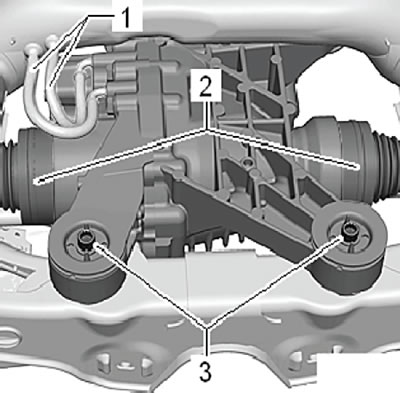
14. Unscrew the rear final drive mounting bolts (3), shown in the figure below.
15. Disconnect the ventilation hose (1) from the final drive housing assembly.
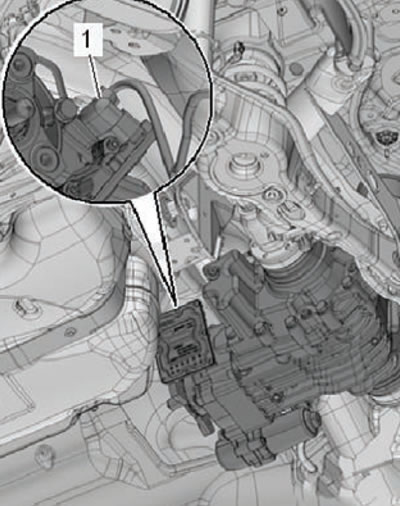
16. Disconnect the wiring harness connector from the rear final drive module (1) as shown in the figure below
Data taken from this portal: SKODABOOK.ru
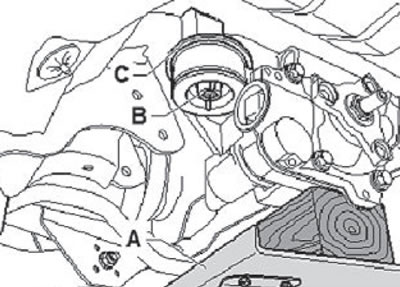
17. Remove the rear final drive mounting bracket mounting bolt (B) and washer (C) as shown in the figure below.
The rear final drive must be in contact with the hydraulic jack support at all times.
18. Move the rear final drive backwards and, at the same time, disconnect the propeller shaft from the final drive flange.
19. Hang the rear propeller shaft under the body tunnel.
Note:
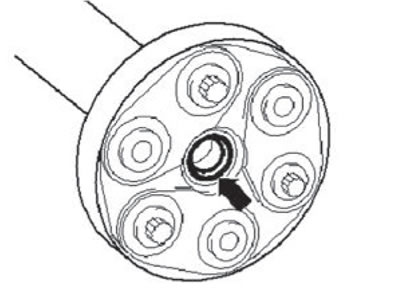
- When removing the propeller shaft, make sure that the sealing ring (arrow) is not damaged.
- If the sealing ring is damaged, the driveshaft must be replaced as an assembly.
- When reusing, install the propeller shaft onto the rear final drive flange, aligning the alignment marks.
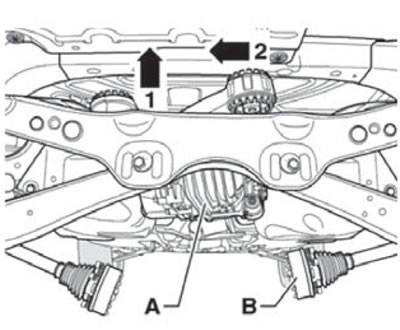
20. Raise the rear final drive (A) arrow (1) and remove it in the direction to the left arrow (2).
21. Remove the right drive shaft (B) from the flange and carefully lower it.
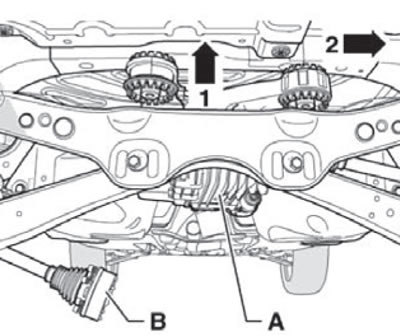
22. Raise the rear final drive (A) arrow (1) and disconnect the right drive shaft arrow (2), as shown in the figure below.
23. Remove the left drive shaft assembly (B) from the flange and carefully lower it.
24. Install the rear final drive into place.
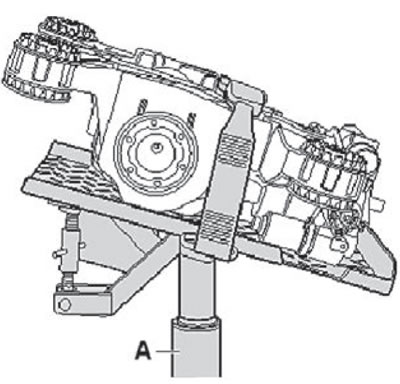
25. Secure the rear final drive to the hydraulic jack support using special mounting straps.
26. Tilt the hydraulic jack support and lower it together with the final drive.
27. Installation is carried out in the reverse order of removal.