



Door panels in cars with manual window control
Door panel (manual window control)
Installation of protective film and door panel fixing clamps (E, F)
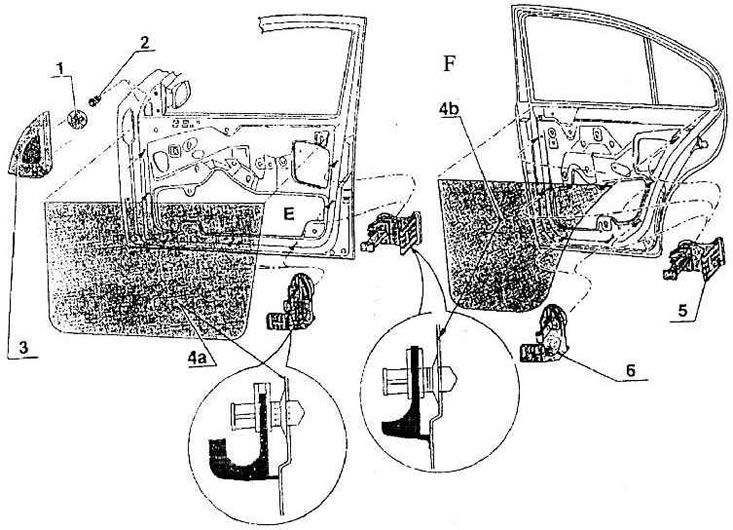
1 - plug in a car without a radio; 2 – bushing; 3 – mirror internal mounting casing; 4a – protective film for front doors; 4b – protective film for rear doors; 5 – piston for fastening the trim assembly; 6 – piston for fastening the trim assembly
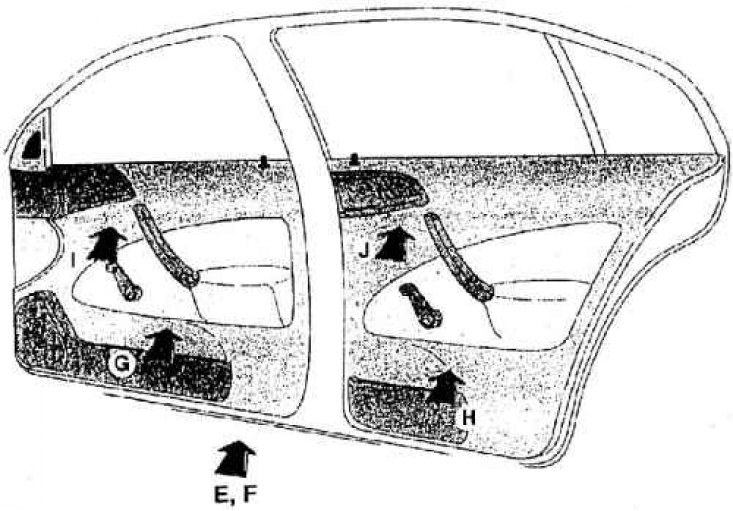
Fitting front door panels in vehicles with manual window operation (G)
Information taken from this resource: SKODABOOK.ru
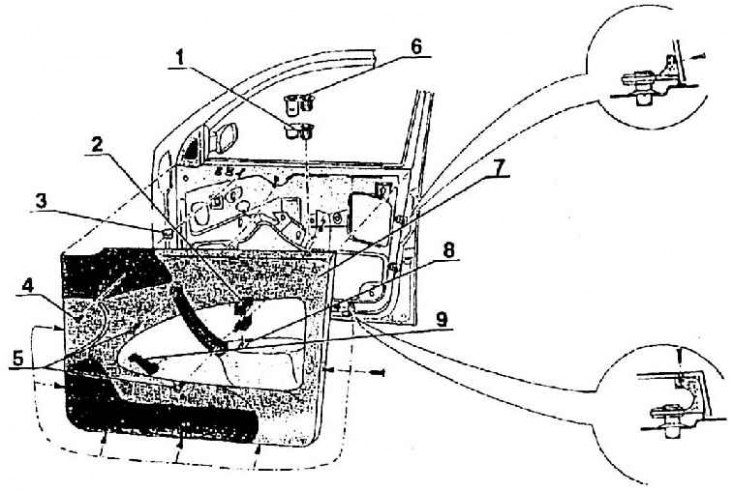
1 – nozzle ring; 2 – switch casing; 3 – expansion nut; 4 – bolt 4.2x12; 5 – countersunk head bolt M6x20; 6 – nozzle ring with LED light; 7 – front door panel assembly; 8 – hole for switch; 9 – handle for the lowering window
Fitting rear door panels in vehicles with manual window operation (H)
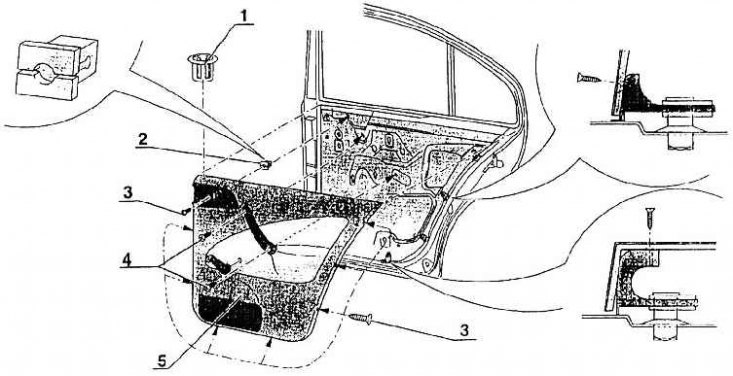
1 – nozzle ring; 2 – expansion nut; 3 – bolt 4.2x12; 4 – bolt with a semi-countersunk head M6x20; 5 – rear door panel assembly
Installation of overlays on the front door (I)
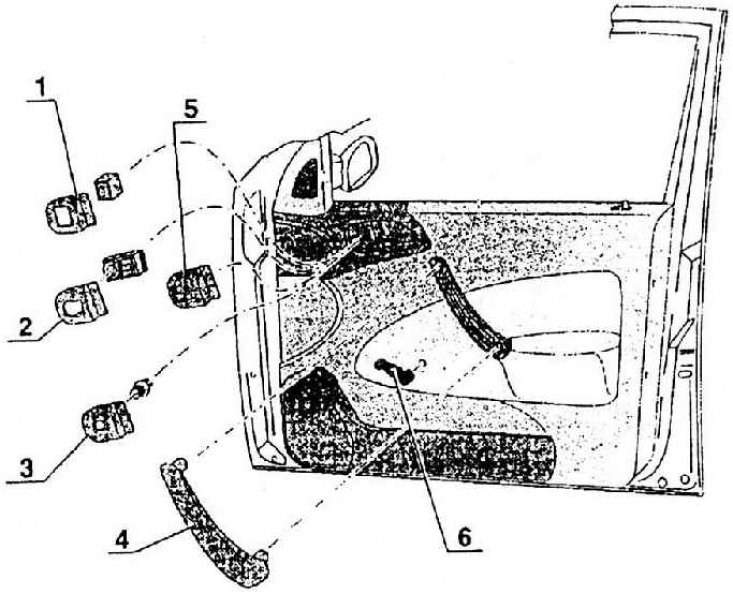
1 – Electric window lowering switch cover; 2 – Electric mirror control cover (only for right hand drive vehicles); 3 – Manual mirror control overlay; 4 – slam handle cover; 5 - mirror control pad (only on the passenger side of the car (GLX and as special equipment); 6 – window lift handle
Fitting the rear door trims (J)
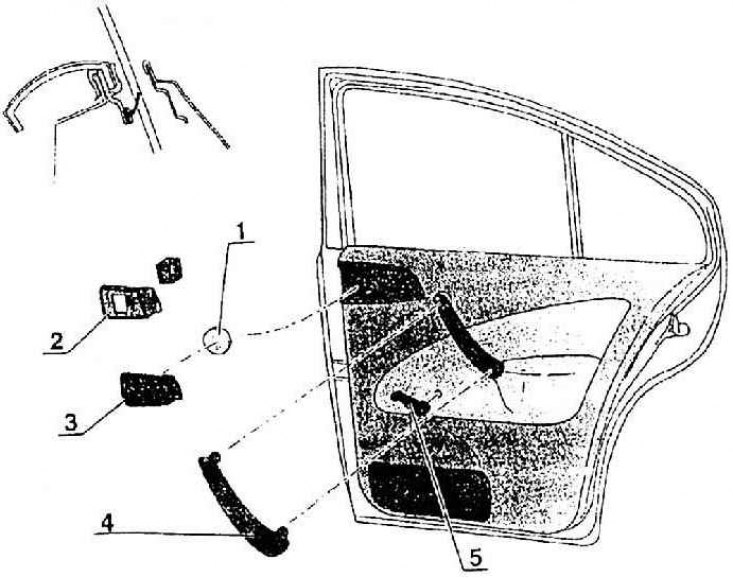
1 – plug (for a car without radio); 2 – high frequency speaker cover; 3 – tweeter cover and switch (for SLX and special equipment); 4 – slam handle cover; 5 – window lift handle
Door panels in cars with electric windows
Door panel (electric window lowering)
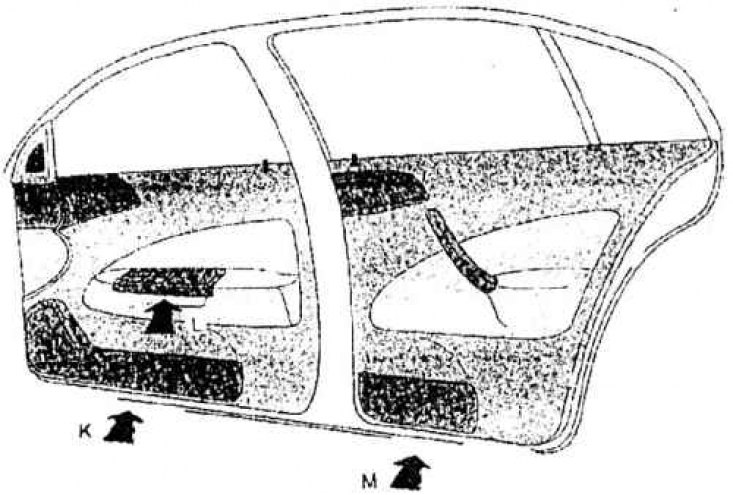
Driver's side door panel (cars with electric windows), view K
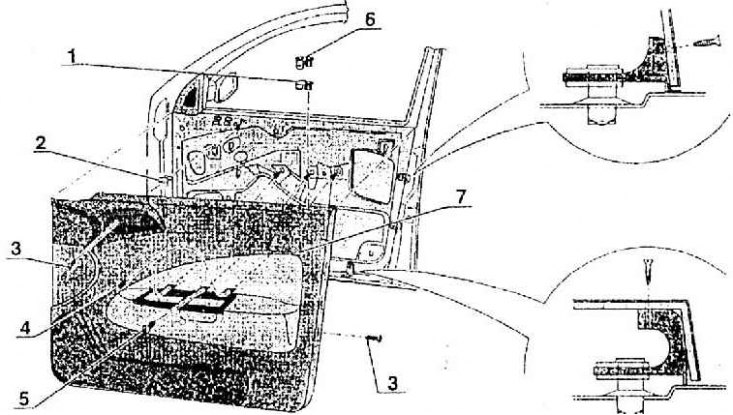
1 – nozzle ring; 2 – expansion nut; 3 – bolt 4.2x12; 4 – bolt with a semi-countersunk head M6x20; 5 – countersunk head bolt M6x25; 6 – LED light ring attachment; 7 – front door panel assembly (electric window lowering)
Door panel in cars with electric window lowering (type M)
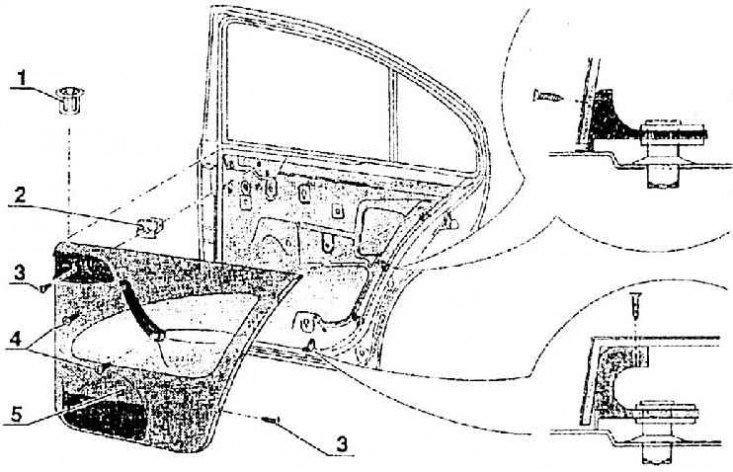
1 – nozzle ring; 2 – expansion nut; 3 – bolt 4.2x12; 4 – bolt with a semi-countersunk head M6x20; 5 – door panel assembly
Driver's side door panel (cars with electric windows), type L
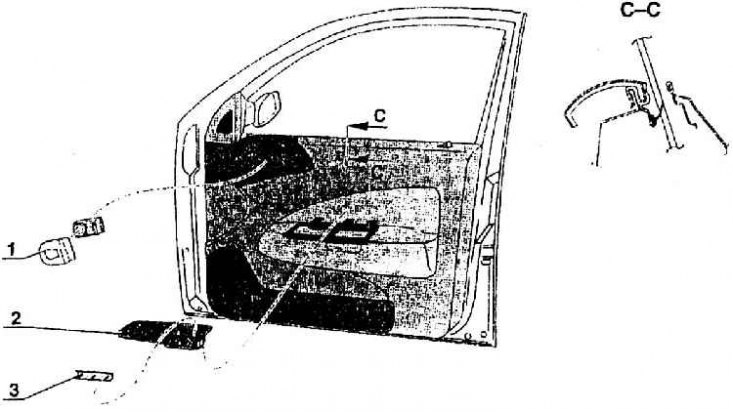
1 – Electric mirror control cover; 2 – handrail – upper part; 3 – bottom of the handle – lower part
The door panels are made of polypropylene with a filler - wood flour. The volumetric profile is obtained by pressing in a hot state. During pressing, the outer surface of the products is protected by a PVC film. The middle part of the panel (the so-called mirror) upholstered in textile according to the vehicle modification. It goes without saying that the panels of the front and rear doors, as well as the right and left, differ from each other. In the front doors of vehicles of the SLX modification, with electric lowering of the windows, there is also a difference between the panels of the vehicle with control on the right and left side. The panel at the driver has a plastic holder in the grab handle with inserted switches for electric lowering of the windows, control of the child safety device and a switch for the internal control of the central locking. In vehicles of the LX and CLX modifications (without electric window control) the panels contain separate vertically oriented handrails for the slam handles on all doors.
The front and rear door panels have bolted pockets for hand luggage. The front pockets have speaker grilles. The plastic pockets are screwed on from the inside. In GLX cars, the panel houses only the interior control switch for the central door locks. The panels (in the front upper corners) there are interior door handles and a handle for controlling the exterior mirrors or – in cars with electrically controlled mirrors – a switch is inserted. The openings are covered with plastic covers.
Profiled elements made of polypropylene foam are glued to the inner surface of the panel, which serve to absorb deformation energy in the event of a side impact.
A protective film is glued under the panel to the inner door leaf. To attach the panel to the inner door leaves, it is inserted into the sealing profile at the top, the side parts and the bottom are fastened with bolts to two-piece plastic brackets. The brackets on the sides differ from the bottom bracket. The front panel has three pistons at the bottom and three pistons on the front and back edges as well. The back panel is fastened at the bottom with two brackets, two on the hinge side as well and three on the back edge. The pistons-brackets at the bottom are driven into holes in the door leaf and secured with a plastic spacer clip. The pistons snap into the edge of the panel with the upper part, which can move, and are screwed in with bolts threaded from the outer surface of the panel. All panels also have a bolt fastening in the plastic door nut and in places of the inner handle of the lock. When dismantling the panel, the brackets are left on the door, they cannot be pulled out. The panel is dismantled by unscrewing the bolts.