
For vehicles with all-wheel drive
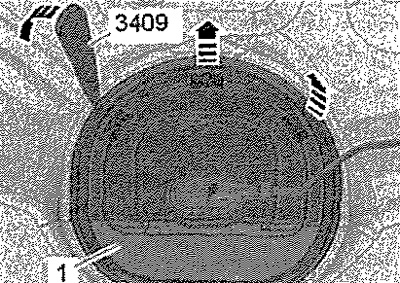
The fuel tank must be filled no more than 3/4 full. Remove rear seat. Release cover -1- of left connecting flange from retainer using wedge -3409- -arrows-.
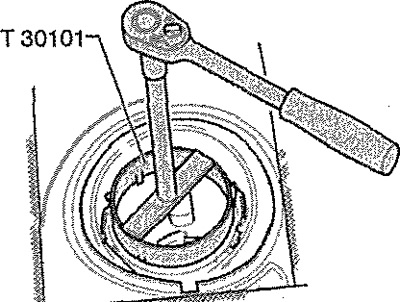
Disconnect connectors -1 and 2- from fuel pump. Unscrew the round nut using the wrench -T30101 (3087) -. Remove the connecting flange and O-ring through the fuel tank opening.
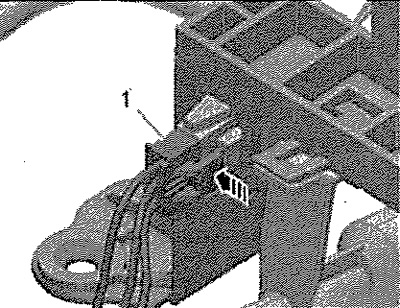
Insert your hand into the opening of the fuel tank, release the catch -arrow- and disconnect the connector -1-.
Unlock catch -arrows A- in fuel tank opening and disconnect connector -1- from bracket -arrow B-. Release catches -2- and pull fuel gauge sender 2 -G169- upwards -arrow C-.

Installation
Installation in reverse order. Replace sealing ring. When connecting the connectors, make sure that they are securely fixed. Insert the fuel gauge sender 2 -G169- into the pipe on the bracket and push it in until it clicks into place. Connect all wires to the fuel delivery module. Install a new dry O-ring in the fuel tank opening and, before installing the connecting flange, lightly lubricate only the inside with fuel.
Carefully. Danger of insufficient sealing. When installing the connecting flange, the gasket must not be damaged or pinched.
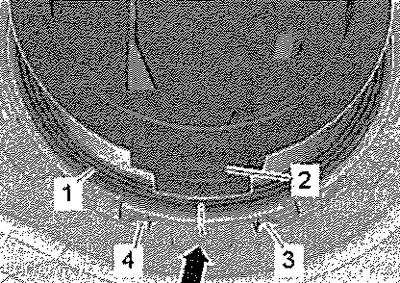
Bring the connecting flange into the installation position. The sleeve -2- of the connecting flange must point towards the hole -arrow- of the round nut and be positioned between the tabs -3 and 4- on the fuel tank. Press connecting flange with spring down.
Install the round nut and tighten it with the wrench -T30101 (3087) -.
Installation in reverse order.