
Removing
1. Turn off the ignition and all electrical consumers.
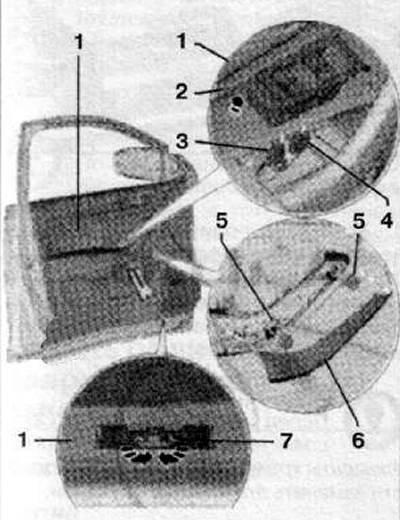
2. Remove trim panel (2) power window master switch as shown in the figure below. Then disconnect the wiring harness connectors (3) And (4), shown in the figure below.
3. Using a special tool (Т10383, 3409), detach the trim panel (6), as shown in the figure below.
4. Turn the nut (7) 90°using the SW10 wrench to release the clamp as shown in the figure below.
5. Unscrew the fastening screws (5), shown in the figure below. Tightening torque when installing 4 Nm.
Attention. When detaching the front door trim panel, there is a high possibility of damage to the fasteners. To avoid this, it is necessary to disconnect the panel in the strict sequence shown in the figure below, using a special tool.
6. Using a special tool (Т10383/1, Т10383), disconnect the cladding panel from the fasteners in the sequence shown in the figure below.
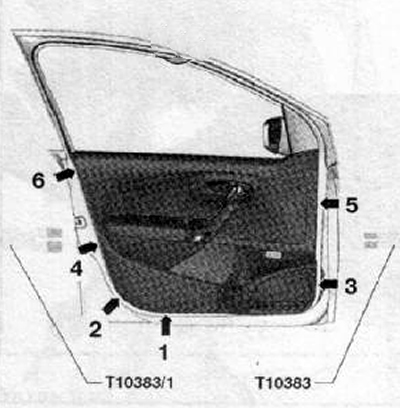
7. Pull the cladding panel upwards, releasing it from under the inner seal of the door glass.
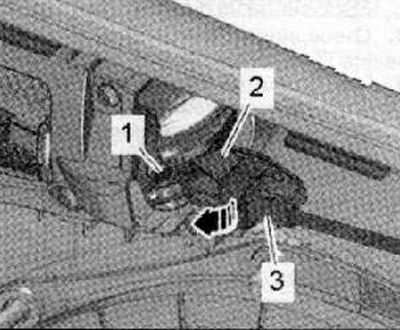
8. Push in the Bowden cable (3) inside the door trim panel, releasing it from the door lock release control mechanism (2), in the direction of the arrow as shown in the figure below, and disconnect its end (1).
9. Disconnect the wiring harness connectors from the front door trim panel.
Installation
Installation is carried out in the reverse order of removal.
Note. Before installation, check the technical condition of all fastening elements for damage, if necessary, replace the fastening elements.