
Removing
1. Turn off the ignition and turn off all electrical consumers of the car.
2. Remove sun visors.
3. Remove the A-pillar trim panels (for details, see the relevant section in this chapter).
4. Remove the upper part of the center pillar trim panel (at both sides) (for details, see the relevant section in this chapter).
5. Remove the C-pillar trim panel assembly (at both sides) (for details, see the relevant section in this chapter).
6. Unscrew the fastening screws and remove the additional handles.
7. Remove the upper part of the side panel lining the luggage compartment (at both sides) (For details, see the relevant section in this chapter).
8. Fold the rear seat back assembly.
9. Move the steering wheel to the lowest position.
Vehicles with manual transmission
10. Engage second gear.
Vehicles with automatic transmission
11. Move the gear selector to the position «S».
Vehicles with interior monitoring system
12. Disconnect the wiring harness connector from the motion sensor (if the car is equipped).
For all vehicles
13. Remove the screws (2) fastening the front interior lamp housing, as shown in the figure below. Tightening torque for mounting screws when installing 2 Nm.
14. To remove a lamp of illumination of a back part of salon.

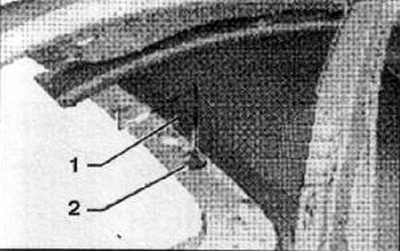
15. Disconnect the fixing clips (2) rear headlining panel (1), as shown in the figure below.
16. Detach the ceiling trim panel (1) from door seals.
17. Gently lower the ceiling trim panel (1), starting from its front. This operation requires the assistance of a second mechanic.
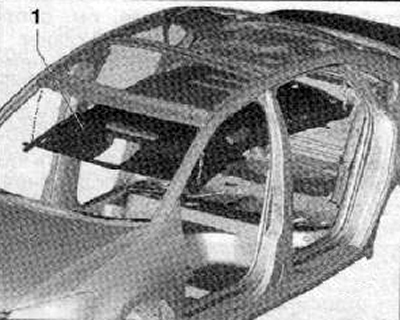
18. To take the panel of facing of a ceiling through an aperture under a door of a luggage compartment.
Installation
Installation is carried out in the reverse order of removal.
Note. Before installing the cladding panel, it is necessary to check all fastening elements and, if necessary, replace these elements with new ones.
Note. After installing the fascia panel, it is necessary to check and make sure that the fascia panel is securely fixed to the tailgate seals.