
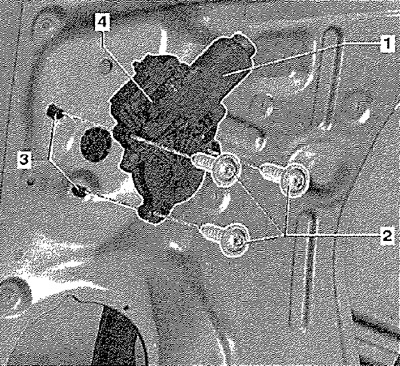
Remove front door trim. Secure the window glass with adhesive tape so that it does not slip down. Disconnect connector -4-. Release screws -2-. Detach power window motor together with control unit -1- from mountings -3-.
Installation
Attention! For new power window motor (door computer) additional functions must be coded and the restriction reinforced when closing!
Insert power window motor -1- into mountings -3-. Raise and lower the door glass so that the motor is better engaged with the coil. Screw in screws -2- (3 Nm). Secure connector -4-. The new power window motor is coded. After coding, lift the glass with an electric drive up to the stop in automatic mode. Pull the switch again for 2 seconds. Due to this, the window lifter motor remembers its upper end position. The subsequent work procedure is carried out in the reverse order of removal.