



Contents: Oil for 5-speed manual transmission…⬇ 6-speed manual transmission oil…⬇ DSG transmission fluid ⬇
Oil for 5-speed manual transmission "0A4" and 6-speed manual transmission "02S"
32. Since the manual transmissions "0A4" and "02S" are installed at an angle, their oil at a normal level is above the lower edge of the inspection and filler hole (see accompanying illustration). Therefore, checking the oil level cannot be done in the traditional way. To check, it is necessary to completely drain and then fill the manual transmission oil, as described in paragraphs 33-38. The oil volume is indicated in the Specifications.
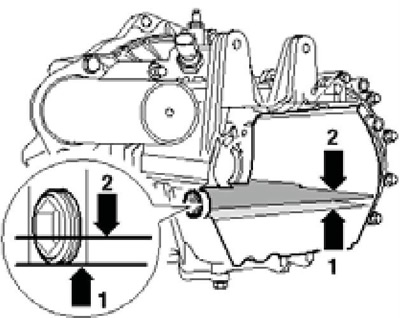
4.32 Oil levels for horizontal (1) and inclined (2) positions of the manual transmission
33. To drain the oil, it is necessary to remove the gear shift fork axle, and the gear shift shaft should be blocked so that the position of the forks does not change (for example, when the gear shift lever is accidentally moved).
34. Remove the air cleaner (see Chapter 4) and lock the gear shift shaft by pressing it down (1 on the accompanying illustration) into the 1st/2nd gear slot of the selector lever and turn the angle lever (A) in the direction of the arrow (2) until it locks.
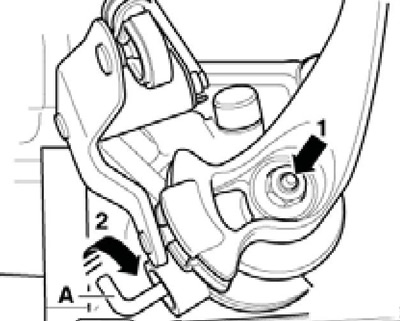
4.34 Fixing the gear shift shaft
35. Remove the sound insulation under the engine compartment (see Chapter 11), place a container under the manual transmission to collect the oil and remove the plug (1 on the accompanying illustration) drain plug and fork axle (2). Let the oil drain, install the drain plug and fork axle with a new sealing ring. Tighten the axle mounting bolt to 25 Nm and the plug to 30 Nm.
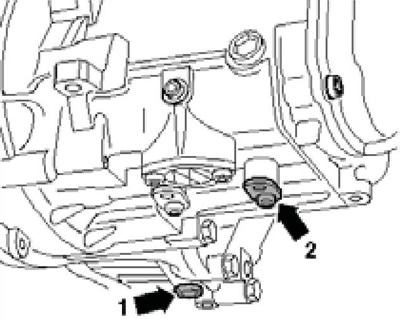
4.35 Drain plug (1) and shift fork axle (2)
36. Return the corner lever to its original position and install the sound insulation.
37. With the air cleaner removed, remove the reversing light assembly (1 on the accompanying illustration), insert a hose with a funnel into its installation hole and fill in the required volume of oil (see Specifications).
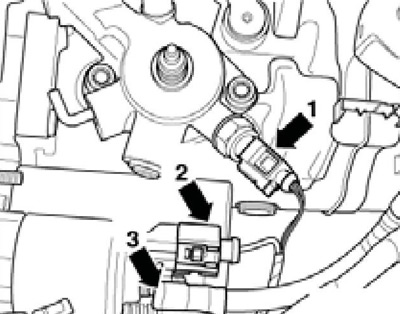
4.37 Connecting the D/W reverse lights of the manual transmission
Note: Use a hose approximately 60 cm long and 10 mm outer diameter.
38. Tighten the reversing light D/W to 20 Nm, check the gearshift mechanism for proper operation and install the air cleaner.
6-speed manual transmission oil ("OAJ", "02Q"), angular transmission, Haldex clutch and rear differential
39. Raise the vehicle so that it is level.
40. When checking the gearbox and angular gear oil level, remove the soundproofing panels under the engine compartment (see Chapter 11). To provide access to the filler plug of the angular transmission, unscrew the bolts (1 on the accompanying illustration) and remove the heat-protective casing (A, if available) right drive shaft (C), and on models with an independent heater - additionally separate the coolant pipes (B) from the engine (2) and the double screws on the angular transmission.
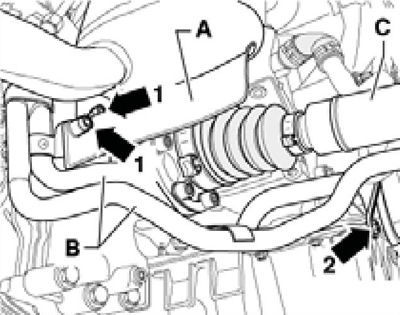
4.40 Bolts (1) of the casing (A) of the drive shaft (C) and fasteners (2) of the coolant pipes (B) on the example of a model with a manual transmission
41. Unscrew the filler plug of the manual transmission, angular gear, Haldex clutch or rear differential (see accompanying illustrations) and insert a wire bent at a right angle into it. Remove the wire - the oil should be at the level of the lower edge of the filler hole (on the bend of the wire). For the Haldex coupling, the fluid level is allowed to be no more than 3 mm below the lower edge of the filler hole. When checking the Haldex coupling oil, it is extremely important that its temperature is between 20 and 40°C. To determine the oil temperature, you can use a diagnostic tool connected via the DLC connector (see Chapter 5).
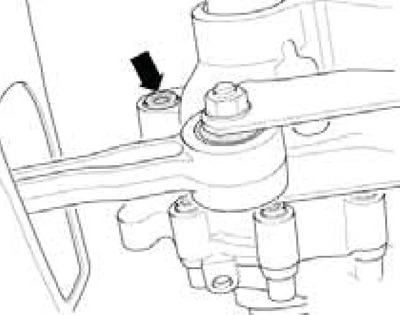
4.41a Check and filler plug for manual transmission 0AJ
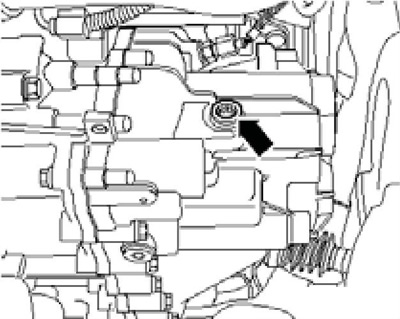
4.41b Check and filler plug for manual transmission 02Q
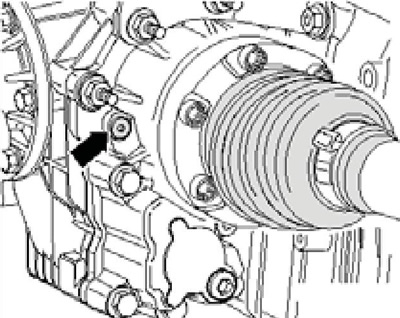
4.41c. Angle gear oil filler plug
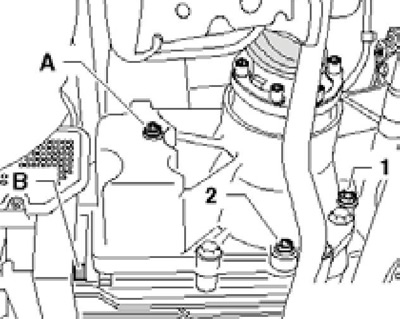
4.41d Plugs of the inspection and filler (1 and A) and drain (2 and B) holes of the rear differential and Haldex coupling, respectively
42. If necessary, add oil through the filler hole. Since it is difficult to fill the Haldex coupling, rear differential or angular gear from under the car, it is recommended to screw an adapter into the filler hole (And in illustration 4.42a) with the elbow (B) and connect the filling device VAS6291 with valve to it (arrow in illustration 4.42b) and a container with oil. Holding the container with oil above the control-filling hole, open the valve and let the oil drain. When the oil stops flowing and its level is above the control-filling hole, place a container under it to collect the oil, close the valve, disconnect the hose from the adapters and drain the remaining oil into the container to collect the oil. Remove the adapters.
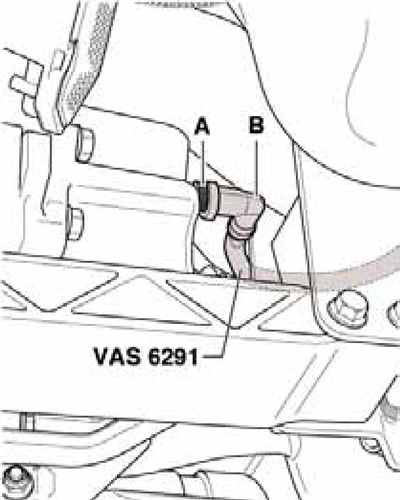
4.42a Adapters for the VAS6291 device in the inspection and filling hole of the Haldex coupling
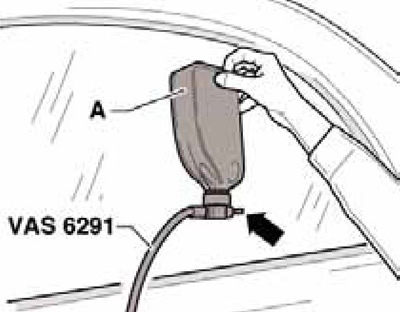
4.42b Tool VAS6291
43. After filling the angular transmission or OAJ manual transmission, tighten its old plug, start the engine and let the transmission run for 2 minutes at idle speed. Then turn off the engine and check the oil level again. Add oil again if necessary.
44. Finally, thoroughly clean the relevant unit if it has been exposed to oil and tighten the filler plug to the torque specified in the Specifications. For the angular gear and rear differential, use a new plug, and for the 02Q manual transmission, use a new plug seal. For the Haldex coupling, use a new plug with a new seal.
45. Install the remaining parts in place.
DSG transmission fluid
46. Checking the fluid level of the 6-speed DSG is done when replacing it (see section 21).
47. The 7-speed DSG has two areas that use different fluids. Both of these fluids are filled for the life of the transmission and do not require checking or adjustment. Changing the fluid in the gear area is described in Chapter 7.