
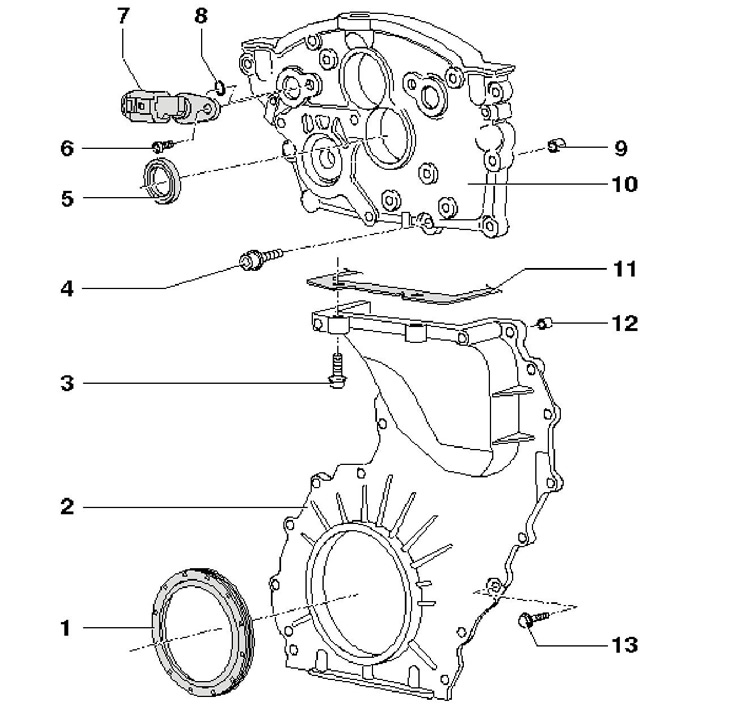
8.1 Installation details of the timing chain covers and crankshaft rear oil seal
1 Rear crankshaft oil seal
2 Rear crankshaft sealing flange/lower timing chain cover
3 Bolt, 23 Nm
4 Bolt, 8 Nm
5 Oil seals of e / m valves "N205" And "N318" Timing timing adjustment (2 pcs.)
6 Sensor bolt 7.8 Nm
7 CMP sensor No. 1 "G40" and CMP sensor No. 2 "G163" (not specified)
8 O-ring, 2 pieces, to be replaced
9 Centering sleeves, 2 pcs.
10 Upper timing chain cover
11 Cylinder head gasket
12 Centering sleeves
13 Bolt, 10 Nm
Flywheel
2. Remove DSG (see chapter 7).
3. Screw counterholder T10044 with spacer washers into the cylinder block (arrow on resist illustrations) approximately 5 mm thick. Set the counterholder to position (A) to loosen the flywheel. Mark the position of the flywheel relative to the crankshaft.
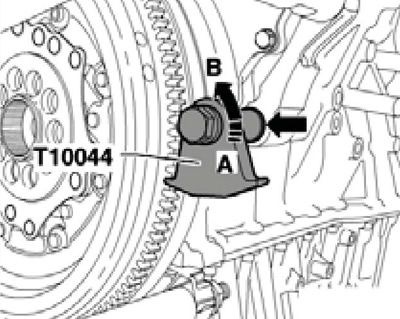
8.3 Locking the flywheel against turning when loosened (A) or tightening (IN) fasteners
4. Rotate the secondary side (And on the opposite illustrations) 2-mass flywheel so that the bolts (IN) were in the center of the holes (arrows). If, when turning out/tightening the bolt, its head rests against the secondary side of the flywheel, it will be damaged.
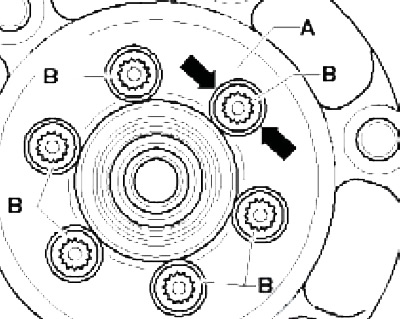
8.4 Flywheel bolts
5. Turn out bolts of fastening of a flywheel and remove it.
6. Installation is carried out in the reverse order. Align the flywheel according to the marks made during removal. Use new bolts. Tighten the bolts in a cross pattern, first by hand, then to 60 Nm, and finally tighten them by 90°.
Rear oil seal
7. Remove the flywheel (see subsection above).
8. Position the T20143/2 puller behind the stuffing box sealing lip as indicated on Ref. illustration, support the puller on the flange in the direction of the arrow and pull out the oil seal.
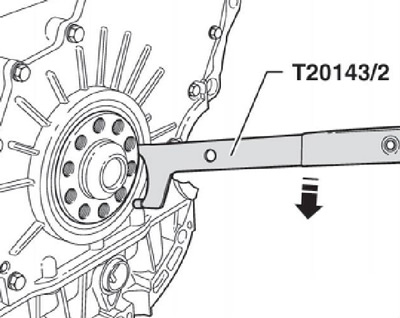
8.8 Removing the rear oil seal
9. Push on the stuffing box (And on the opposite illustrations) its outer side through the bushing T10122/1 of the tool T10122 onto the mounting bushing T10122/2. Remove bushing T10122/1 and slide bushing T10122/2 with a dry seal onto the crankshaft journal.
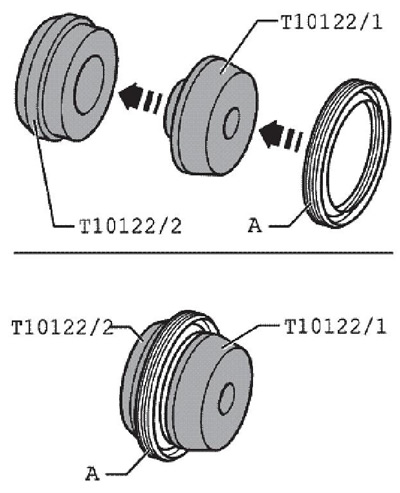
8.9 Preparing the rear oil seal for installation
10. Drive the rear oil seal with sleeve T10122/2 into the rear flange using plate T10122/3 until it stops (see resist. illustration).
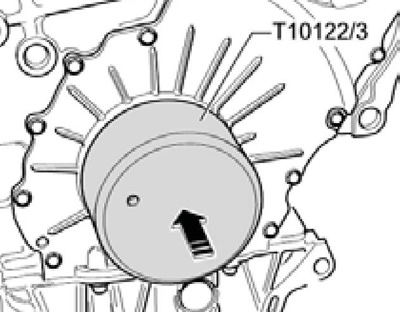
8.10 Fitting the rear oil seal
11. Install the flywheel.
Lower Timing Chain Cover/Rear Seal Flange
12. Remove the flywheel (see subsection above).
13. Remove the engine oil pan (see Section 13).
14. Turn out bolts (1 and 2 on resist. illustrations) fastening the sealing flange and remove it from the cylinder block strictly horizontally so as not to damage the cylinder head gasket. Remove the rear oil seal from the flange.
Caution: If the cylinder head gasket is too kinked, it will need to be replaced (see Section 9).
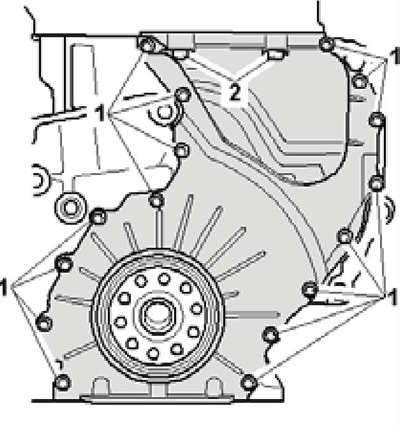
8.14 Rear sealing flange bolts
15. Plug the engine ports to keep sealant residue out and remove sealant residue from mating surfaces with a suitable chemical cleaner. Remove the old sealant that has squeezed out onto the cylinder head gasket and into its holes (see resist. illustration).
Note: With the cylinder head installed, the gasket holes are only half visible.
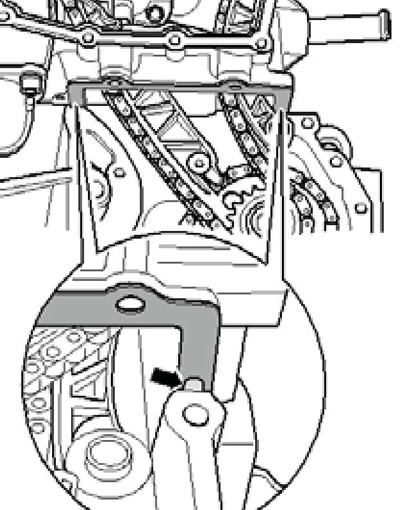
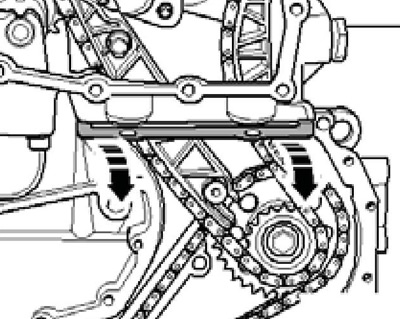
8.15 Where to remove old sealant
16. Slightly bend the edge of the cylinder head gasket down (see resist. illustration) and clean its upper surface and the lower surface of the cylinder head. All surfaces must be degreased. Apply a light coat of sealant D176 501A1 to the upper and lower surfaces of the cylinder head gasket. To apply grease between the cylinder head and its gasket, for example, a feeler gauge can be used.
8.16 Bending the cylinder head gasket
17. Apply a thin bead of sealant to both cylinder head gasket and cylinder block joints so that the gasket holes are filled (see resist. illustration). Make sure the sealing flange dowels are in the cylinder block.
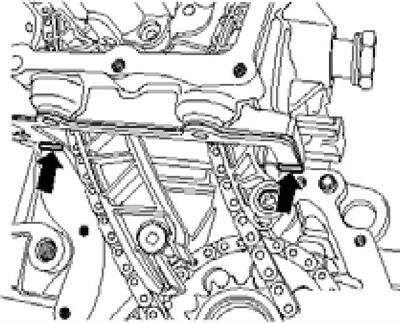
8.17 Places for applying sealant to joints
18. Apply a bead of D176 501A1 sealant to the rear sealing flange as indicated on resist. illustration and install the flange within 5 minutes of applying the sealant.
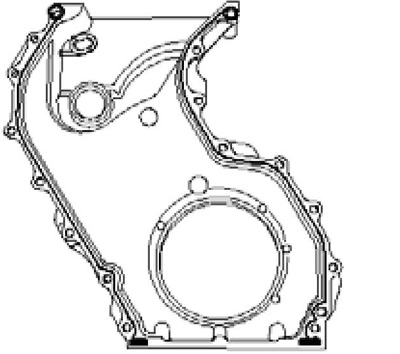
8.18 Scheme for applying sealant to the flange
19. Tighten the rear flange mounting bolts in three steps. Tighten the bolts first (1 in illustration 8.14) with a force of 5 Nm, then tighten the bolts (2) with a force of 23 Nm, and finally tighten the bolts (1) with a force of 10 Nm.
20. Install rear oil seal (see subsection above).
21. Install the engine oil pan and flywheel.