
Removal and installation of the door handle
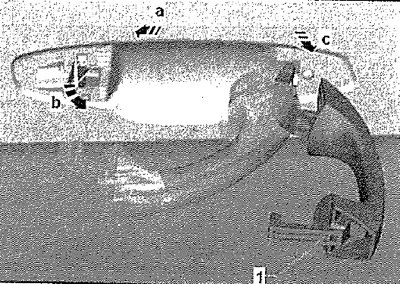
Remove the lock cylinder or its cover. Slightly pull handle -1 -backward -arrow a- out of handle housing. Move the handle in -arrow b-. Hold the handle at a right angle to the door -arrow a- and pull it out of the housing -2-.
Installation
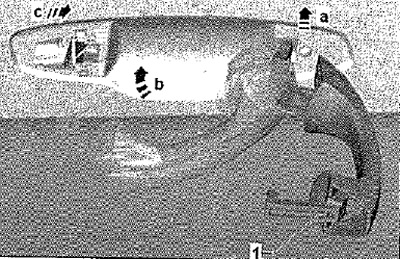
Insert door handle -1- in right corner -see illustration. arrow b- into the support bracket. Insert handle -1- into door -arrow b-. Firmly push the handle forward -arrow c- into the seat in the housing. Install the lock cylinder or its cover. Then be sure to check the operation of the lock with the door open.
Removal and installation of the door lock
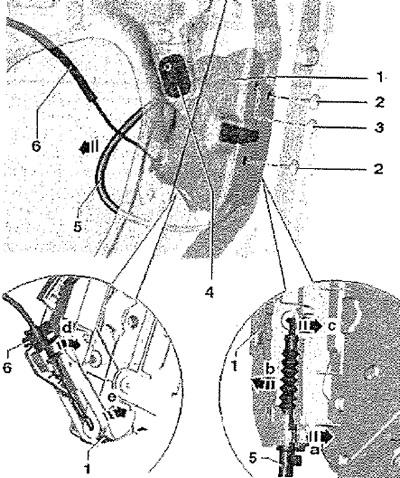
Remove front door trim. Remove cover. Pry up and remove the cap -3-. Disconnect connector -4-. Remove the lock cylinder. Release screws -2-. Remove the lock -1- from the door.
Note: If necessary for further work, the cable can be detached.
Disconnecting the cable from the support bracket
Turn cable -5- by 451 and remove it from bracket -arrow a-. Turn the cable -arrow b- so far that it can be unhooked from the lug in the door lock (pos.1) -arrow c-.
Disconnecting the cable from the inner door handle drive
Rotate cable -6- by 45°and remove from holder. Turn the cable -arrow d- until it can be unhooked from the lug in the door lock (pos.1) -arrow e-.
Installation
Installation in reverse order. Screw tightening torque (pos. 2): 20 Nm. Then it is necessary to check the operation of the lock, as if the cables are not properly installed and fixed, the lock may not open.