
Instruction. Repairs may only be carried out by specialized service centers with the necessary equipment for work on the refrigerant circuit and qualified personnel. An assistant is required to remove and install the heater/air conditioning module. For easy access to the expansion valve on some engines, the cover must be removed, and, if necessary, the suction hose.
Disconnect the negative terminal from the battery. Vehicles with air conditioning - Disconnect the refrigerant lines from the expansion valve.
Danger! The coolant temperature of a warm engine may exceed 100°C. Cooling system under pressure Risk of burns! Relieve pressure and allow coolant to cool before starting repair work.
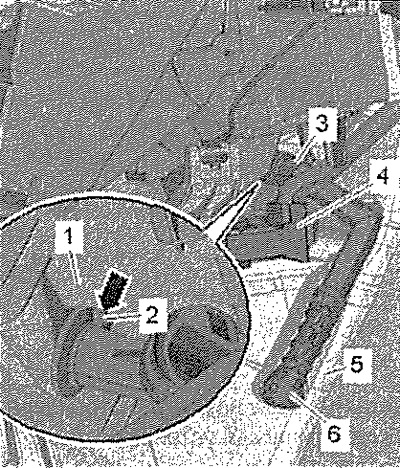
Mark coolant hoses -1- and -4-.
Note: The heat exchanger is designed so that the refrigerant flows in a certain direction, so it is important not to mix up the hoses when connecting.
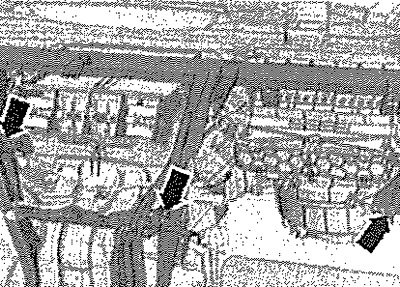
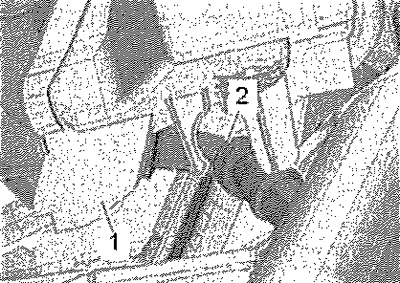
Clamp the cooling system hoses with clamps. Push out clips -2- and -3-. Detach coolant hoses -1- and -4- from heater heat exchanger.

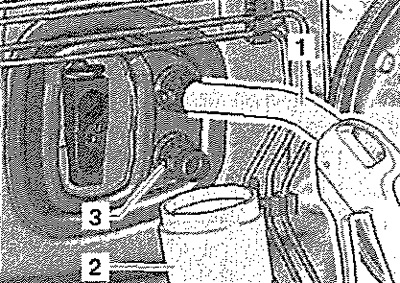
Push the short hose -1- onto the top fitting. Place a container -2- under the lower fitting -3-. Using a blow gun, carefully blow out the remaining coolant from the heat exchanger into container -2-. Close open openings of pipelines and fittings with clean plugs. Remove the front panel and center support of the front panel.
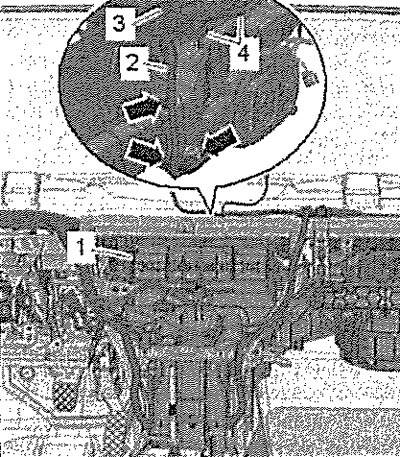
The heater and air conditioner module is attached to the central support with three screws -arrows- (4 Nm). Remove the center air duct to the rear vent under the center console. Raise the rear legroom deflector under the front seat and pull it back.
Unplug connector -3- from fresh air blower control unit -J126-.
Loosen clip -arrow- and unplug connector -5- from airbag control unit -J234-. Cover carpeted floor and airbag control unit -J234- with a liquid-tight foil on which absorbent paper has been laid.
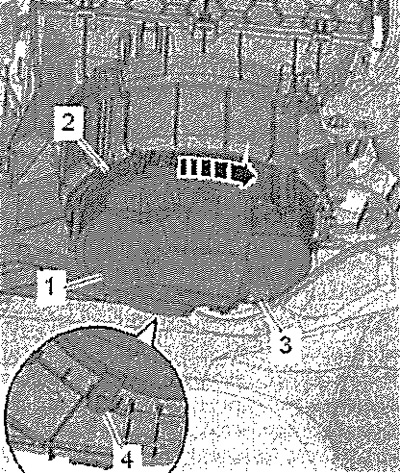
Carefully detach drain hose -2- from heater and air conditioner module.
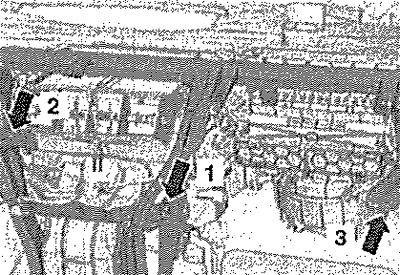
Detach heater and air conditioner module -1- from brackets on plenum box cover. Release cable duct -3-. Detach wiring harness -2- from retainers -arrows-. Remove the heater and air conditioner module.
Installation
Installation in reverse order.
Instruction. The installation of the heater and air conditioning module will require assistance from a 2nd mechanic.
Fit heater module -2- onto brackets -1- and -3-.
Note: The brackets remain in the vehicle during installation.
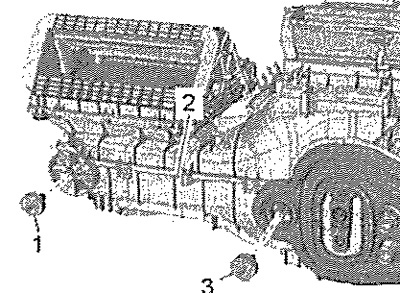
Tighten screws securing heater module and air conditioner/support in sequence -1-, -2- and -3- (4 Nm).
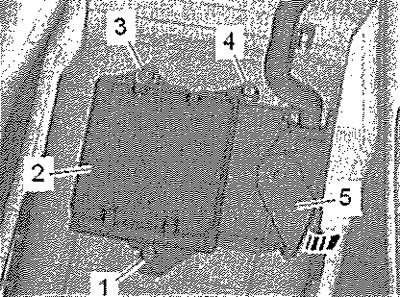
When installing, make sure drain hose -3- is correctly positioned. The retainer -arrow- of the fitting must engage in the guide -2-. If a clamp was used to secure the drain hose -3-, replace it with a new one.
The drain hose -3- must be routed under the wiring harness of the airbag control unit -J234- pos. -4-. Fill up the coolant. Charge the refrigerant using an air conditioning service stand. Connect the Tester, simplify and clear the event recorder. Finally, check the operation of the heater and air conditioner module.