
2. Place a container for collecting fuels and lubricants under the gearbox.
3. Drain all gear oil from the gearbox into a container prepared in advance.
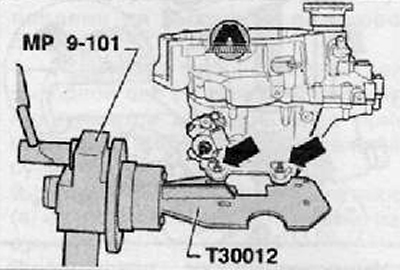
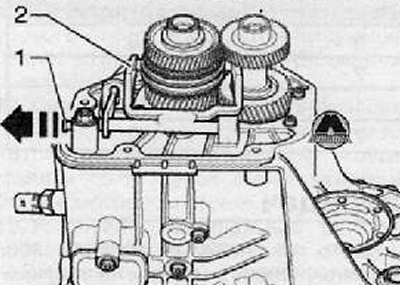
4. Unscrew the mounting bolts and remove the clutch release fork together with the release bearing, as shown in the figure below.
5. Unscrew the bolt securing the flange of the right drive shaft. To do this, screw in the two drive shaft mounting bolts and, holding the flange with a screwdriver, unscrew the mounting bolt, as shown in the figure below.
6. Remove the drive shaft flange from the gearbox housing with the pressure spring, locking disc and conical ring.
7. Unscrew the mounting bolts and remove the rear cover of the gearbox housing assembly, as shown in the figure below.
8. Remove axle bolt (1) 5th/6th gear selector fork in the direction of the arrow, then remove the gear selector fork (2). as shown in the picture below.
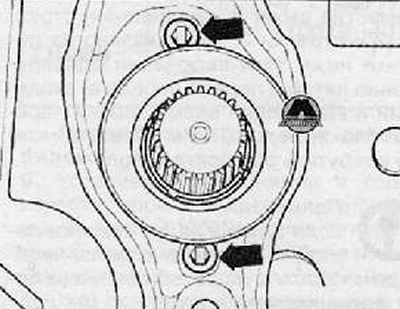
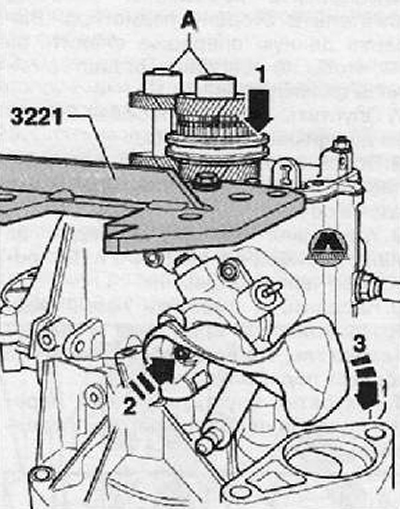
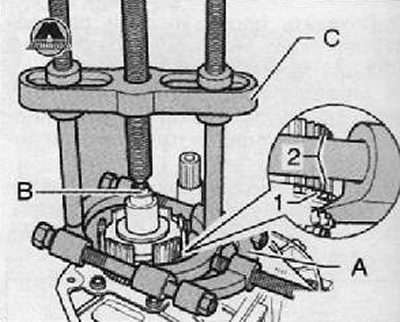
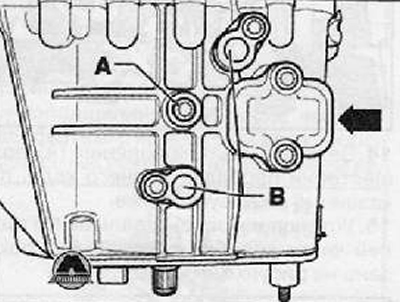
9. Unscrew the fastening bolt (A) inner rings of the bearing of the input and output shafts of the gearbox, to do this, turn on the fifth gear (arrow 1), and first gear by moving the lever in the direction of arrow 2 and arrow 3 as shown in the figure below. When the fifth and first gears are engaged at the same time, the incoming and outgoing shafts of the gearbox are blocked. Thus, both mounting bolts can be unscrewed.
Note.
- If the replacement of the gearbox shafts is not provided, it is necessary to remove the remains of the fixing adhesive from the threads of the shafts.
- Using a 3-jaw universal puller, remove the 6th gear.
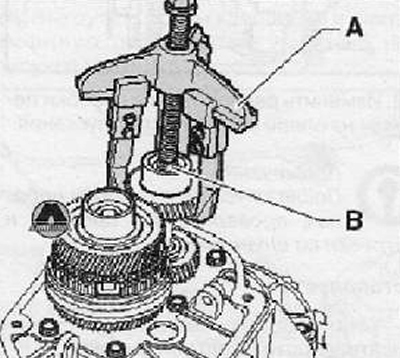
10. Using a special puller (Kukko 30/1) (A), press the 6th driven gear off the gearbox output shaft as shown in the figure below.
11. Fit the disengagement tool to the gear (A), next to the 6th gear synchronizer ring, arrow, as shown in the figure below.
12. Press the 6th gear together with the roller bearing inner race and the transmission input shaft thrust washer as shown in the figure below.
13. Remove the 5th/6th gear synchroniser sliding sleeve.
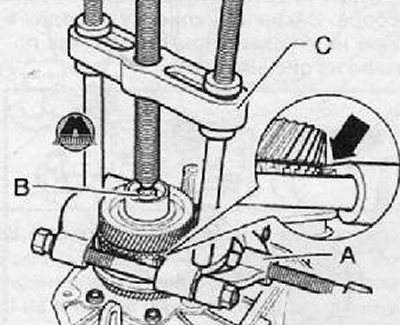
14. Fit the release tool (A) under the 5th gear synchro ring (1), as shown in the figure below. Thus, the synchronizer ring will be pressed against the synchronizer body (2), as shown in the figure below.
15. Press the 5th/6th synchro housing together with the 6th gear needle bearing inner race and the 5th synchro ring off the transmission shaft.
Note. Always replace the 5th gear synchronizer ring after disassembly.
16. Unscrew the bolt securing the left flange of the drive shaft (1), to do this, screw two mounting bolts into the flange and, holding it from turning by these bolts, unscrew the flange mounting bolt, as shown in the figure below.
17. Remove drive shaft flange (1) out of the gearbox along with the pressure spring.
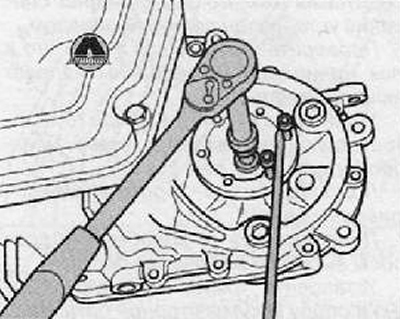
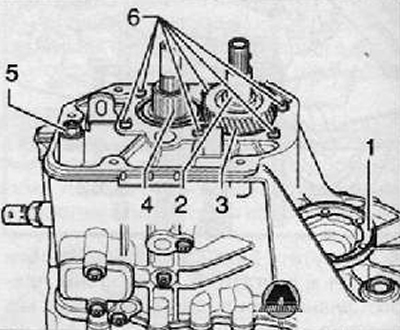
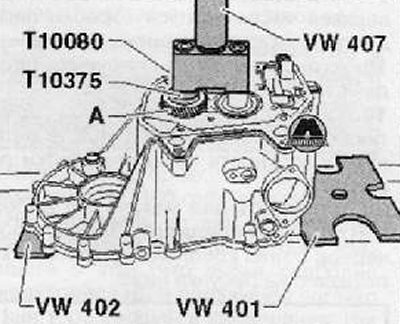
18. Remove bushing (2) 5th gear needle bearing (4), as shown in the figure below.
19. Unscrew the bushing nut (5) mechanism for selecting and engaging gears.
20. Unscrew the fastening bolts (5) bearing supports for the input and output shaft of the gearbox, as shown in the figure below.
21. Check and make sure the 5th gear is properly installed.
22. Remove 5th gear (3).
23. Turn the gearbox assembly on the stand, setting it with the clutch housing up.
24. Unscrew the mounting bolts of the clutch housing to the gearbox housing.
25. Carefully detach the gearbox housing from the gearbox housing. At the same time, be extremely careful not to damage the additional surfaces.
Note. When disconnecting the clutch housing, be extremely careful. not to warp it, otherwise the bearings may be damaged.
26. Remove the differential assembly with the final drive gear from the gearbox housing (A), as shown in the figure below.

Vehicles with start-stop system
27. Unscrew the fastening bolt and remove the gearbox neutralization mechanism (arrow), as shown in the figure below.
For all vehicles
28. Remove the selection and gear shaft together with the cover (A), as shown in the figure below. To do this, set the shaft to the neutral position. Loosen the fixing screws (arrows) and remove the gear shift and select shaft housing.
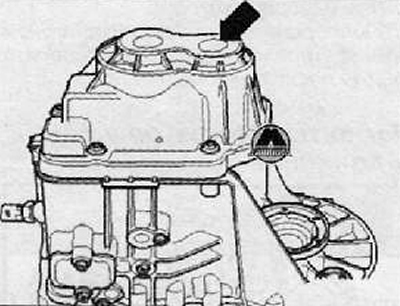
29. Remove axle pins (IN) from the top of the gearbox housing as shown in the figure below.
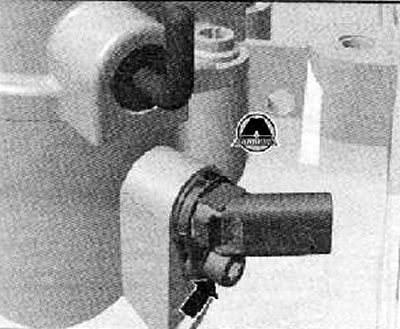
30. Remove the reverse lamp switch (WITH), as shown in the figure below.
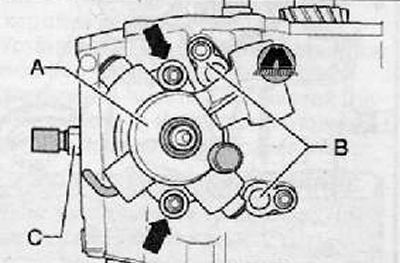
31. Unscrew the fastening bolt (A) reverse gear shaft as shown in the figure below.
32. Remove axle pins (IN) from the bottom of the gearbox housing as shown in the figure below.
Note. Do not remove cover (arrow), shown in the figure below to disassemble the gearbox.
33. Using a special tool, press the drive and driven shafts out of the gearbox housing, together with the 5th gear (A), bearing support, shift forks and reverse gear as shown in the figure below.
Note.
- Install the gearbox housing so that the guide pins are not damaged during removal.
- To perform this operation, an assistant is needed to prevent the parts of the gearbox from falling when they are pressed out.
34. Press the input and output shafts of the gearbox out of the bearing support, together with the bearings.