



Contents: Removal ⬇ Installation ⬇
Removal
Note: If the coolant is to be reused, it must be drained into a clean container prepared in advance.
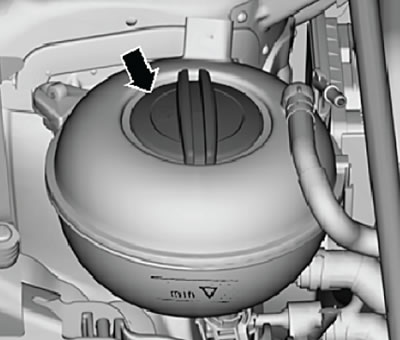
1. Open the coolant expansion tank cap (arrow) as shown in the figure below.
2. Remove the soundproofing coating.
3. Place a special crane bath (VAS6208) under the engine.
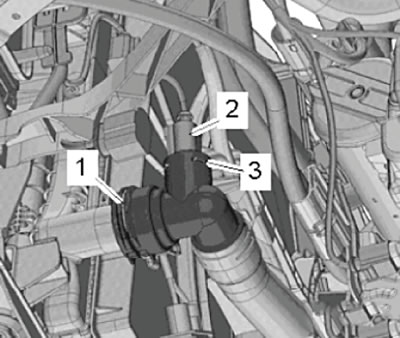
4. Disconnect the wiring harness connector (2) from the coolant temperature sensor at the radiator outlet of the cooling system (3), as shown in the figure below.
5. Loosen the fastening clamp (1), disconnect the lower left water hose from the radiator, as shown in the figure below. Drain the coolant.
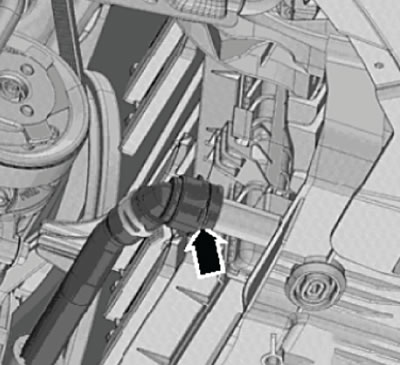
6. Loosen the clamp (arrow) shown in the figure below and remove the lower right water hose from the intercooler. Drain the leaking liquid.
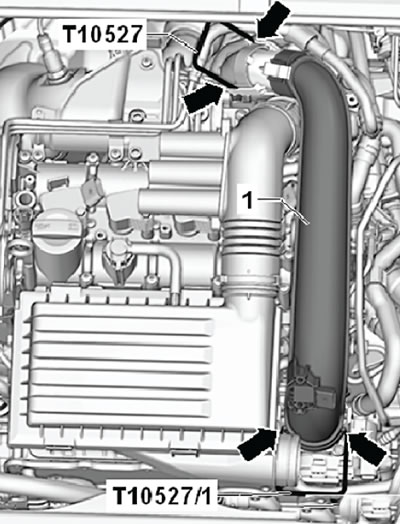
8. Release the air hoses from the clamps on the air duct pipe.
9. Unlock the latches (arrows) using the special tool (T10527) and remove the air duct pipe as shown in the figure below.
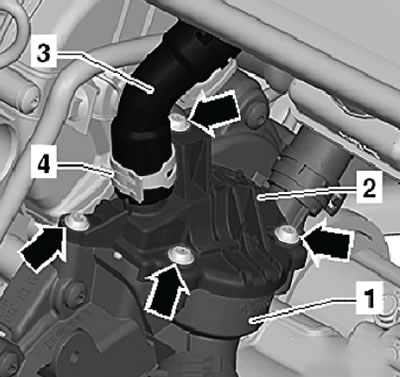
10. Loosen the fastening clamp (4) and disconnect the water hose (3) shown in the figure below.
11. Unscrew the fastening screws (arrows) and remove the cover (2) from the thermostat housing (1), as shown in the figure below.
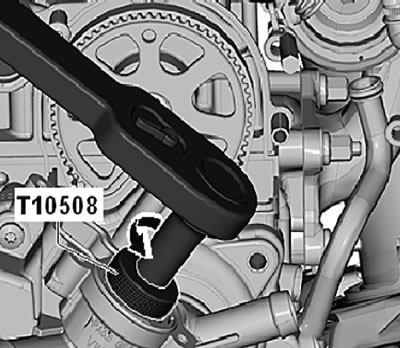
12. Using a special tool (T10508), remove the thermostat assembly from the housing. To do this, you need to gently press on the key and turn it in the direction of the arrow, as shown in the figure below.
Installation
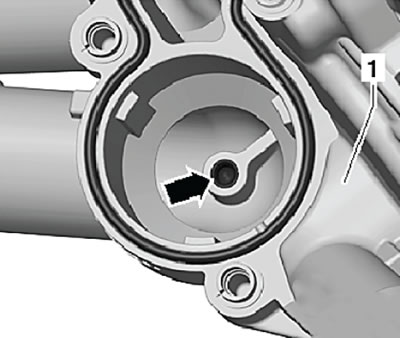
1. Insert the thermostat into the housing. Direct the mounting pin into the hole (arrow) as shown in the figure below.
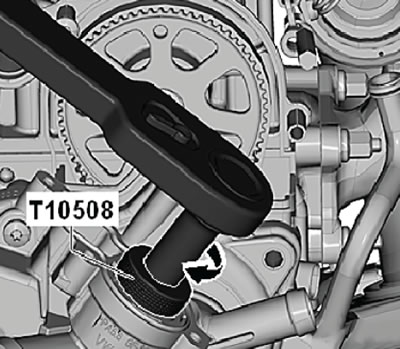
2. Using a special tool (T10508) and a ratchet wrench, secure the thermostat in the housing. To do this, gently press on the key and turn the head in the direction of the arrow until it stops, as shown in the figure below.
3. Next, installation is carried out in the reverse order of removal.
Note: Always replace the gaskets after disassembly.
4. Before installation, moisten the gasket with fresh coolant.
5. Fill the cooling system with coolant (for more details, see the relevant section in this chapter).
6. Tighten the thermostat cover mounting screws to a torque of 7 Nm.