



Contents: Removal and installation ⬇ Installation ⬇
Removal and installation
Removal
1. Drain the coolant (for more details, see the relevant section in this chapter).
2. Remove the battery and the battery support plate (for more details, see the relevant section in the chapter "Engine electrical equipment").
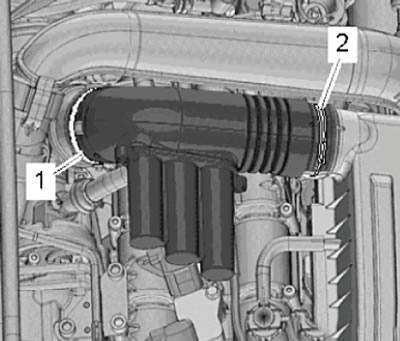
3. Loosen the mounting clamps (1) and (2), then remove the air duct pipe shown in the figure below.
4. Release the air hoses from the clamps on the air duct pipe.
5. Disconnect the wiring harness connector (1) shown in the figure below.
6. Unlock the latches (arrows) using the special tool (T10527) and remove the air duct pipe as shown in the figure below.
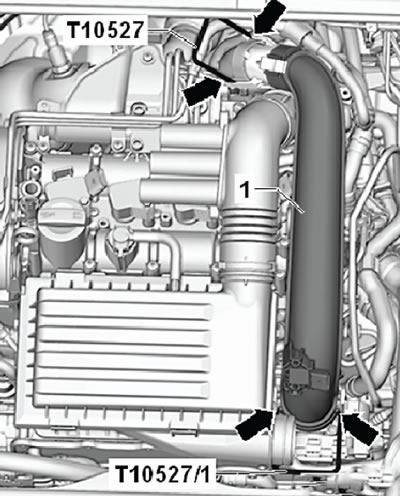
7. Press the release buttons on the hose (1) to remove the activated carbon filter as shown in the figure below.
8. Unscrew the fastening screws (arrows) and remove the crankcase ventilation hose shown in the figure below.
Data taken from an online portal: SkodaBook.ru
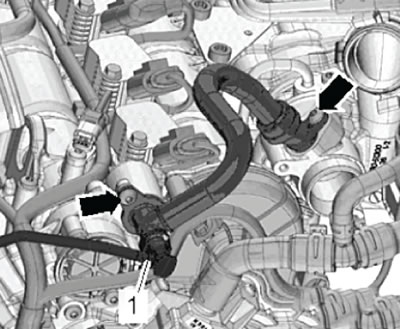
9. Disconnect the wiring harness (arrows) shown in the figure below from the clamps.
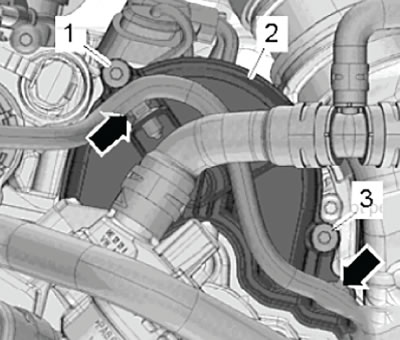
10. Unscrew the fastening screws (1) and (3), then remove the upper cover (2) of the water pump drive belt assembly, as shown in the figure below.
11. Release and disconnect the wiring harness (1) and water hose (2) shown in the figure below.
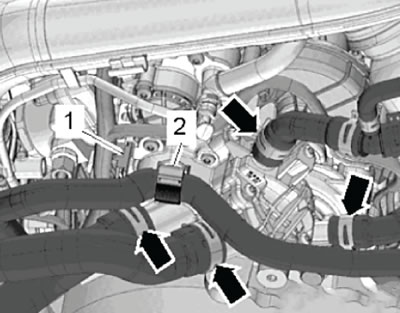
12. Loosen the mounting clamps (arrows) and remove the water hoses shown in the figure below.
13. Loosen the mounting screws in sequence from 5 to 1, then unscrew them completely.
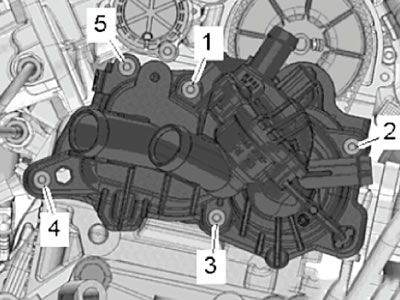
14. Remove the water pump together with the water pump drive toothed belt.
15. Remove the thermostat housing assembly if the water pump is to be replaced.
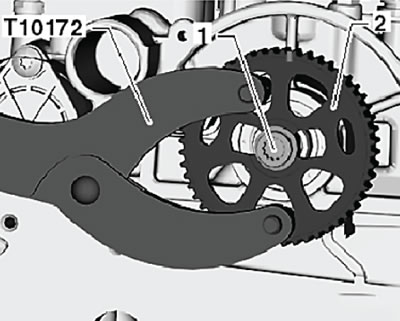
16. Using a special device - a counter support (T10172) with an adapter (T10172/2) - loosen the fastening bolt (1) shown in the figure below.
17. Unscrew the mounting bolt and remove the water pump drive toothed pulley assembly (2), as shown in the figure below.
Installation
Installation is carried out in the reverse order of removal.
1. Install the water pump drive pulley:
- The notches (1) and (2) on the camshaft must be installed asymmetrically, as shown in the figure below.
- The notches on the toothed pulley (arrows) must also be installed asymmetrically, as shown in the figure below.
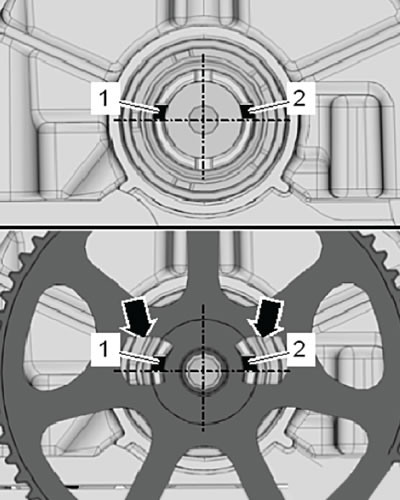
2. Install the timing pulley onto the camshaft so that the grooves on the shaft are located in the center of the grooves on the timing pulley, as shown in the figure above.
3. Tighten the toothed pulley mounting bolt with a tightening torque of 20 Nm + an additional 90° angle.
Note:
- Replace the gaskets (arrows) shown in the figure.
- Completely remove the timing belt when replacing the water pump.
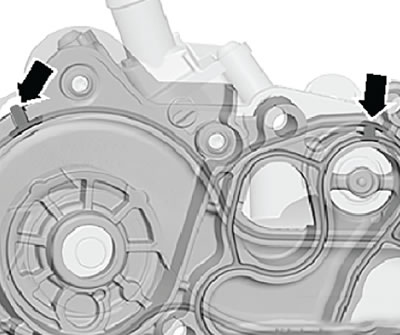
4. Check and ensure that the gaskets are seated properly in the housing (arrow) as shown in the figure below.
5. Moisten the water pump gasket with coolant.
Attention:
- Strictly follow the entire sequence of actions when installing the water pump assembly. This is also necessary to ensure that the timing belt is installed correctly.
- Some operations must be performed together with a second mechanic.
Note: When replacing the water pump, the timing belt must always be replaced as well.
6. Set the piston of the first cylinder to the TDC position.
7. Install the drive belt, move the water pump to the installation position.
8. Secure the water pump to the cylinder head with the mounting screws.
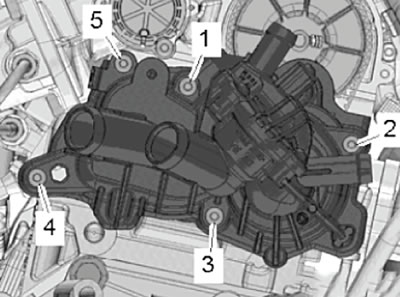
9. Tighten the water pump housing mounting screws in two steps in the sequence shown in the figure below.
- first approach: tighten by hand until it stops.
- second approach: tighten to a torque of 10 Nm.
10. Loosen all mounting screws by one turn.
11. Install the torque wrench (VAS 6583) with a special head SW10 on the water pump bolt, as shown in the figure below.
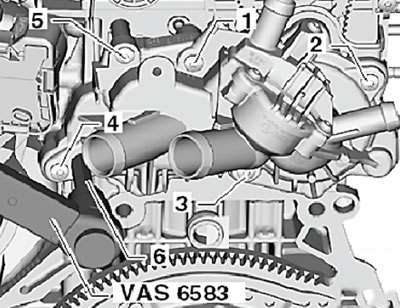
12. Pre-tighten the water pump using a torque wrench with a 10 mm socket to a tightening torque of 30 N·m. Position the torque wrench vertically for a better grip.
Note:
- Do not hold the torque wrench with your other hand.
- To prevent over-tensioning of the timing belt, do not apply excessive pressure to the torque wrench.
13. Leave the water pump in the pre-tensioned position.
14. At the same time, the second mechanic should tighten the water pump mounting screws (2), (1) and (5) - third approach - with a tightening torque of 10 Nm.
15. Then tighten the mounting screws in sequence (3), (4), (5), (1) and (2) - fourth approach - with a tightening torque of 12 Nm.
16. Further installation is carried out in the reverse order of removal.