
Removal and installation of the sensor of blow of a front airbag
Attention! When working on airbags, observe the general safety regulations for handling the pyrotechnic modules for airbags, seat belt pretensioners and the battery disconnector.
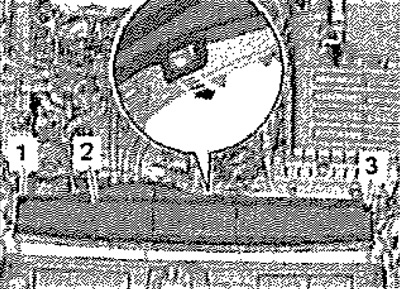
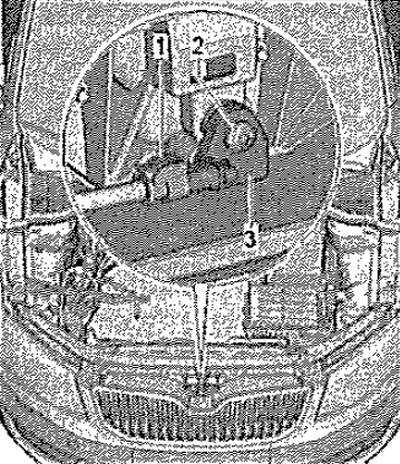
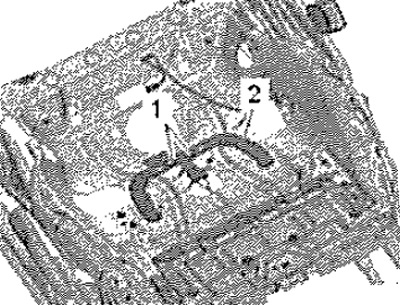
Open the hood. Release screws -1, 3-. Unlock catch -arrow- and remove cover -2-.
 | 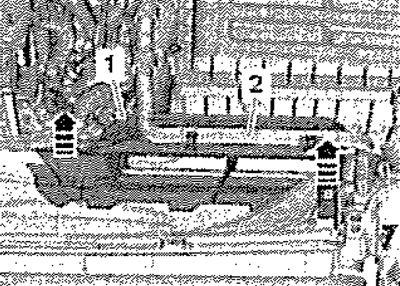 |
Move coolant hose -2- aside if necessary (depends on engine). Unlock catches -arrows-, detach top section of air duct -1-.
Release screws on left and right -arrows-. Detach and remove bottom section of air duct -1-.
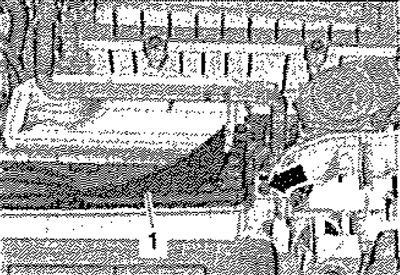
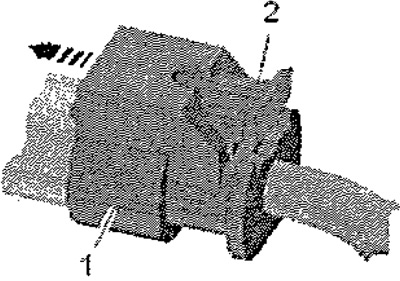
Remove screw -2- and remove crash sensor -3- for front airbag from front carrier. Disconnect connector -1 -.
To do this, pull out and press the latch -2- -arrow-, disconnect the connector -1- from the shock sensor.
 |  |
Installation
Connect connector -1- to impact sensor -arrow- until audibly engaged. Press the latch -2- to lock the connector.
Installation in reverse order.
Note: Check that the connector is well connected and clicks into place audibly. Make sure that the wires are not pinched anywhere.
Turn on the ignition. Connect battery terminals.
Remove and install collision sensor front side airbag
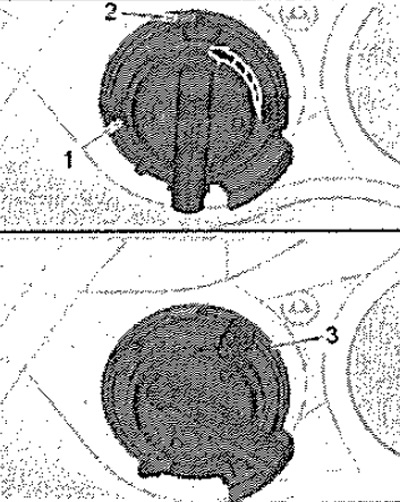
Remove front door trim. Pull out and press lock -2- -arrow- and disconnect connector -1- from crash sensor. Unlock catch -2- and turn crash sensor mount -1- counterclockwise by approx. 45°-arrow-. Remove sensor -3- through door opening.
Installation
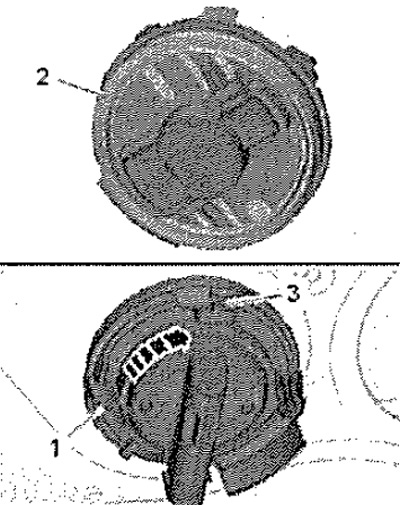
Attention! Observe the rules for handling shock sensors (pressure) for front side airbags. For perfect operation of the shock sensor (pressure) door must be sealed. Check correct position of seal -2-. If damage or deformation is found, replace the shock sensor.
Check correct position of seal -2-. If there is damage or deformation, replace the shock sensor with a new one. Insert the shock sensor into the door opening so that the recesses of the sensor are fixed on the edge of the opening. Turn mounting -1- of crash sensor clockwise -arrow-. Latch -3- must click into place with a clearly audible sound.
Connect connector -1- to impact sensor -arrow- until audibly engaged. Press the latch -2- to lock the connector.
Note: Check that the connector is well connected and clicks into place audibly. Make sure that the wires are not pinched anywhere.
Installation in reverse order, Switch on the ignition. Connect battery terminals.
Removal and installation of the sensor of employment of a seat of the forward passenger
Note: The occupancy sensor is only available in the front passenger seat.
Attention! When working on airbags, observe the general safety regulations for handling the pyrotechnic modules for airbags, seat belt pretensioners and the battery disconnector.
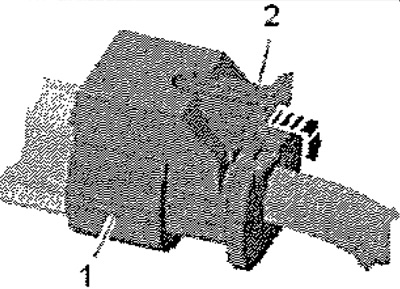
Remove the front passenger seat. Remove the upholstery and soft padding of the seat bowl. Disconnect the seat occupied sensor connector. Detach retainer -1- from seat shell and remove occupancy sensor -2-.
Installation
Attention! Install the new seat occupied sensor in place of the old one.
Installation in reverse order. Press the occupancy sensor retainer into the seat shell until you hear an audible click.
Note: Check that the connector is well connected and clicks into place audibly. Make sure that the wires are not pinched anywhere.
Installation in reverse order. Turn on the ignition. Connect battery terminals.