
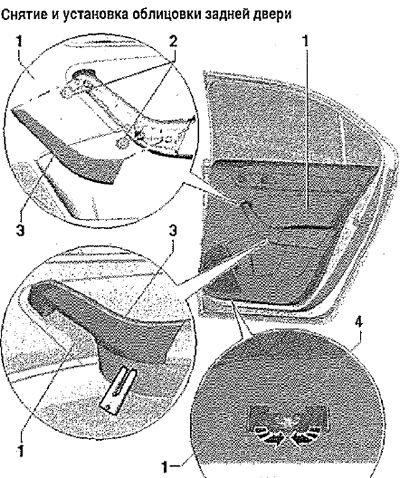
Remove screws -2- (4 Nm). Turn the nut -4- on the underside by 90°with a SW10 wrench and unclip the locking tab.
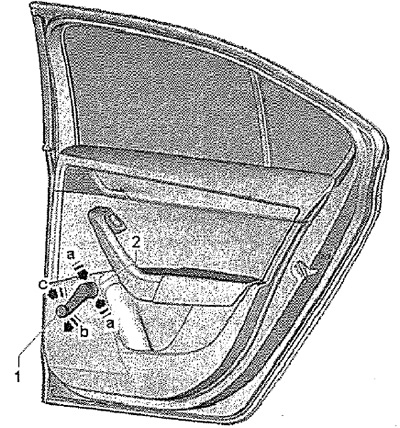
Vehicles with power window handles
Remove power window handle. To do this, press circlip -2- in direction of arrow -a-. Move circlip -2- in direction of arrow -b-. Remove the handle -1- from the shaft in the direction of arrow -c-.
Further for all vehicles
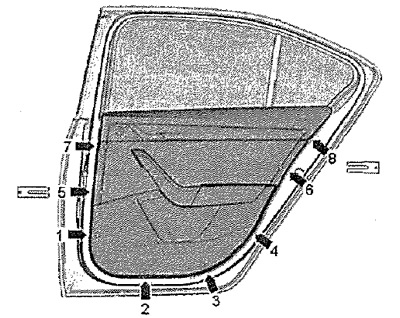
Turn the nut -7- on the underside by 90°with a SW10 wrench and unclip the locking tab. Remove screws -5- (4 Nm).
Carefully! There is a risk of damaging the fasteners when releasing the door trim! To prevent this, when removing, be sure to observe the indicated provisions and the sequence of work for disconnecting the clamps.
Detach the door trim from the clips in the -order shown-. To do this, use, for example, a wide plastic wedge T10383/1, T10383-.
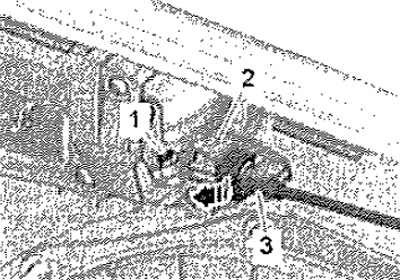
Pull the door trim upwards out of the window opening. On the inside of the door trim, pull the cable -3- out of the inner door handle drive -2- in the direction of the -arrow- and remove the stub -1- from the clip. In accordance with the vehicle equipment, disconnect the electrical connectors of the wiring harness from the door trim panel.
Installation
Installation in reverse order.
Note: Before installation, check all fastening elements for damage and replace if necessary.
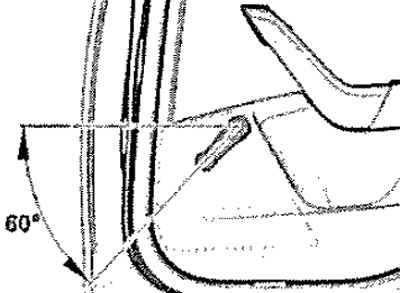
On vehicles with manual power windows, the cranks are angled down at an angle of 60°when the windows are up.