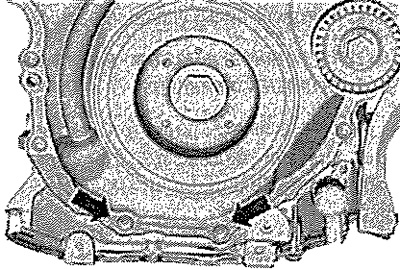
Remove screws -arrows-. Using a sharp spatula, cut the sealant between the lower timing chain cover and the upper part of the oil pan.
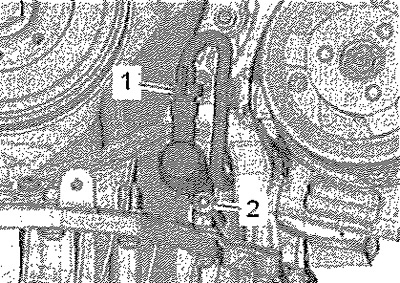
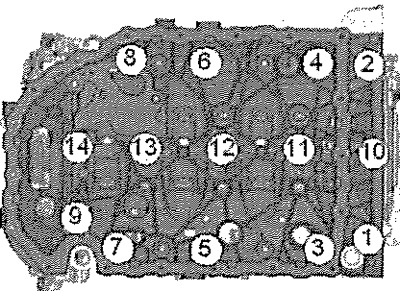
Release screws -1...14- and remove upper part of sump. If necessary, loosen the upper part of the oil pan with light blows from a rubber mallet.
Attention! First detach the upper part of the oil pan from the side of the gearbox. When separating, be careful not to bend the timing chain cover.
Installation
Note: The sealant must not be expired (see expiry date). The upper part of the oil pan must be installed within 5 minutes after applying the silicone sealant. Replace screws that are tightened to a certain angle. Replace gaskets, lip seals and self-locking nuts.
Remove sealant residue from cylinder block, top of oil pan and lower timing chain cover with a chemical sealant remover.
Note: Check the timing chain cover for deformation. To do this, install the upper part of the oil pan in place first without sealant and check the gap between the casing and the upper part of the oil pan. If deformation is detected and the casing cannot be straightened out any longer, it must be replaced after the upper part of the oil pan has been installed.
Clean and degrease mating surfaces. Check the oil passages at the top of the oil pan and in the cylinder block for dirt. Cut off the tip of the sealant tube at the front mark (hole diameter about 2mm).
Attention! Danger of clogging the lubrication system due to excess sealant. The sealant strip should not be thicker than specified.
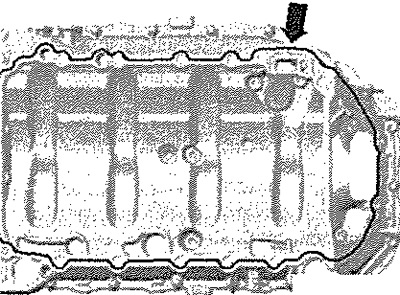
Apply a bead of sealant -arrow- to the cleaned seating surface of the upper part of the sump as shown in the illustration. Sealant strip thickness: 2...3 mm.