



Note: Before checking, correct the engine oil level if necessary (see Chapter 1). Engine oil pressure depends on many factors, such as its temperature and viscosity, crankshaft speed and oil filter condition, so measurements should be taken strictly at the crankshaft speed and engine temperature specified in the Specifications.
1. Disconnect the engine oil pressure D/V connector (see accompanying illustrations).
Note: Description of removal/installation or location of engine oil pressure sensor can also be found in the relevant parts of Chapter 2. On 1.8L (except "BZB") and 2.0L petrol engines, two sensors are used; they should be checked separately.
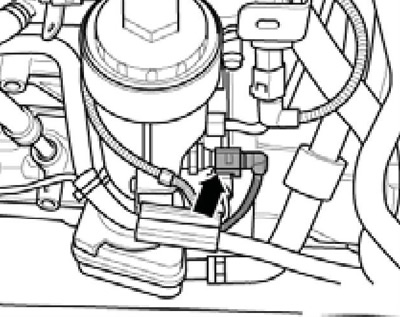
4.1a Connector D/V engine oil pressure 1.9 l engine
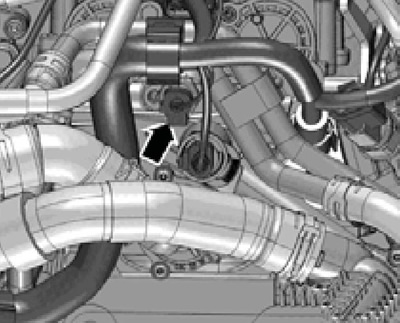
4.1b D/V engine oil pressure 1.4 l engine (on the left side of the cylinder head, use the socket head to turn it out)
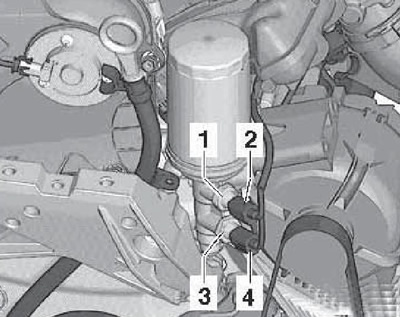
4.1c Petrol engines 1.8 and 2.0 l: D/V low pressure engine oil (1, except engine "BZB") with connector (2) and D/V engine oil pressure (3) with connector (4)
2. On models other than 3.6L, unscrew the engine oil pressure D/V and screw it into the VAG1342 pressure gauge (2 on the accompanying illustration), and screw the pressure gauge hose into the cylinder head instead of the sensor. On a 3.6 L engine, the pressure gauge hose is screwed into the hole in the oil filter housing, closed with a threaded plug, and this plug is screwed into the pressure gauge.
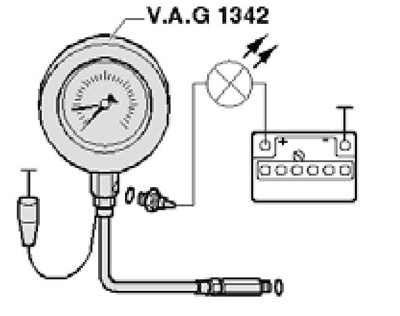
4.2 Engine oil pressure test diagram
Note: On 2.0L diesel engines with codes "CFFB", "CLJA" and "CFGB" it is also more convenient to return the pressure gauge to the hole in the oil channel, closed with a threaded plug, and screw this plug into the pressure gauge.
(Data copied from the portal: SKODABOOK.RU)
Connect the negative wire of the pressure gauge to the vehicle ground to ensure that the oil pressure D/V connection is connected to ground.
3. Connect the voltage indicator VAG1527B (test lamp) to the positive terminal of the battery and to the oil pressure D/V, - the indicator should not light. Otherwise, the oil pressure D/V should be replaced.
4. Start the engine and, if necessary, slowly increase the crankshaft speed. The voltage indicator should light when the oil pressure reaches the value at which the engine oil pressure D/V should operate (see Specifications). Otherwise, the oil pressure D/V should be replaced. If the Specifications contain data for checking the oil pressure at idle, perform the corresponding measurement and compare with the requirements Specifications.
5. Increase the crankshaft speed to 2000 rpm and check the engine oil pressure at a temperature of 80°C - the pressure should meet the requirements Specifications. For 1.8 l (except "BZB") and 2.0 l petrol engines, the pressure can also be checked at 3700 rpm. With further increase in rpm, the oil pressure should not increase more than 7 bar. If the required values are not reached, check the engine (for example, the crankshaft main bearings may be damaged or the oil intake may be clogged), or replace the relief valve, bypass valve or oil pump. Before installing a new oil pump, make sure that the oil lines in the upper section of the oil pan are not contaminated.
6. Disconnect and unscrew the pressure gauge and voltage indicator. Screw the engine oil pressure sensor back in place. Tighten the 3.6L engine service hole plug to 35 Nm.