
Company vehicles Hyundai Company vehicles Kia Company vehicles Lada Company vehicles Mazda Company vehicles Mercedes-Benz Company vehicles Opel Company vehicles Mitsubishi
English Русский
Български
Беларускі
Український
Српски
Hrvatski
Română
Polski
Slovenský
Magyar
Articles   
Bookmark Contacts Sitemap
SkodaBook.ru


Fabia Rapid Octavia Superb Kodiaq Yeti Others
Octavia 1 (1996-2004) Octavia 3 (2013-2019)

Oil sensors and valves (Skoda Octavia 5E)

  • Main
  • Octavia
  • 5E (2013-2019)
  • Petrol engines 1.4 l
  • Engine repair
  • Oil sensors and valves
0
Contents: Removal and installation the oil…⬇ Removal and installation oil…⬇ Checking oil pressure ⬇ Checking the low oil pressure sensor…⬇ Checking the oil pressure sensor…⬇

Removal and installation the oil pressure sensor "F22"


Note: When installing, secure all thermal insulation cuffs in their original places.


Remove the noise-insulating casing. Unscrew the "arrow" bolts and remove the heat shield of the right drive shaft.
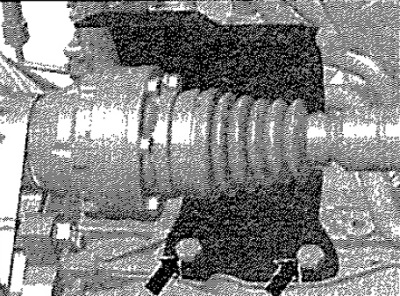
Remove the noise-insulating casing. Unscrew the…


Disconnect the "arrow" connector. Unscrew the oil pressure sensor "F22".
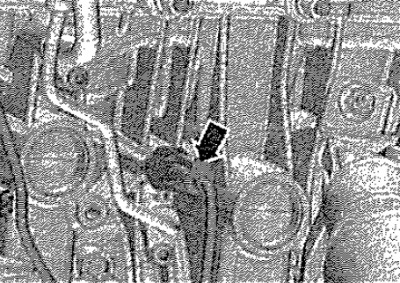
Disconnect the «arrow» connector. Unscrew the oil…


Installation


Installation in reverse order.

Note: Replace the sealing ring. To avoid oil loss, immediately screw a new oil pressure sensor "F22" into the hole.


Check the oil level.


Removal and installation oil pressure regulating valve N428-


Note: When installing, secure all thermal insulation cuffs in their original places.


Remove the noise-insulating casing. Remove the heat-protective covers. Disconnect connector "1". Unscrew screw "2" and remove the oil pressure regulating valve "N428".

[Text copied from this resource skodabook]
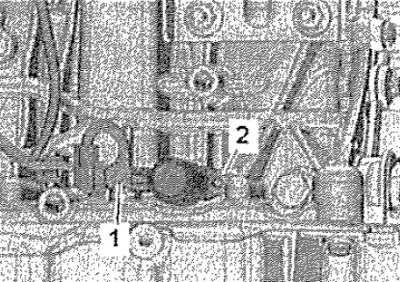
Remove the noise-insulating casing. Remove the…


Installation


Installation in reverse order. Replace the sealing ring. Install the noise-insulating casing.

Checking oil pressure


Engine oil level is within normal limits, check, Engine oil temperature is not less than 80°C (the radiator fan should turn on at least once). Remove the low oil pressure sensor "F378". Screw in the pressure gauge "V.A.G 1342" into the hole for the oil pressure sensor. Screw the low oil pressure sensor "F378" into the hole on the pressure gauge "V.A.G 1342", to plug this hole. Start the engine. Oil pressure at idle; not less than 0.06 MPa (0.6 bar). Oil pressure at 2000 rpm: not less than 0.15 MPa (1.5 bar). Oil pressure at 4500 rpm: not less than 0.28 MPa (2.8 bar) If the nominal value is not achieved: check the oil pressure regulating valve "N428".


Note: Low oil pressure may also be caused by mechanical damage, such as bearings.


If no fault is found: replace the oil pump.

Checking the low oil pressure sensor "F378" (black)


Switch off the engine, Connect the brown wire of the pressure gauge to ground (-), Connect the "VAG 1527 B" tester using the auxiliary wires from the "VAG 1594 C" set to the positive terminal of the battery (+) and the low oil pressure sensor "F378". The tester LED should not light. If the LED lights up, replace the low oil pressure sensor "F378". If the LED does not light up: start the engine: when the pressure reaches 0.3...0.6 MPa (3...6 bar), the LED should light up, otherwise replace the oil pressure sensor.
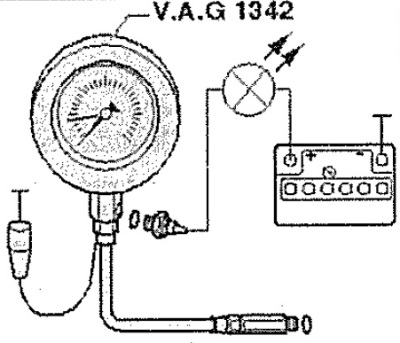
Switch off the engine, Connect the brown wire of…


Checking the oil pressure sensor -F22-(brown)


Turn off the engine. Connect the voltage indicator "VAG 1527B" using auxiliary wires from the auxiliary measuring equipment kit "VAG 1594 C" to the positive terminal of the battery (+) and to the oil pressure sensor "F22" (blue). The LED of the tester should not light. If the LED lights up, replace the switch of the oil pressure indicator "F22". If the LED does not light up: start the engine and increase the speed: when the pressure reaches 0.215.,.0.295 MPa (2.15,.2.95 bar) the LED should light up, otherwise replace the oil pressure sensor. Install the low oil pressure sensor "F378".
This article is available at russian, bulgarian, belarusian, ukrainian, serbian, croatian, romanian, polish, slovak, hungarian
Article verified: Anatoly Ovchinnikov
Share with friends:
◀ Previous
Skoda Octavia 3: Engine repair
Next ►

Oil filter and oil pressure sensor — parts and components
Removal and installation the upper part of the oil pan
Removal and installation the oil pump
Removal and installation the lower part of the oil pan
Removal and installation the oil level and temperature sensor «G266»
Removal and installation the toothed pulley of the coolant pump drive
Radiators and fans — parts and components
Removal and installation the intake manifold
Read similar articles on other Skoda models

➧ Lapping valves Skoda Fabia 1 (1999-2007)
➧ Boost pressure, intake air temperature, air pressure sensors Skoda Rapid 1 (2012-2022)
➧ Removal and installation of sensors and some lines of the engine… Skoda Superb 2 (2008-2015)
➧ Sensors (1.4 TSI) — removal and installation Skoda Kodiaq 1 (2016-2024)
➧ Removal and installation of sensors and some lines of the engine… Skoda Yeti (2009-2017)
➧ Cylinder head and valves — cleaning and inspection Skoda Favorit (1987-1994)
Link to this article in various formats
Reviews and comments of visitors
No comments yet


Add two numbers: 33 + 44


Octavia 3 (2013-2019) 
  • General information
  • User manual
  • Car driving
  • Maintenance
  • Petrol engines 1.2 l
  • Engine repair
  • Cooling system
  • Supply system
  • Petrol engines 1.4 l
  • Engine repair
  • Supply system
  • Petrol engines 1.8/2.0 l
  • Engine repair
  • Cooling system
  • Supply system
  • Diesel engines 1.6/2.0 l
  • Engine repair
  • Cooling system
  • Supply system
  • Transmission
  • Mechanical gearbox 02S
  • Automatic gearbox 0CW
  • Automatic gearbox 0D9
  • Chassis (running gear)
  • Front suspension
  • Rear suspension
  • Brake system
  • Steering
  • Body and interior
  • Doors, locks and windows
  • Exterior (external elements)
  • Interior (internal elements)
  • Ventilation and air conditioning
  • Electrical equipment
  • Equipment and devices
  • Headlights and lighting
  • Wiring diagrams (basic)
  • Wiring diagrams (comfort)
Octavia 1 (1996-2004) 
  • General information
  • Vehicle details
  • Maintenance
  • Power unit
  • Petrol engines 1.6 l AEE
  • Petrol engines 1.8 l AGN
  • Diesel engines 1.9 l AGR
  • Fuel system
  • Exhaust system
  • Cooling system
  • Transmission
  • Clutch
  • Car gearbox
  • Gearbox repair 02J
  • Gearbox repair 02K
  • Chassis (running gear)
  • Wheels and tires
  • Suspension and axles
  • Brake system
  • Body and interior
  • Exterior (external elements)
  • Interior (internal elements)
  • Doors, locks and windows
  • Electrical equipment
  • Equipment and devices
  • Electrical circuits
SkodaBook.ru © 2018–2026 | Mobile version | Articles on Skoda | Sitemap EN BG BY UA RS HR RO PL SK HU | Feedback | Site search | Bookmark
Fabia 1 (1999-2007) | Fabia 2 (2007-2014) | Rapid 1 (2012-2022) | Octavia 1 (1996-2004) | Octavia 3 (2013-2019) | Superb 2 (2008-2015) | Kodiaq 1 (2016-2024) | Yeti (2009-2017) | Favorit (1987-1994) | Felicia (1994-2001) |
By continuing to use the site, you agree to the use of cookies.