Note: If the engine has been severely overheated, it is logical to assume that the cylinder head is deformed. so check it carefully.
Cleaning
2. Clean off all traces of the old gasket and sealant from the cylinder head; see details in Chapter 6 of Section 2A.
3. Remove carbon deposits from combustion chambers and bores, then thoroughly flush cylinder head with kerosene or a suitable solvent.
4. Scrape most of the carbon off the valves, then use a wire brush to remove any remaining carbon from the valve heads and stems.
Inspection
Note: Complete all inspection procedures before concluding that you need to go to an auto repair shop for regrinding. Make a list of all components that require processing.
Cylinder head
5. Carefully inspect the cylinder head for cracks, signs of coolant leakage and other damage. If cracks are found, replace the head.
6. Using a steel ruler and feeler gauge, check the deformation of the seating surface of the cylinder head. Since Skoda does not indicate any data on the maximum allowable deformation, if it is available, consult a Skoda dealer, who can determine the possibility of regrinding the head or purchasing a new one.
7. Inspect the valve seats in each combustion chamber. If they are excessively corroded, cracked, or burnt, they should be replaced or reground by an engine rebuilder. If there is slight corrosion, it can be removed by lapping the valve head against the seat as described below. If the valve seats must be reground, this should only be tediously done after the valve guides have been inspected and rebuilt.
8. Inspect the valve guides for signs of wear and damage. If you have the necessary measuring tools, measure the diameter of the valve stems (see below) and holes of the guides, then calculate the gap and compare the result with the regulated value. If there are no measuring tools, then a rough estimate of the wear of the guide bushing can be done in the following way. Insert the valve into the appropriate guide so that its head is approximately 10 mm above the surface of the cylinder head, and check the movement of the valve from side to side. There should be very little lateral play. Please note that valve guides are an integral part of the cylinder head and are not sold separately. Therefore, if the clearance between the valve stem and guide exceeds the Specifications limit, or side play seems to be excessive, it is necessary to widen the guide bushings and install a new set of valves with stems of the appropriate oversize (nominal diameter 8.25 mm). Have this job done by a Skoda dealer.
Valves
9. Inspect each valve head for pitting, burn marks, cracks, and general wear, and valve stem for scratches and gouges. While rotating the valve, inspect it for deformation. Replace any damaged or worn valves.
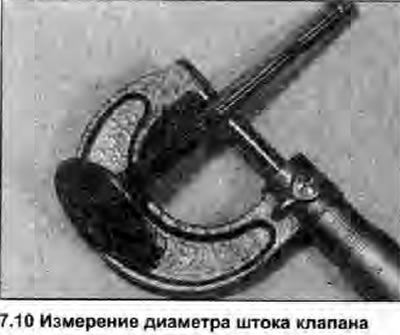
10. If the valve is in satisfactory condition, measure the stem diameter in several places using a micrometer (see illustration). Any significant difference indicates valve stem wear. If any of the listed damage is found, the valve must be replaced.
11. If the valves are not damaged, they should be lapped into their respective seats to ensure a tight seal.
12. Lapping of valves is performed as follows. Place the cylinder head upside down on a workbench.
13. Apply valve lapping paste (appropriate grade) on the seat surface, and attach the special suction cup to the valve head. Rotating the valve back and forth half a turn, grind its head, rubbing it against the seat, occasionally lifting the valve. to redistribute the paste. If a weak spring is placed under the valve head, this will greatly facilitate the work.
14. If a coarse grinding paste is used, work until the seat and valve contact surfaces become dull, dull, then wipe off the compound and repeat the process with a fine paste. When the seat and valve surfaces are a uniform light gray color, lapping is complete. Do not lap the valves longer than necessary, as this will cause the seat to dig into the cylinder head undesirably.
15. When all valves are lapped, carefully wash off all traces of grinding paste using kerosene or a suitable solvent. Even a small amount of grinding paste left in the cylinder head. can cause rapid wear.
Valve components
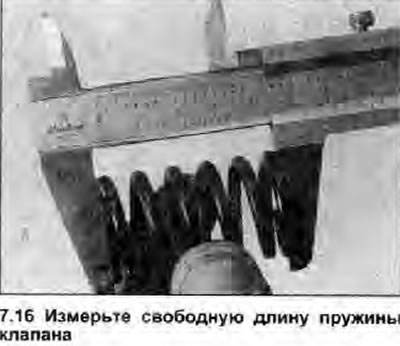
16. Inspect the valve springs for signs of damage and discoloration, and measure their free length with a caliper or steel ruler, and compare the values obtained with those indicated in Specifications (see illustration). If any of the springs are damaged, distorted, or significantly shorter, purchase a new set of inner and outer springs.