
Company vehicles Hyundai Company vehicles Kia Company vehicles Lada Company vehicles Mazda Company vehicles Mercedes-Benz Company vehicles Opel Company vehicles Mitsubishi
English Русский
Български
Беларускі
Український
Српски
Hrvatski
Română
Polski
Slovenský
Magyar
Articles   
Bookmark Contacts Sitemap
SkodaBook.ru


Fabia Rapid Octavia Superb Kodiaq Yeti Others
Octavia 1 (1996-2004) Octavia 3 (2013-2019)

Removal the timing belt from the camshaft (Skoda Octavia 5E)

  • Main
  • Octavia
  • 5E (2013-2019)
  • Petrol engines 1.4 l
  • Engine repair
  • Removal the timing belt from the camshaft
0
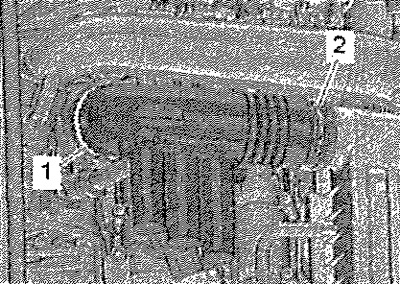
Loosen clamps -1, 2- and remove the air duct.

Loosen clamps -1, 2- and remove the air duct.


Unlock the "arrow" clamps using the "T10527" puller and remove the air duct.
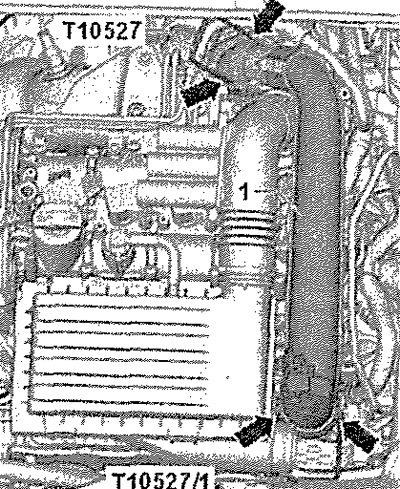
Unlock the «arrow» clamps using the «T10527»…


Press the release buttons and disconnect the hose "1". Unscrew the screws "arrows" and remove the crankcase ventilation hose.
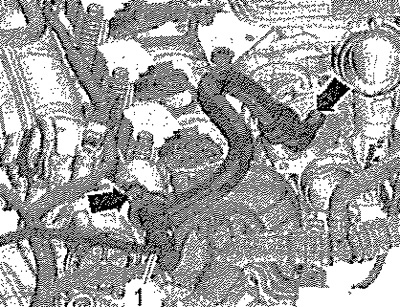
Press the release buttons and disconnect the hose…


Hang up the wiring harness "arrows". Unscrew screws -1, 3- and remove the protective cover "2" of the toothed belt of the cooling system pump.
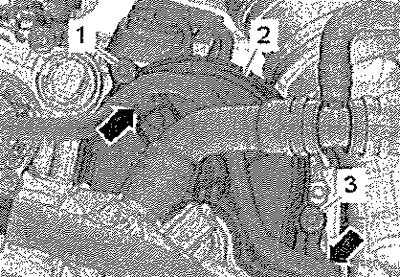


Hang up the wiring harness «arrows». Unscrew…


Unscrew the "arrow" screws and remove the cover "1". Release the hoses from the fastening "3".
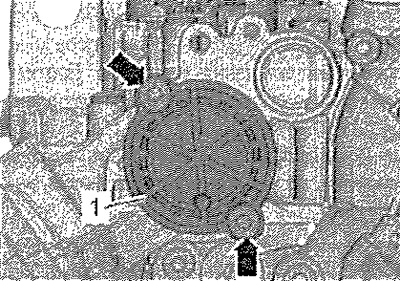
Unscrew the «arrow» screws and remove the cover…


[Material is available on the website: skodabook]

Unscrew bolt "2". Disconnect clamps "arrows" and remove upper protective cover of toothed belt "1".
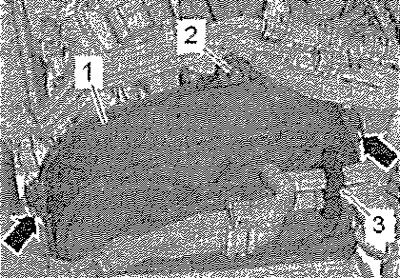
Unscrew bolt «2». Disconnect clamps «arrows» and…


Unscrew the "arrow" screws and remove the cover from the exhaust valve timing adjuster.


Caution! Collect leaking engine oil! To protect the timing belt from leaking engine oil, place a rag under the valve timing adjuster. Belt drive parts - camshaft sprockets, crankshaft sprocket, tension roller and guide roller must be degreased.
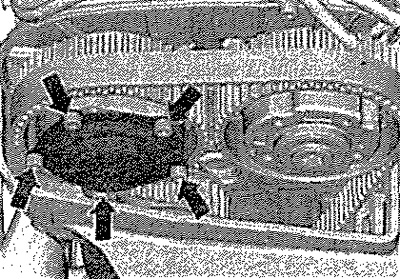

Caution! Collect leaking engine oil! To protect…


Drain the coolant. Unscrew screws -A...D- and press cover "1" of the thermostat to the side. Remove the noise-insulating casing.
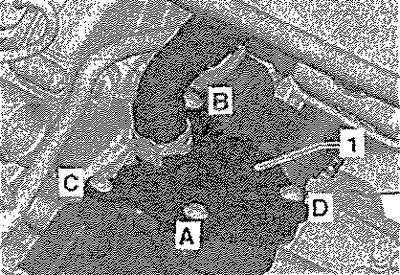
Drain the coolant. Unscrew screws -A...D- and…


Turn the crankshaft to "TDC" as follows. Unscrew the threaded plug of the "TDC" hole on the cylinder block. Screw the locking bolt "T10340" into the cylinder block until it stops and tighten to a torque of 30 Nm. Turn the crankshaft until it stops in the direction of engine rotation. The crankshaft counterweight is now adjacent to the locking bolt.


Note: The locking bolt "T10340" locks the crankshaft only in the working direction of rotation.
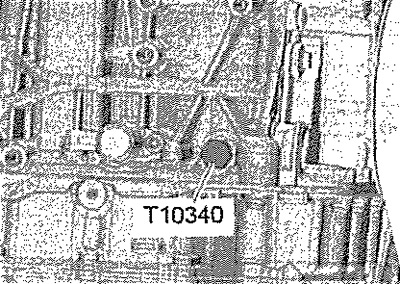

Note: The locking bolt «T10340» locks the…


Caution! Risk of engine damage! If the locking screw "T10340" does not screw in all the way, the crankshaft is not in the correct position! In this case, proceed as follows; Loosen the locking screw. Turn the crankshaft 90° in the direction of engine rotation. Screw the locking bolt "T10340" into the cylinder block until it stops and tighten to a torque of 30 Nm. Turn the crankshaft in the direction of engine rotation until it stops.


On both camshafts, the asymmetrically located recesses "arrows" on the gearbox side should now point upwards, as shown in the figure. On the exhaust camshaft "A", these recesses - the upper arrows - are accessible through the holes in the pulley for driving the coolant pump. On the intake camshaft "E", these recesses - the lower arrows - are located above the middle of the camshaft.

Note: The camshafts have two pairs of recesses: one symmetrical, the other asymmetrical. At TDC, the asymmetrical pair of recesses should be located above an imaginary horizontal center line.


Note: The camshafts have two pairs of recesses:…


If the camshafts are not installed as described above: unscrew the locking bolt "T10340", turn the crankshaft one turn and set it to "TDC" again. If the camshafts are installed as described above: insert the locking tool "T10494" into the camshafts until it stops and tighten the screw "arrow" by hand.

Note: The camshaft locking tool "T10494" must be inserted easily. The camshaft locking tool must not be installed with an impact tool.


If the camshaft locking tool "T10494" does not install easily.

Caution! To avoid damaging the timing belt, do not use sharp tools!


Press the "T10487" tool in the "direction of the arrow" onto the toothed belt.
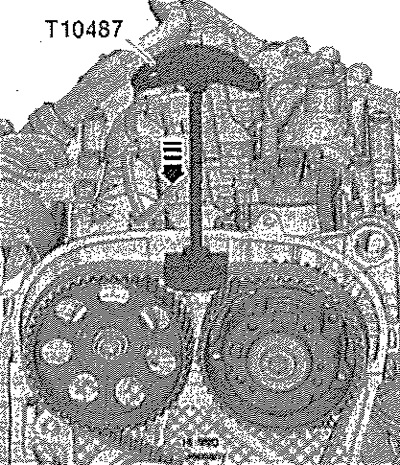
Press the «T10487» tool in the «direction of the…


At this time, insert the camshaft locking tool "T10494" all the way into the camshaft and tighten it by hand using the bolt "arrow".


Caution! Risk of damage to the camshaft. Do not use the "T10494" camshaft locking devices as a stop.


Tighten the "arrow" screw by hand.
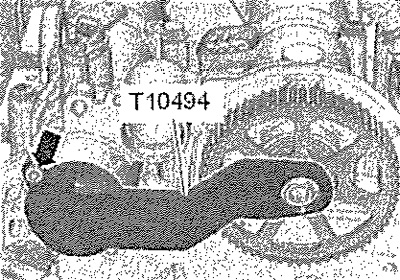
Tighten the «arrow» screw by hand.


Unscrew the threaded plug "1" on the intake camshaft pulley using the stop "T10172" with the adapter "T10172/1".
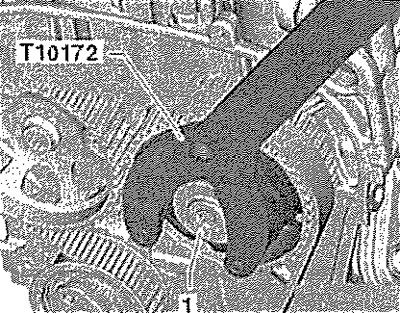
Unscrew the threaded plug «1» on the intake…


Loosen bolts -1,2- by about one turn. To do this, use the puller "T10172" with adapters "T10172/2" and "T10172/1".

Caution! Changing the direction of rotation of a used timing belt can damage it. Before removing the belt, mark the direction of rotation with chalk or a felt-tip pen for reinstallation.
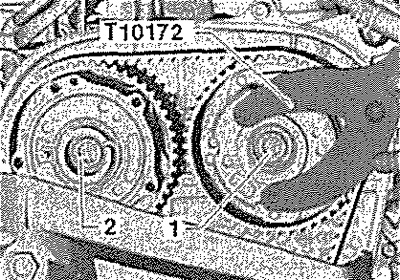

Caution! Changing the direction of rotation of a…


Loosen screw "1" with key "T10500". Loosen tension roller by turning eccentric "2" with key "T10499".


Caution! Risk of damage to the timing belt! The timing belt is made using fiberglass. Therefore, its bending diameter should not be less than 50 mm. Otherwise, the service life of the timing belt will be significantly reduced.
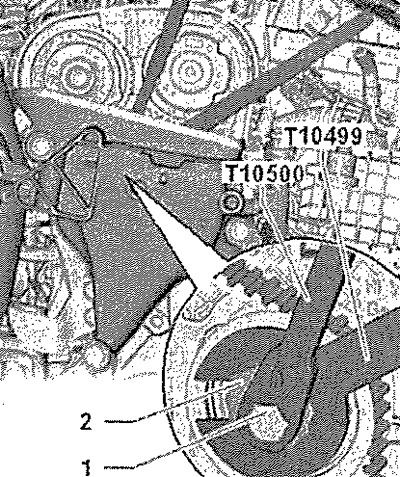

Caution! Risk of damage to the timing belt! The…


Remove the timing belt from the camshaft pulleys.
This article is available at russian, bulgarian, belarusian, ukrainian, serbian, croatian, romanian, polish, slovak, hungarian
Article verified: Anatoly Ovchinnikov
Share with friends:
◀ Previous
Skoda Octavia 3: Engine repair
Next ►

Details and units of toothed belt transmission
Removal and installation of engine and gearbox mounts
Engine installation
Removal the engine
Engine characteristics
Timing Belt Installation/Adjustment
Checking the valve timing
Pulley Side Flange Seal — General Installation Diagram
Crankshaft cover pulley side — torque and tightening sequence
Removal and installation the flywheel
Read similar articles on other Skoda models

➧ Replacing and adjusting the camshaft drive belt Skoda Fabia 1 (1999-2007)
➧ Timing Belt — Removal and Installation Skoda Rapid 1 (2012-2022)
➧ Removal and installation the crankshaft pulley and timing belt housing Skoda Superb 2 (2008-2015)
➧ Upper cover of the timing belt Skoda Kodiaq 1 (2016-2024)
➧ Removal and installation timing belt covers Skoda Yeti (2009-2017)
➧ Removal and installation the timing belt and its covers Skoda Felicia (1994-2001)
Link to this article in various formats
Reviews and comments of visitors
No comments yet


Add two numbers: 27 + 22


Octavia 3 (2013-2019) 
  • General information
  • User manual
  • Car driving
  • Maintenance
  • Petrol engines 1.2 l
  • Engine repair
  • Cooling system
  • Supply system
  • Petrol engines 1.4 l
  • Engine repair
  • Supply system
  • Petrol engines 1.8/2.0 l
  • Engine repair
  • Cooling system
  • Supply system
  • Diesel engines 1.6/2.0 l
  • Engine repair
  • Cooling system
  • Supply system
  • Transmission
  • Mechanical gearbox 02S
  • Automatic gearbox 0CW
  • Automatic gearbox 0D9
  • Chassis (running gear)
  • Front suspension
  • Rear suspension
  • Brake system
  • Steering
  • Body and interior
  • Doors, locks and windows
  • Exterior (external elements)
  • Interior (internal elements)
  • Ventilation and air conditioning
  • Electrical equipment
  • Equipment and devices
  • Headlights and lighting
  • Wiring diagrams (basic)
  • Wiring diagrams (comfort)
Octavia 1 (1996-2004) 
  • General information
  • Vehicle details
  • Maintenance
  • Power unit
  • Petrol engines 1.6 l AEE
  • Petrol engines 1.8 l AGN
  • Diesel engines 1.9 l AGR
  • Fuel system
  • Exhaust system
  • Cooling system
  • Transmission
  • Clutch
  • Car gearbox
  • Gearbox repair 02J
  • Gearbox repair 02K
  • Chassis (running gear)
  • Wheels and tires
  • Suspension and axles
  • Brake system
  • Body and interior
  • Exterior (external elements)
  • Interior (internal elements)
  • Doors, locks and windows
  • Electrical equipment
  • Equipment and devices
  • Electrical circuits
SkodaBook.ru © 2018–2026 | Mobile version | Articles on Skoda | Sitemap EN BG BY UA RS HR RO PL SK HU | Feedback | Site search | Bookmark
Fabia 1 (1999-2007) | Fabia 2 (2007-2014) | Rapid 1 (2012-2022) | Octavia 1 (1996-2004) | Octavia 3 (2013-2019) | Superb 2 (2008-2015) | Kodiaq 1 (2016-2024) | Yeti (2009-2017) | Favorit (1987-1994) | Felicia (1994-2001) |
By continuing to use the site, you agree to the use of cookies.