



Contents: Installation ⬇ Clutch disc installation position ⬇ Checking the ends of diaphragm…⬇ Checking spring and riveted…⬇ Checking the position of the…⬇
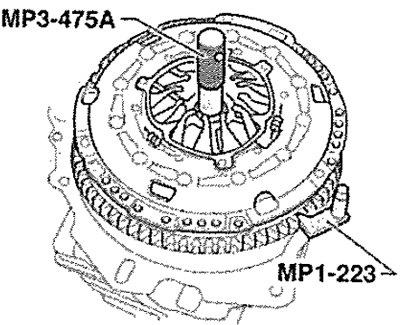
To prevent deformation of the clutch pressure plate when removing (which leads to jerks when starting off) the clutch pressure plate mounting screws should be loosened as follows: To loosen the screws, install the counter support "MP1-223" (3067). Loosen the screws step by step in a crosswise order. Remove the clutch pressure plate and the clutch disc.
Installation
Installation in reverse order.
Note: The clutch pressure plate and clutch disc must always be replaced together. Select the appropriate clutch pressure plate and clutch disc according to the engine designation.
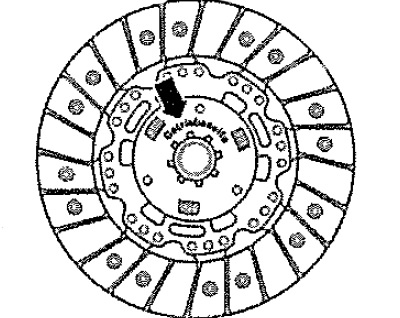
Clutch disc installation position
Inscription "Getriebeseite" facing the CP.
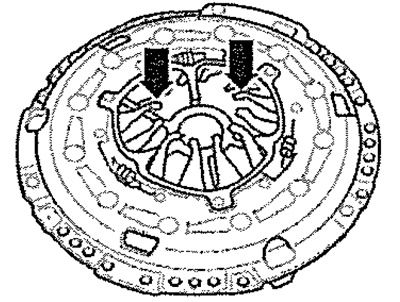
Checking the ends of diaphragm springs
It is allowed to wear the diaphragm springs up to half the thickness "see arrows".
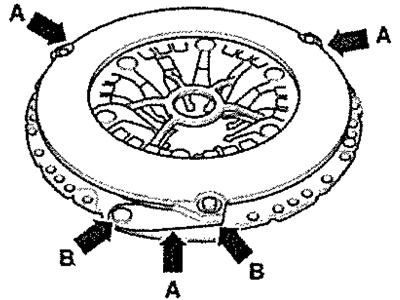
Checking spring and riveted connections
Check the spring connections "see arrows A" for any damage, as well as the rivet connections "see arrows B" for reliable fastening.
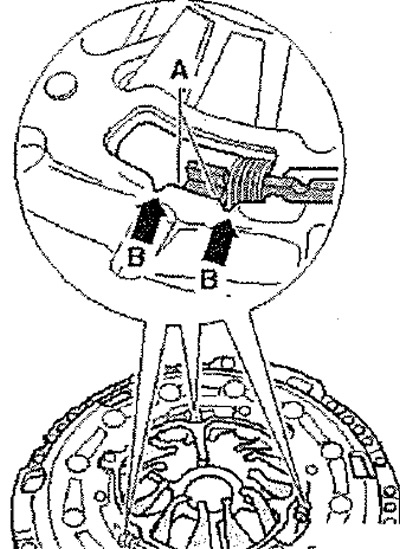
Checking the position of the adjustment mechanism only with new clutch pressure plates
Both edges "A" of the adjusting ring must be located between the pair of notches "B". If the adjusting ring with new clutch pressure plates is in a different position, the clutch pressure plate and the clutch disc must not be installed. With used clutches, the adjusting ring may be in a different position outside the notches.
Note: Replace the clutch disc and pressure plate with damaged or loose rivet connections. To reduce the smell when the clutch burns, thoroughly clean the clutch housing, as well as the flywheel and engine on the gearbox side. Clean the teeth of the drive shaft and, if the clutch disc has already been in operation, the teeth of the hub, remove traces of corrosion. Apply a very thin layer of grease "G 000 100" to the teeth. Then move the clutch disc on the drive shaft in one direction and then in the other until the hub moves freely along the shaft. Be sure to remove excess grease. The clutch pressure plates must be protected from corrosion and lubricated. Only the working surfaces can be cleaned, otherwise the service life of the clutch is significantly reduced. The working surfaces of the clutch pressure plate and the clutch disc linings must be completely adjacent to the flywheel before inserting the screws. Only then can the fastening screws be inserted.
When installing, use the counter support "MP1-223" (3067) again to tighten the screws. Place the clutch pressure plate on the centering pins. To center the clutch disc, use the centering mandrel "MP3-475A" (3190A). To prevent deformation of the clutch pressure plate during installation, (which leads to jerks when starting off) the clutch pressure plate should be installed as follows. Tighten all screws evenly by hand until the heads touch the clutch pressure plate. Tighten the screws in stages in a cross pattern to avoid damaging the centering holes of the clutch pressure plate and the flywheel centering pins. Tighten all 6 screws in stages with torque. Install the gearbox.