



Caution: Long-term skin contact with used engine oil can be quite hazardous to health. Use barrier cream or wear rubber gloves when performing the procedures described below.
Note: Frequent engine oil changes are the most important preventative maintenance procedure available to the amateur mechanic. Over time, oil is susceptible to dilution and contamination, which leads to premature engine wear.
Note: On diesel models, the oil filter should be replaced before draining the engine oil, as removing the filter opens a valve and allows oil to drain from the filter housing into the engine oil pan.
1. Warm up the engine to operating temperature and remove the engine oil filler cap (3 in the illustrations of Section 1). Provide access to the oil filter (for example, it may be necessary to disconnect hoses, remove the air cleaner and/or other components).
2. Jack up the car and place it on supports, or drive it into an inspection pit. The car must be positioned horizontally.
3. If installed, remove the sound insulation under the engine compartment (see Chapter 11). Unscrew the oil drain plug in the oil pan and let the oil drain into a container placed there beforehand.
Note: Be careful not to burn yourself with hot oil. You can first pump out the oil through the dipstick guide tube.
4. On diesel models with the filter element installed in a separate housing, follow these steps:. Loosen the bolt (arrow in illustration 6.4a), release the wire (2), unhook the electromagnetic valve (1) with the holder, and place them aside to provide access to the filter element cover installed on the front side of the engine. Remove the lid (1 in illustration 6.4b) oil filter housing with a 32 mm wrench, remove the filter element (3) and replace the sealing rings (2), lubricating the new rings with oil.
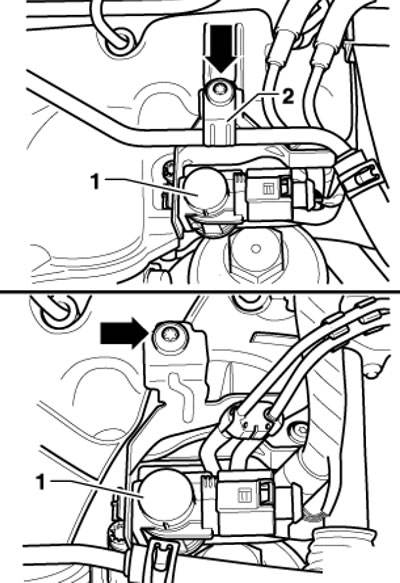
6.4a. Electromagnetic valve above the filter element cover of diesel models
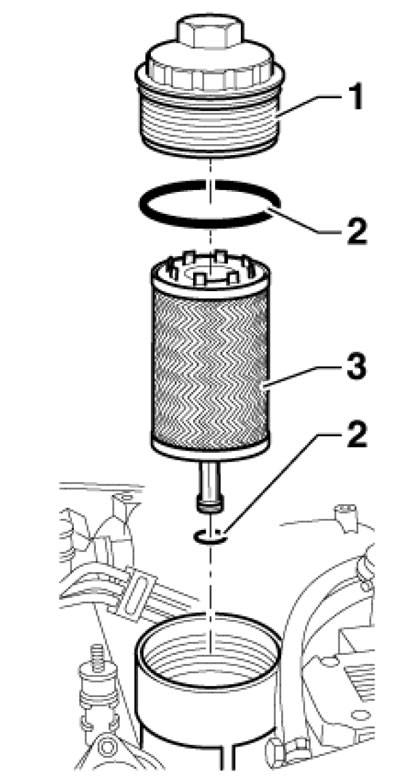
6.4b. Diesel Engine Filter Element Installation Details
Note: Some engines use two lower O-rings. Make sure there are no foreign particles in the filter housing, clean the mating surfaces of the cover and filter housing. Install a new filter element and tighten the cap to 25 Nm. Secure the solenoid valve and wire.
5. On petrol models with a fully replaceable filter, unscrew the oil filter (see section "Work with the lubrication system") using a strap wrench or a suitable large multi-sided wrench. Clean the sealing surfaces of the filter and engine, lubricate the O-ring of the new filter with clean engine oil and screw it into the engine by hand. Then pull the filter up to the specified Specifications efforts.
6. Tighten the new oil drain plug to 30 Nm.
Note: The seal does not separate from the plug, so the plug is replaced together with the seal.
7. Fill with engine oil and tighten the filler plug (see Section 4).
8. Start the engine and let it idle until the low engine oil pressure light goes out (see Section 13 Chapters "Controls and operating techniques"). Increasing the speed when the low pressure engine oil light is on can cause the turbocharger to fail (if available).
9. Wait 3-5 minutes and check the engine oil level, adjust it again if necessary.
10. Test drive the vehicle and check the drain plug and oil filter for leaks. If necessary, tighten the plug and/or filter slightly. Check the oil level again and adjust it if necessary.