
Warning! Remember that gasoline is a volatile and highly flammable liquid - take appropriate safety precautions.
1. Relieve any residual pressure in the supply system.
2. The fuel filter is located behind the vehicle and on the left in front of the fuel tank. Access to the filter is very limited. Chock the front wheels of the vehicle, then jack up the rear of the vehicle and support it on jack stands.
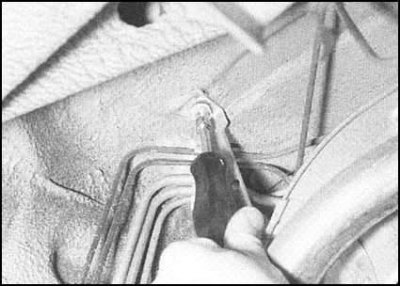
3. Give three fixing nuts...
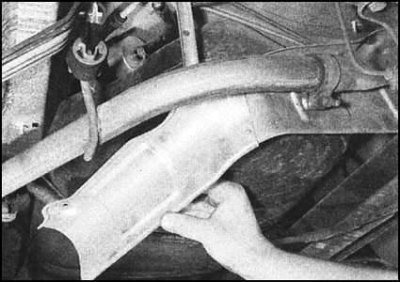
... and remove the heat shield from the exhaust system.
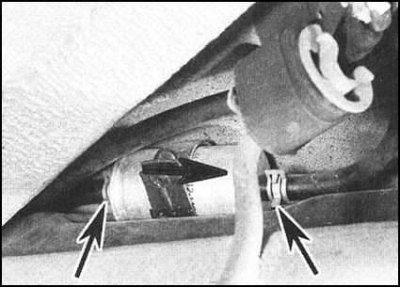
4. Pinch the inlet and outlet hoses of the fuel filter with special clamps. The fuel remaining inside the filter can be pumped out after the hoses are disconnected. Have a supply of rags ready to catch spilled fuel.
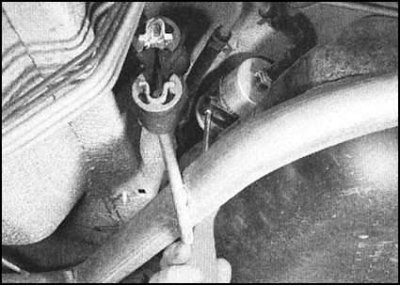
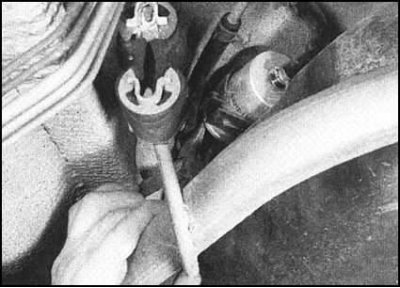
5. Loosen the filter clamp screw.
6. Release fastening collars and disconnect hoses from the filter. The standard spring-type clamps should be replaced during assembly with more practical screw or worm clamps. Check the condition of the hoses, replace the defective ones.
 |  |
7. Before removing the filter, mark its installation position with respect to the direction of fuel flow. On the body of the new filter, the direction of flow is indicated by an arrow. Remember that fuel is supplied from the gas tank to the engine.
8. Install the replacement filter, making sure that it is positioned correctly in relation to the direction of fuel flow.
9. Connect the hoses and secure them with new clamps. Try not to let dirt get into the fuel lines or filter fittings. Tighten the filter clamp screw and remove the hose clamp clamp.
10. Start the engine (the procedure may take a little more than usual time, because. the new filter should be filled with fuel), let it run for a few minutes while checking the filter and its fittings for signs of fuel leaks.
11. Reinstall the exhaust system heat shield, then lower the vehicle to the ground.
Attention! The filter removed from the vehicle must be disposed of in accordance with the procedure established by regional legislation!