



Car engine overhaul Skoda Favorit

Engine Removal and Overhaul Procedures — General Description
This Part of Section 2 describes the procedures for removing the engine/transmission assembly from the vehicle and the basic procedures for rebuilding the cylinder head, cylinder block/crankcase and all internal engine...
This Part of Section 2 describes the procedures for removing the engine/transmission assembly from the vehicle and the basic procedures for rebuilding the cylinder head, cylinder block/crankcase and all internal engine...
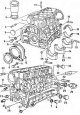
Engine overhaul — general description
It is not always easy to determine whether an engine needs to be rebuilt, as it depends on many factors. High mileage does not necessarily mean that an overhaul is necessary, and vice versa, low mileage does not...
It is not always easy to determine whether an engine needs to be rebuilt, as it depends on many factors. High mileage does not necessarily mean that an overhaul is necessary, and vice versa, low mileage does not...
Engine and Transmission Removal — Methods and Precautions
If the engine needs to be removed for rebuilding, there are a few preliminary steps to take. The choice of location for the work is extremely important. You will need sufficient work space and a garage where you can...
If the engine needs to be removed for rebuilding, there are a few preliminary steps to take. The choice of location for the work is extremely important. You will need sufficient work space and a garage where you can...

Engine and transmission — removal and installation
Removal Note: The engine can only be removed from the vehicle together with the transmission. After which they can be separated. The engine/transmission assembly is lowered from the engine bay onto the floor. 1. Place...
Removal Note: The engine can only be removed from the vehicle together with the transmission. After which they can be separated. The engine/transmission assembly is lowered from the engine bay onto the floor. 1. Place...
Engine disassembly sequence
1. It will be much easier to work if you install the engine on a special portable stand. Before installing the engine on the stand, remove the flywheel so that the stand bolts can be screwed into the cylinder block. 2....
1. It will be much easier to work if you install the engine on a special portable stand. Before installing the engine on the stand, remove the flywheel so that the stand bolts can be screwed into the cylinder block. 2....

Cylinder head — disassembly
Note: Given that special tools are required to remove and inspect the head, it is recommended that you purchase a new or reconditioned component from an engine rebuilder. This may ultimately be cheaper than rebuilding...
Note: Given that special tools are required to remove and inspect the head, it is recommended that you purchase a new or reconditioned component from an engine rebuilder. This may ultimately be cheaper than rebuilding...

Cylinder head and valves — cleaning and inspection
1. A complete cleaning of the cylinder head components and valves followed by a detailed inspection will allow you to determine what procedures need to be performed during an engine overhaul. Note: If the engine has...
1. A complete cleaning of the cylinder head components and valves followed by a detailed inspection will allow you to determine what procedures need to be performed during an engine overhaul. Note: If the engine has...

Cylinder head — assembly
Fig. 2B.2. Location of valve components in the cylinder head 1. Cylinder head; 2. Valve seat; 3. Valve; 4. Valve guide bushing; 5. Outer spring support; 6. Inner spring support; 7. Valve guide bushing oil seal; 8....
Fig. 2B.2. Location of valve components in the cylinder head 1. Cylinder head; 2. Valve seat; 3. Valve; 4. Valve guide bushing; 5. Outer spring support; 6. Inner spring support; 7. Valve guide bushing oil seal; 8....

Camshaft and tappets — removal, inspection and installation
Removal 1. Remove the valve mechanism as described in Chapter 5 of Section 2A . 2. Remove the push rods one by one and stack them in the correct order by pushing them into the cardboard holder. 3. Remove the four nuts...
Removal 1. Remove the valve mechanism as described in Chapter 5 of Section 2A . 2. Remove the push rods one by one and stack them in the correct order by pushing them into the cardboard holder. 3. Remove the four nuts...

Piston and connecting rod assemblies — removal
1. Remove the cylinder head, oil pan and oil pump gears as described in Chapters 6 , 9 and 10 from Section 2A . Make sure the cylinder liners are securely fastened in the working position. 2. Before removing the cranks,...
1. Remove the cylinder head, oil pan and oil pump gears as described in Chapters 6 , 9 and 10 from Section 2A . Make sure the cylinder liners are securely fastened in the working position. 2. Before removing the cranks,...
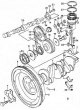
Crankshaft, camshaft and related components
Fig. 2B.3. Crankshaft, camshaft and related components 1. Crankshaft; 2. Segment key; 3. Flywheel; 4. Flywheel ring gear; 5. Mounting pin; 6. Flywheel mounting bolt; 7. Blocking plate; 8. Crankshaft thrust washers; 9....
Fig. 2B.3. Crankshaft, camshaft and related components 1. Crankshaft; 2. Segment key; 3. Flywheel; 4. Flywheel ring gear; 5. Mounting pin; 6. Flywheel mounting bolt; 7. Blocking plate; 8. Crankshaft thrust washers; 9....

Crankshaft — removal
1. Remove the cylinder head, drive chain and sprockets as described in Chapters 6 and 7 from Section 2A . Make sure the cylinder liners are securely fastened in the working position. 2. Release the connecting rod caps...
1. Remove the cylinder head, drive chain and sprockets as described in Chapters 6 and 7 from Section 2A . Make sure the cylinder liners are securely fastened in the working position. 2. Release the connecting rod caps...

Cylinder block/crankcase — cleaning and inspection
Cleaning 1. For a complete cleaning, remove the liners (see point 19 below), lube channel plugs, and all external components and electrical switches/sensors. 2. Clean the cylinder block and crankcase from any remaining...
Cleaning 1. For a complete cleaning, remove the liners (see point 19 below), lube channel plugs, and all external components and electrical switches/sensors. 2. Clean the cylinder block and crankcase from any remaining...

Piston/Connecting Rod Assemblies — Disassembly, Inspection and Assembly
Fig. 2B.4. Marking on the piston head and the location of diameter measurement 1. Manufacturer's number 2. Manufacturer's mark 3. Piston size class (diameter) 4. Date of production 5. Arrow (points to the front of the...
Fig. 2B.4. Marking on the piston head and the location of diameter measurement 1. Manufacturer's number 2. Manufacturer's mark 3. Piston size class (diameter) 4. Date of production 5. Arrow (points to the front of the...

Crankshaft — inspection
1. Clean the crankshaft and dry it with compressed air. Make sure the oil holes are not clogged. 2. Check the main and connecting rod journals for uneven wear, scratches, corrosion and cracks. 3. Run a copper coin...
1. Clean the crankshaft and dry it with compressed air. Make sure the oil holes are not clogged. 2. Check the main and connecting rod journals for uneven wear, scratches, corrosion and cracks. 3. Run a copper coin...

Main and connecting rod bearings — inspection
Fig. 2B.6. Typical damage to liners A. Scratched by foreign particles - grains are visible, sunk into the working surface of the liner IN. Lack of oil - the top layer is worn off. The bearings are incorrectly positioned...
Fig. 2B.6. Typical damage to liners A. Scratched by foreign particles - grains are visible, sunk into the working surface of the liner IN. Lack of oil - the top layer is worn off. The bearings are incorrectly positioned...
Engine assembly sequence
1. Before beginning assembly, make sure you have all the new parts you need and all the tools ready. Read all the procedures to familiarize yourself with the work. In addition to the usual tools and materials, you will...
1. Before beginning assembly, make sure you have all the new parts you need and all the tools ready. Read all the procedures to familiarize yourself with the work. In addition to the usual tools and materials, you will...

Piston rings — installation
1. Before installing new piston rings, check the ring cut clearances and ring to groove wall clearances as described in Chapter 13 . 2. When measuring new rings, arrange all piston/rod sets according to their location...
1. Before installing new piston rings, check the ring cut clearances and ring to groove wall clearances as described in Chapter 13 . 2. When measuring new rings, arrange all piston/rod sets according to their location...

Crankshaft — installation and checking of main bearing clearance
Selecting inserts 1. To select the required main bearings, you will first need to determine the size group of the crankshaft main journals. To do this, measure the diameters of the main journals and, based on the...
Selecting inserts 1. To select the required main bearings, you will first need to determine the size group of the crankshaft main journals. To do this, measure the diameters of the main journals and, based on the...

Piston/connecting rod assemblies installation and checking of connecting rod bearing working clearance
Selecting inserts 1. To select the required connecting rod bearings, you will first need to determine the size group of the crankshaft connecting rod journals. To do this, measure the diameters of the connecting rod...
Selecting inserts 1. To select the required connecting rod bearings, you will first need to determine the size group of the crankshaft connecting rod journals. To do this, measure the diameters of the connecting rod...
Engine — Starting after Overhaul
1. Recheck the engine oil and coolant levels. Make sure all wires and hoses are connected and that no tools or rags are left in the engine compartment. 2. Remove the spark plugs, disconnect the ignition system by...
1. Recheck the engine oil and coolant levels. Make sure all wires and hoses are connected and that no tools or rags are left in the engine compartment. 2. Remove the spark plugs, disconnect the ignition system by...
This section is available on russian, bulgarian, belarusian, ukrainian, serbian, croatian, romanian, polish, slovak, hungarian
Link to this section in various formats
TEXTHTMLBB Code
- General information
- Maintenance
- Troubleshooting
- Power unit
- Engine in car
- Engine overhaul
- Cooling and heating
- Fuel and exhaust system
- Fuel injection system
- Ignition system
- Transmission
- Clutch
- Manual gearbox
- Drive shafts
- Chassis (running gear)
- Brake system
- Car suspension
- Steering
- Body and interior
- Exterior (external elements)
- Interior (salon)
- Electrical equipment
- Equipment and devices
- Power devices
- Electrical circuits
- General information
- Introduction to guide
- User manual
- Maintenance (petrol)
- Maintenance (diesel)
- Power unit
- Petrol engine 1.3 l
- Petrol engine 1.6 l
- Diesel engine
- Engine overhaul
- Cooling system
- Fuel system (carburetor)
- Central injection (SPFI)
- Multipoint injection (MPFI)
- Diesel power system
- Decreased toxicity
- Engine electrics
- Transmission
- Clutch
- Car gearbox
- Drive shafts
- Chassis (running gear)
- Brake system
- Car suspension
- Steering
- Body and interior
- Exterior (external elements)
- Interior (salon)
- Doors, locks and windows
- Electrical equipment
- Equipment and devices
- Headlights and lighting
- Electrical circuits