



2. Before you begin removing the spark plugs, wait until the engine has cooled down completely.
3. To gain access to the spark plugs, remove the three screws securing the cover over the throttle body. Note that the front screw is longer than the other two. Release all hoses and wires from the clips on the underside of the cover, then remove the cover.
4. If there is no factory marking on the spark plug high voltage wires, mark the wires yourself using tape in accordance with the cylinder numbering (the first is considered to be the one closest to the timing belt). Try not to damage the insulation of the wires.
5. The spark plug wire tips are equipped with metal heat shields. Carefully remove the tips from the spark plug tails (to avoid damaging the contact terminal, pull only on the tip, but never on the wire itself).
6. Before unscrewing the spark plugs, remove small debris and dirt from the spark plug niches - use a small brush or blow out the niches with compressed air (you can use a regular bicycle pump).
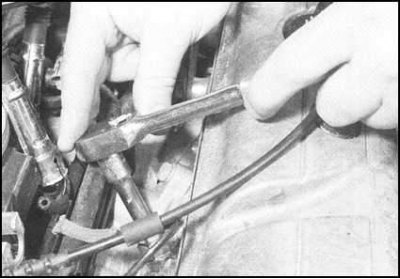
7. Using a special key equipped with an elastic insert, unscrew the spark plugs. To avoid damaging the threads, try not to tilt the spark plugs while unscrewing.
8. The external condition of the spark plugs can provide a lot of useful information about the degree of engine wear. If the working end of the spark plug is shiny and free of deposits and deposits, then the combustion chambers are supplied with too lean an air-fuel mixture, or the spark plug has an excessively high heat rating (heat removal from the electrodes in a hot spark plug occurs less intensively than in a cold one).
9. If the working end of the spark plug and the inner central insulator are covered with a thick layer of soot deposits, the mixture is too rich. Black coloration of the working part of the spark plug in combination with traces of oil indicates internal wear of the engine, or also excessive enrichment of the mixture.
10. A golden or greyish-brown colouring of the working part of the spark plug is evidence of the correct composition of the air-fuel mixture and the good internal condition of the engine.
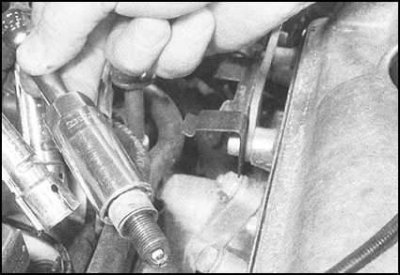
11. The engines of Skoda cars under consideration use multi-electrode spark plugs (see accompanying illustration). The interelectrode gaps on such spark plugs are set at the factory and are not subject to adjustment.
12. Further description of the procedure is given in SectionReplacing Spark Plugs - 1.3L Models, dedicated to 1.3 l models.
13. Finally, having connected the high-voltage wires to the spark plugs, install the throttle body cover in place, firmly tightening the screws that secure it.
Text obtained from the website: skodabook