
Company vehicles Hyundai Company vehicles Kia Company vehicles Lada Company vehicles Mazda Company vehicles Mercedes-Benz Company vehicles Opel Company vehicles Mitsubishi
English Русский
Български
Беларускі
Український
Српски
Hrvatski
Română
Polski
Slovenský
Magyar
Articles   
Bookmark Contacts Sitemap
SkodaBook.ru


Fabia Rapid Octavia Superb Kodiaq Yeti Others
Octavia 1 (1996-2004) Octavia 3 (2013-2019)

Installing a double clutch (Skoda Octavia 5E)

  • Main
  • Octavia
  • 5E (2013-2019)
  • Transmission
  • Automatic gearbox 0CW
  • Installing a double clutch
0
Attention! When replacing the dual clutch, it is necessary to replace the following parts at the same time: both engagement levers with release bearings, the spherical journal of the engagement lever of the "K2" clutch, the adjusting washers of the release bearings. After replacing the dual clutch and the above parts, it is necessary to re-adjust the position of the release bearings of the friction clutches "K1" and "K2". Adjustment is not required if the above parts were simply removed and installed in place. The retaining ring must be replaced in each case. The large adjusting washer for the "K1" clutch is installed with the semicircular side down on the large bearing, the small adjusting washer for the "K2" clutch is placed under the small bearing.


Do not lubricate with oil or grease! Install the pivot bearing "1" and the spherical pin "2".
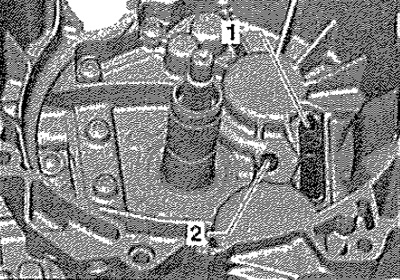
Do not lubricate with oil or grease! Install the…


Insert the small engagement lever with the upper and lower parts of the guide sleeve. Tighten the screws to the specified torque.
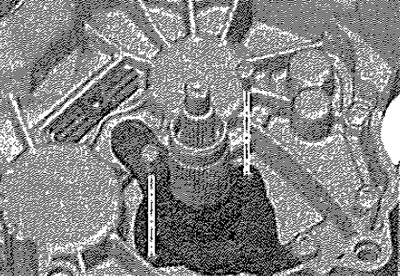
Insert the small engagement lever with the upper…


Note: The engagement lever mount and the entire engagement bearing mechanism must be dry and free of oil or grease. If necessary, clean these parts with a rag.


Install the second, "large" engagement lever with specific clutch adjusting washers "K1" and "K2".
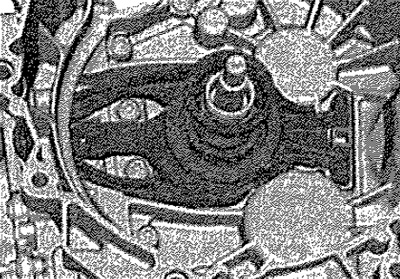
Install the second, «large» engagement lever with…


Note: The large adjusting washer for the "K1" clutch is installed with the semicircular side down on the large bearing, the small adjusting washer for the "K2" clutch is placed under the small bearing. The small engagement bearing and adjusting washer are installed on the 8 grooves in only one position.


Install the "small" engagement bearing. "Turn" to ensure that the bearing is installed correctly and the grooves are seated correctly. Check both engagement levers for proper seating.

Large adjusting washer for clutch "K1", small for clutch "K2". Unscrew the lead screw of puller "T10373". Install puller "T10373" on the clutch. Install the clutch in the gearbox with puller "T10373".
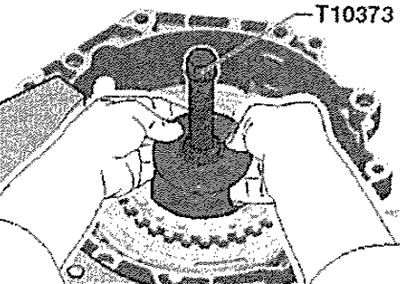
Large adjusting washer for clutch «K1», small for…


Note: The clutch automatically adjusts the working clearance. Vibrations can adversely affect the adjusting device. Therefore, the clutch must not be dropped. Also, when installing the clutch, do not drop the clutch in the gearbox.


Remove the puller "T10373" from the clutch. Install the support bridge "T10323" parallel to the flange of the clutch housing. Adjust the distances, for example, with washers "B" to a total thickness of 15 mm. Fasten the support bridge "T10323" with screws "A" and nuts. Press the clutch with the lead screw until it stops downwards.
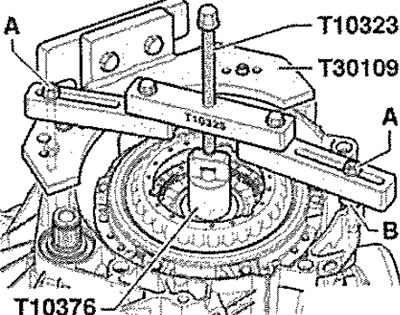
Remove the puller «T10373» from the clutch.…


Note: When pressing, place your hand on the clutch. Your hand should feel a slight rattling sound. The rattling sound means that the clutch is being pressed into the installation position. When the clutch is in place, you should feel a jolt. The clutch is pressed all the way in if the snap ring can be installed.


Snap ring installation position: The thinner side of the snap ring faces upward.
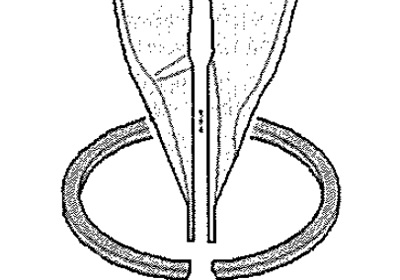
Snap ring installation position: The thinner side…


Install a new locking ring "see arrow".
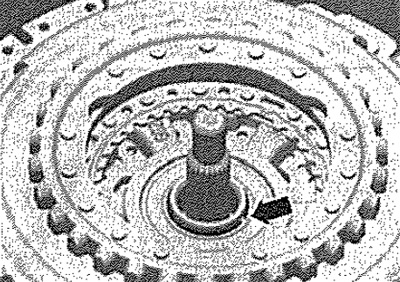


Install a new locking ring «see arrow».


Note: If the retaining ring is not inserted "see arrow", the clutch will not seat correctly in its place.


To get the clutch into place, you should turn it by hand using the puller. Turn the clutch only by hand, do not use a tool.
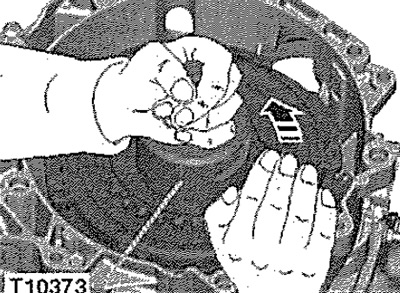
To get the clutch into place, you should turn it…


Turn by hand only. This way the clutch sits on the retaining ring. Do not use a tool. When pressing "the clutch sits lower" on the input shaft. The clutch should be pulled out just enough to touch the retaining ring.
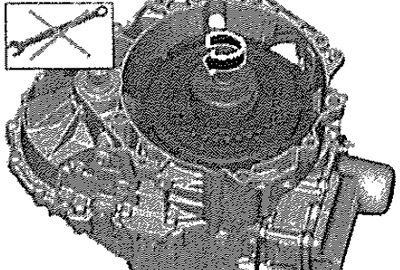
Turn by hand only. This way the clutch sits on…


Then install the disc hub: There is a "large" tooth on the disc hub, so the disc is installed in only one position. On the engine side, the "large" tooth is marked "see arrow".
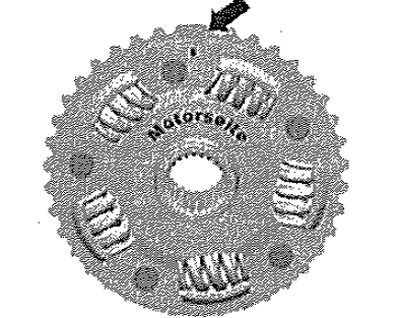


Then install the disc hub: There is a «large»…


Install the disc hub with the mark at the "large tooth" so that it coincides with the mark on the driven disc "see arrow".
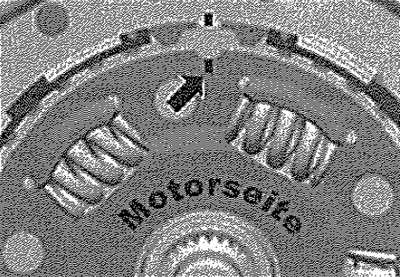
Install the disc hub with the mark at the «large…


Install the disc hub retaining ring "see arrow". Installation position: The joint of the ring should point to the "protrusion" on the clutch.
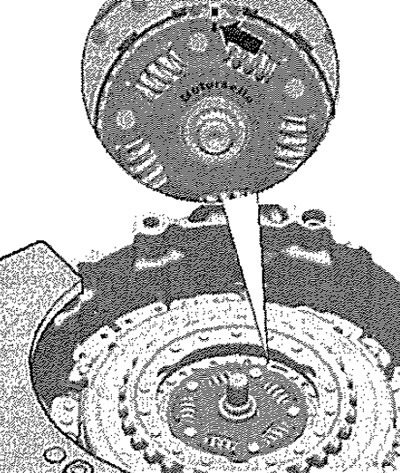
Install the disc hub retaining ring «see arrow».…


Turn the clutch by hand and while turning it, watch the "small" engagement lever.
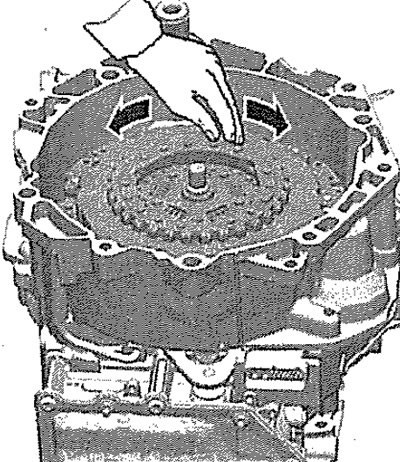


Turn the clutch by hand and while turning it,…


The switch lever must remain "motionless" in its position. It must not move. If the switch lever moves, the adjusting washer is installed in the wrong position.
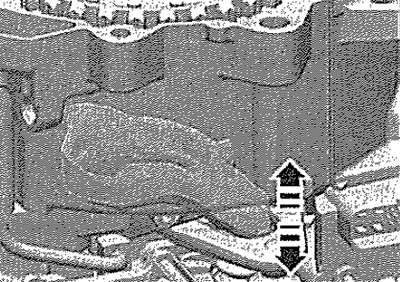
The switch lever must remain «motionless» in its…


In this case, remove the clutch again. Make sure that the adjusting washer is installed correctly "see arrows". The washers must be installed correctly. They must not be damaged.
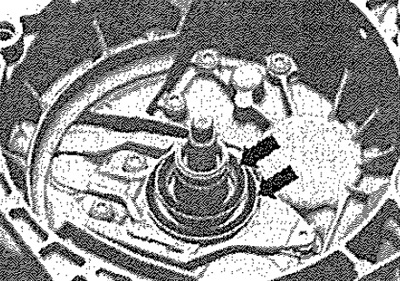
In this case, remove the clutch again. Make sure…


Remove the plugs and replace both breather units "see arrows".
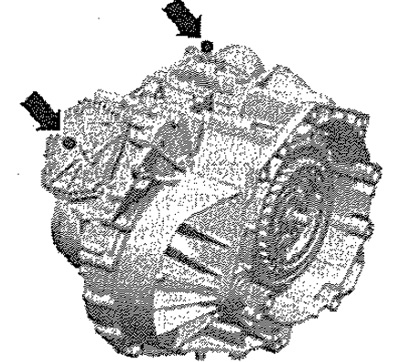


Remove the plugs and replace both breather units…


Note: If the mechatronics breather is damaged during removal, it must be replaced.


After installing the control panel, perform the "Basic setup".
This article is available at russian, bulgarian, belarusian, ukrainian, serbian, croatian, romanian, polish, slovak, hungarian
Article verified: Anatoly Ovchinnikov
Share with friends:
◀ Previous
Skoda Octavia 3: Automatic gearbox 0CW
Next ►

Adjusting the dual clutch
Clutch Drive Overview
Removal the double clutch
General diagram of installation of double clutch
Removal and installation of a double-disc clutch — brief description
Electrical/electronic components and their installation locations, DSG…
Switching mechanism
General assembly diagram — gear shift mechanism
Removal and installation the gearshift housing
Removal and installation the selector lever handle
Read similar articles on other Skoda models

➧ Installing the steering gear Skoda Fabia 1 (1999-2007)
➧ Centering the clutch disc, removing and installing the pressure plate Skoda Rapid 1 (2012-2022)
➧ Removal and installation of double clutch Skoda Superb 2 (2008-2015)
➧ Double Clutch — removal and installation Skoda Kodiaq 1 (2016-2024)
➧ Removal and installation of double clutch Skoda Yeti (2009-2017)
➧ Adjusting the clutch cable Skoda Favorit (1987-1994)
Link to this article in various formats
Reviews and comments of visitors
No comments yet


Add two numbers: 22 + 50


Octavia 3 (2013-2019) 
  • General information
  • User manual
  • Car driving
  • Maintenance
  • Petrol engines 1.2 l
  • Engine repair
  • Cooling system
  • Supply system
  • Petrol engines 1.4 l
  • Engine repair
  • Supply system
  • Petrol engines 1.8/2.0 l
  • Engine repair
  • Cooling system
  • Supply system
  • Diesel engines 1.6/2.0 l
  • Engine repair
  • Cooling system
  • Supply system
  • Transmission
  • Mechanical gearbox 02S
  • Automatic gearbox 0CW
  • Automatic gearbox 0D9
  • Chassis (running gear)
  • Front suspension
  • Rear suspension
  • Brake system
  • Steering
  • Body and interior
  • Doors, locks and windows
  • Exterior (external elements)
  • Interior (internal elements)
  • Ventilation and air conditioning
  • Electrical equipment
  • Equipment and devices
  • Headlights and lighting
  • Wiring diagrams (basic)
  • Wiring diagrams (comfort)
Octavia 1 (1996-2004) 
  • General information
  • Vehicle details
  • Maintenance
  • Power unit
  • Petrol engines 1.6 l AEE
  • Petrol engines 1.8 l AGN
  • Diesel engines 1.9 l AGR
  • Fuel system
  • Exhaust system
  • Cooling system
  • Transmission
  • Clutch
  • Car gearbox
  • Gearbox repair 02J
  • Gearbox repair 02K
  • Chassis (running gear)
  • Wheels and tires
  • Suspension and axles
  • Brake system
  • Body and interior
  • Exterior (external elements)
  • Interior (internal elements)
  • Doors, locks and windows
  • Electrical equipment
  • Equipment and devices
  • Electrical circuits
SkodaBook.ru © 2018–2026 | Mobile version | Articles on Skoda | Sitemap EN BG BY UA RS HR RO PL SK HU | Feedback | Site search | Bookmark
Fabia 1 (1999-2007) | Fabia 2 (2007-2014) | Rapid 1 (2012-2022) | Octavia 1 (1996-2004) | Octavia 3 (2013-2019) | Superb 2 (2008-2015) | Kodiaq 1 (2016-2024) | Yeti (2009-2017) | Favorit (1987-1994) | Felicia (1994-2001) |
By continuing to use the site, you agree to the use of cookies.