
Note.
- Necessary devices, special control and measuring devices, as well as auxiliary means:
- Assembly tool -T10118-.
- Container for collecting engine oil -VAS 6208-.
- Upholstery removal tool -MP8-602/1-.
- Old oil catcher and suction device -VAG 1782-.
- Pliers for spring clamps.
Removing
1. Remove the top decorative engine cover.
2. Drain coolant (for details, see the relevant section in chapter Cooling system).
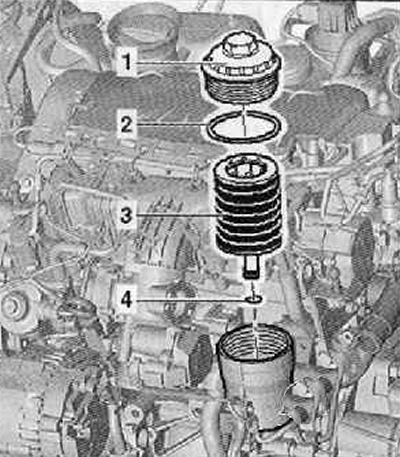
3. Remove the oil filter element (3), as shown in the figure below.
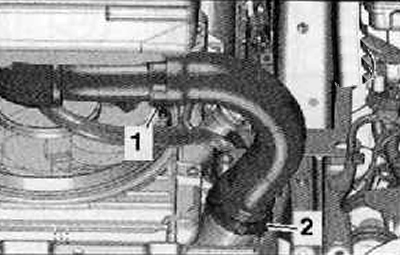
4. Remove the charge air hose by loosening the hose clamps (1) And (2), as shown in the figure below.
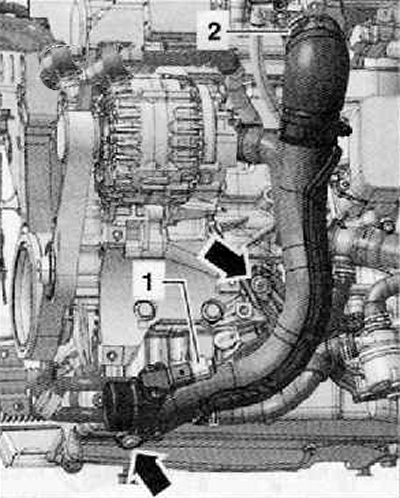
5. Unscrew the fastening screws (arrows), shown in the figure below.
6. Loosen the hose clamp (2), as shown in the figure below.
7. Disconnect the wiring harness connector (1) on charge pressure sender -G31- with intake air temperature sender -G42-, remove charge air pipe to right as shown in figure below.
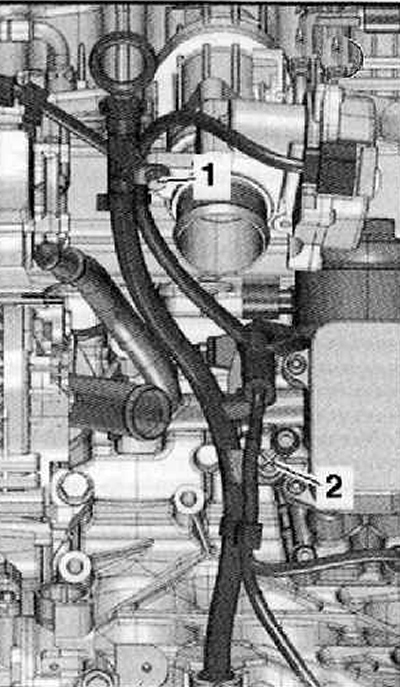
8. Remove, but not completely, the oil level indicator, unscrew the fastening screw (1), shown in the figure below.
9. Release clamp (2) interior panel removal tool (upholstery) -MP8-602/1-.
10. Remove the guide tube of the oil level indicator from the cylinder block in an upward direction, take it to the side.
11. Place a container for collecting engine oil -VAS 6208- under the engine.
12. Place the old oil catcher and suction device -VAG 1782- under the engine.
13. Unscrew the fastening screws (arrows), shown in the figure below and remove the oil filter holder with the engine oil cooler.
Installation
Installation is carried out in the reverse order of removal.
Note.
- Replace seals, O-rings and O-rings.
- Before proceeding with the installation of the hose connections, as well as the pipes and the charge air hoses themselves, it must be ensured that they are free of oil and grease.
- Hose connections are fixed with spring clamps. When repairing, use only spring clamps.
Install the oil filter element, add engine oil and check the engine oil level.
Pour or change the coolant if the engine oil cooler has been replaced.