
Removing
Door
1. Support the door with a bar; protect the stain with a piece of cloth.
2. Disconnect the door travel stop by removing the pin, do not lose the protective end cap.
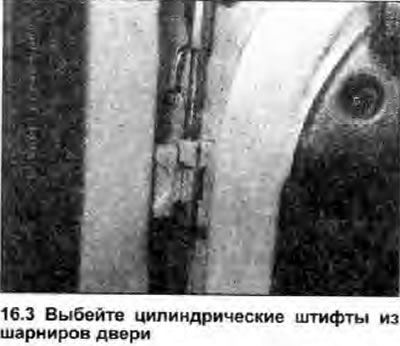
3. Using a suitable punch, push the roll pins out of the top and bottom door hinges (photo), and remove the door.
Hinges
4. To remove the hinge plates from the body, remove the door (see above). If it is a front door, remove the front fender as well (Chapter 6).
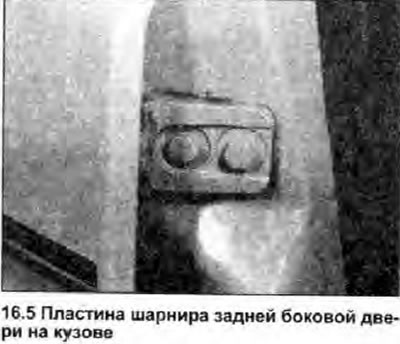
5. Draw the hinge plate on the body with a pencil, then unscrew the bolts securing the upper and lower hinge plates to the body (photo).
6. To remove the hinge plates from the door, remove the door, the inner handle of the door lock actuator (Chapter 17), door trim panel (Chapter 22) and a polyethylene membrane.
7. With a pencil, trace the hinge plate on the door, then unscrew the bolts securing the upper and lower hinge plates to the door.
Installation
8. Install in the reverse order of removal paying attention to the following:
- A) If installing an old door, align the one made before removing the mark: if installing a new door, center the hinges on the bolt holes. Lightly tighten the bolts, then carefully close the door and check that it is correctly installed.
- b) When the door is installed correctly (see below), tighten the bolts with a torque specified specifications.
Adjustment
Note: If the door hinges have not been disturbed, then only the door locking pin will probably need to be adjusted (Chapter 17).
9. Close the door and check that it fits evenly around the entire perimeter of the opening.
10. If the installation is not correct, open the door, remove the inner handle of the door lock actuator (Chapter 17), interior trim panel (Chapter 22) and polyethylene membrane, then loosen the hinge bolts.
11. Adjust the position of the door, then tighten the hinge bolts with a torque specified specifications.