
Note: See Asbestos Dust Warning given at the beginning of the Chapters 4.
Removing
1. The clutch release mechanism can be reached when the power unit is removed from the vehicle for overhaul (see section 2), or by removing the transmission as described in Section 7.
2. Loosen and remove the clutch release fork bolt, then remove the release lever from the transmission while holding the release bearing. The bearing and release fork assembly can then also be removed.
3. Unhook the release bearing from the pin on the fork and separate the two components from each other.
Inspection
4. Check the release mechanism for damage and signs of wear and replace any components that show them. Carefully inspect all running surfaces and contact points and replace the release lever pivot pin if worn.
5. Check that the contact side of the release bearing rotates smoothly and easily, without noise, and its surface is smooth and free from cracks, pitting, nicks or signs of wear. If there is any doubt about the condition of the bearing, it must be replaced. Given the difficulty of accessing the bearing, it is recommended to replace it regardless of the actual condition of the component.
6. When cleaning clutch components, do not apply solvent to the release bearing - it is filled with grease that is vulnerable to such an attack.
Installation
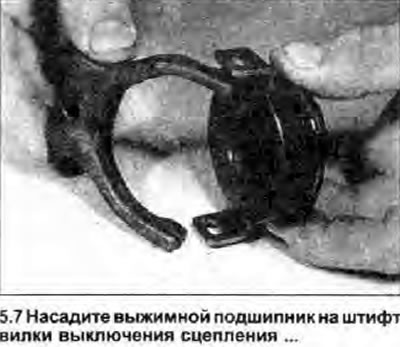
7. Attach the release bearing to the clutch release fork by pushing it onto the locating pin (see photo). Apply a small amount of molybdenum grease to the center of the bearing and release lever shaft.
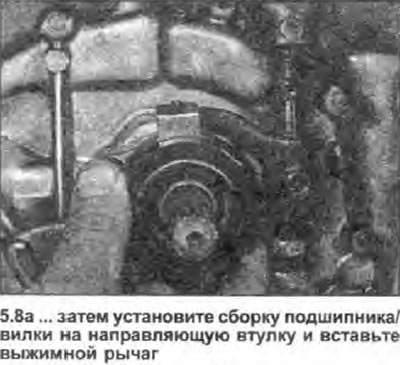
8. Install the bearing and release fork assembly onto the guide bushing and insert the release lever. Align the holes of the fork and the release lever shaft, then install the fork mounting bolt and tighten it with a tightening torque regulated specifications (see photo).
 |  |
9. Move the release lever back and forth to check the operation of the release mechanism, and then install the transmission as described in Section 7.