



Contents: Removal ⬇ Installation ⬇
Removal
1. Remove the gearbox assembly (for more details, see the relevant section in this chapter).
2. To prevent deformation of the pressure plate during removal (which would cause jerking during acceleration), it is necessary to loosen the pressure plate as follows:
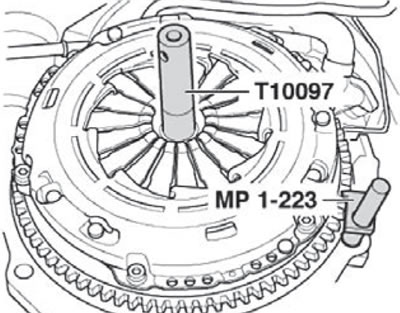
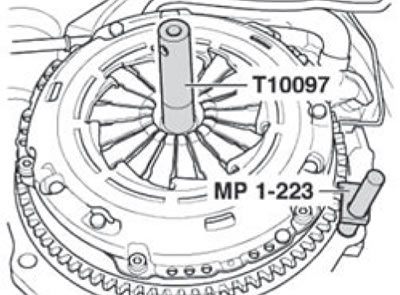
- To loosen the screws, use the locking tool (MP1-223 (3067)) shown in the figure below.
- Loosen the screws in several steps, crosswise.
3. Remove the clutch housing assembly with the pressure plate and driven clutch disc.
Installation
1. Installation is carried out in the reverse order of removal. In this case, the following conditions must be met.
Note:
- The clutch housing and driven disc must only be replaced as an assembly.
- The clutch housing and driven disc must be selected according to the engine code.
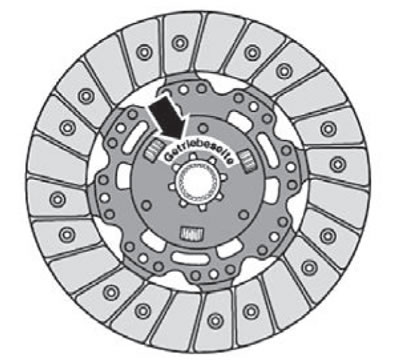
Clutch disc assembly position
Inscription "Getriebeseite" directed towards the gearbox.
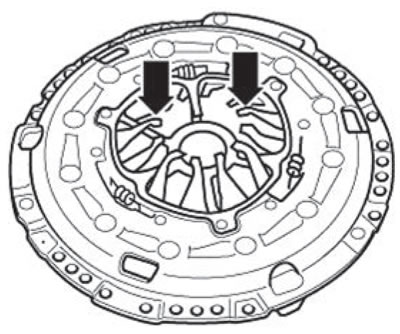
Checking the ends of diaphragm springs
Permissible wear is up to half the thickness of the springs (arrows).
[Text taken from this website: SkodaBook.ru]
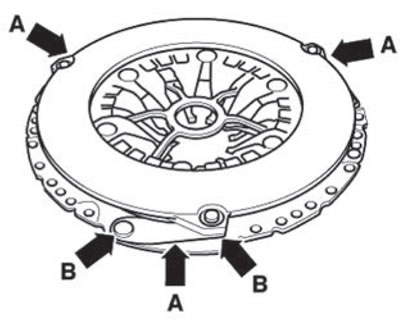
Checking the fastening of springs and riveted joints
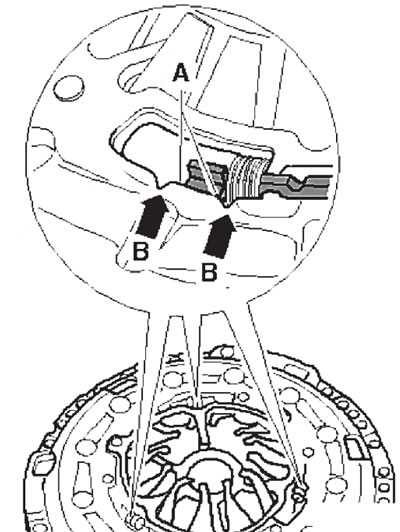
Check the spring fastenings (arrows A) for damage and the riveted connections (arrows B) for secure installation.
Control of the position of the adjustment mechanism only for new pressure plates
- Both edges (A) of the mounting ring must be located between the pair of splines (B) as shown in the figure below.
- If the mounting ring of the new pressure plate were in a different position, the pressure plate cannot be installed with the clutch friction disc. In used clutches, the installation ring may also be in a different position outside the splines.
Note:
- Clutch discs and pressure plates with damaged or loose riveted connections must be replaced.
- To limit the unpleasant smell of a burnt clutch, it is necessary to thoroughly clean the clutch housing, flywheel and engine on the gearbox side.
- Clean and remove rust from the drive shaft splines and the used clutch disc also has a fine-spline hub connection. Lubricate the splines with a thin layer of grease (G 000 100). Slide the disc back and forth along the drive shaft until the hub slides easily along the shaft. It is absolutely necessary to remove excess grease.
- The pressure plates are provided with anti-corrosion protection and lubricated with consistent grease. Therefore, it is only permissible to clean the working surface on them, otherwise the durability of the adhesion would be significantly reduced.
- Before installing the screws, the clutch disc and pressure plate must be fully seated against the flywheel. Only then should the mounting screws be put on.
2. To tighten the screws, use the counter support (MP1-223 (3067)) again.
3. Install the clutch cover onto the centering pins.
4. To center the clutch driven disc, use the centering mandrel (T10097) shown in the figure below.
5. To prevent deformation of the pressure plate during installation (which would cause jerking during acceleration), the pressure plate must be installed as follows:
- Screw in all screws, tightening them by hand so that the screw heads are flush with the pressure plate.
- Tighten the mounting screws in several passes, crosswise, to avoid damaging the centering holes of the pressure plate and the centering pins of the flywheel.
6. Install the gearbox assembly.