



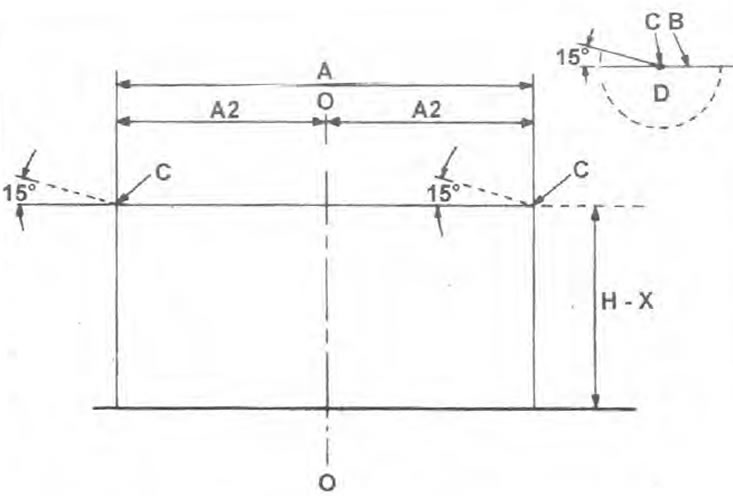
Fig. 12.7. Light beam direction adjustment diagram
A - Distance between headlight centers
B - Light/shadow boundary
C - Center of low beam
D - Low beam spot
H - Height from ground to center of headlights
O - Center line of the car
X = 65 mm.
1. To check the beam adjustment device, we recommend that you contact a Skoda dealer who has special optical beam adjustment equipment for this purpose. Correct beam adjustment is important not only to ensure good visibility for the driver, but also to protect other drivers from being dazzled.
2. The direction of the light beam is changed to compensate for the vehicle load by turning the knob on the panel (see Chapter 17). Before performing any checks, the handle must be returned to the "single driver" position.
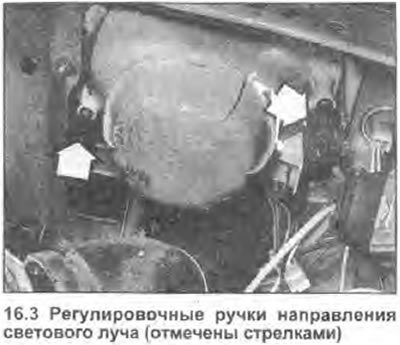
3. In an emergency, the headlights can be adjusted by turning the knobs on the back of each headlight unit. The upper knob is for vertical adjustment, the lower knob is for lateral adjustment (photo).
4. The car must be at a net weight, without any cargo in the trunk. The headlight height adjustment handles must be in the standard load position (as described above), and the tires are properly inflated. Place the car on a level surface (not downhill), about 5 meters away from a flat wall or garage door, and rock it to ensure the suspension components are properly seated. Have an assistant sit in the driver's seat.
[View the original on the website Skodabook.ru]
5. Draw a vertical line on the wall or door that matches the center line of the car. (The location of the center line can be determined as follows: make marks with chalk in the centers of the windshield and rear windows, and then look through the windows at the wall or door from behind the car).
6. After drawing the central line, draw the others shown in Fig. 12.7.
7. Switch the headlights to low beam. Cover one headlight with a cloth. On the other headlight, use the two adjusting screws to set the beam center to point "C" on the corresponding side of the diagram.
8. Move the cloth to the adjusted headlight and repeat the adjustment on the other one.
9. Although this setting is considered acceptable, please contact your car service station for precise adjustment.