



Contents: Removal ⬇ Installation ⬇
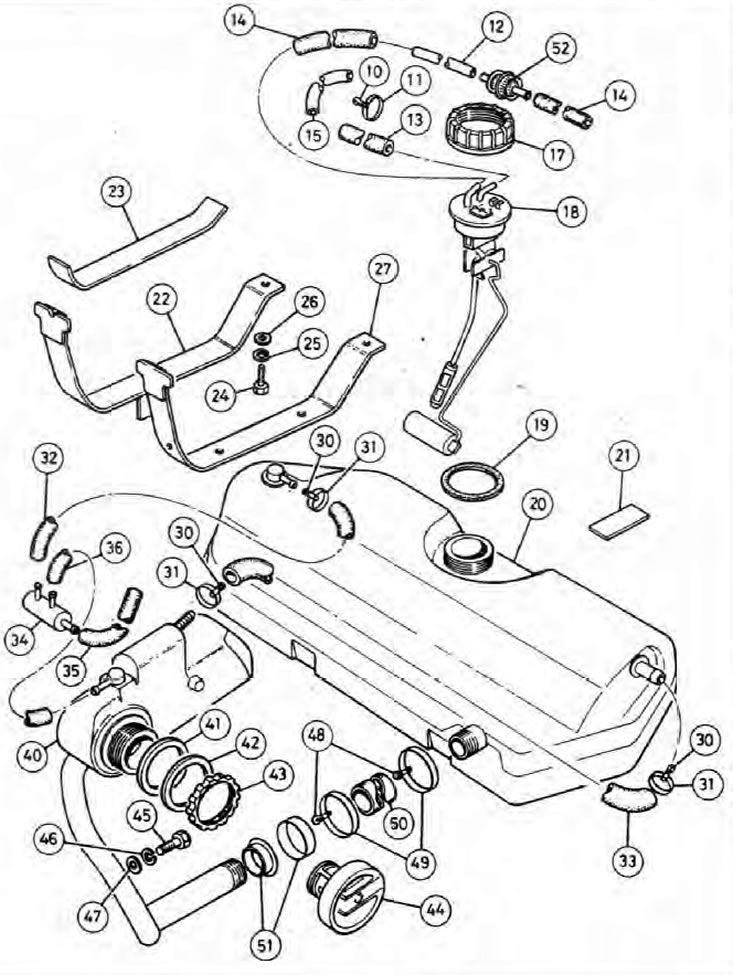
Fig. 4.4. Fuel tank and related components
10. Bracket; 11. Tie; 12. Fuel line; 13. Hose; 14. Hose; 15. Bypass tube; 17. Nut; 18. Fuel level sensor; 19. Gasket; 20. Fuel tank; 21. Sealing strip; 22. Tank mounting strap (left); 23. Sealing strip; 24. Bolt; 25. Washer; 26. Washer; 27. Tank mounting strap (right); 30. Bracket; 31. Tie; 32. Air hose; 33. Ventilation hose; 34. Connector; 35. Air hose; 36. Air hose; 40. Filler neck; 41. O-ring seal; 42. Washer; 43. Nut; 44. Filler cap; 45. Bolt; 46. Washer; 47. Washer; 48. Bracket; 49. Tie; 50. Hose; 51. Filler neck insert and bracket (late models); 52. Fuel filter (late models).
Note: Before you begin, please see the warning in Chapter 1.
Removal
1. The tank is not equipped with a fuel drain plug, so it is preferable to remove it when the tank is empty. Before starting work, disconnect the negative cable from the battery and pump out the remaining fuel from the tank.
2. Block the front wheels, jack up the rear of the car and place it on axle stands. Remove the right rear wheel.
(Text obtained from the website: «SKODABOOK»)
3. Remove the access cover and disconnect the wiring, fuel supply and return hoses from the top of the sensor as described in the previous Chapter.
4. Working under the vehicle, unscrew the retaining clip and separate the filler pipe from the fuel tank.
5. Bend back the retaining clips and release the handbrake cables from the tank retaining strap and rear axle beam on each side. Move the cables to the side and tie them back so that they do not interfere when removing the fuel tank.
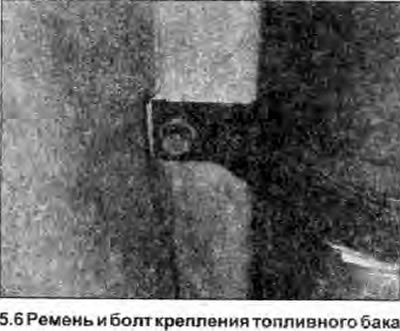
6. Support the weight of the fuel tank, then loosen the mounting strap bolts (see illustration), turn the straps down, lower the fuel tank and remove it from under the car. Plug all hoses and their connectors to prevent dirt from entering the block and fuel leakage.
7. If the tank is contaminated with sediment or water, flush it with clean fuel. If the tank is damaged or leaking, consult a specialist about the possibility of repair or replacement. Do not attempt to restore the fuel tank yourself.
Installation
8. Install in the reverse order of removal. Make sure all hoses are routed correctly and securely fastened to prevent any fuel leaks.