
Note: Please refer to the warning in the Chapter 1.
Removing
1. Disconnect the negative cable from the battery.
2. If necessary, remove the rear seat. See Section 11.
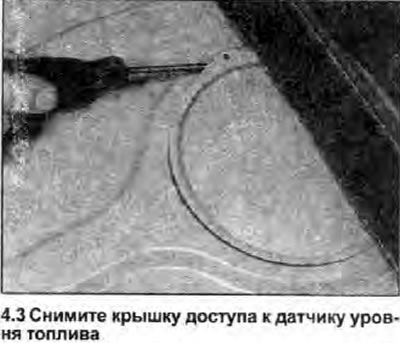
3. The sensor access cover is located in the floor, rear axle forward, and is removed from inside the vehicle. On some models, the cover is secured with two screws; in this case, unscrew them. Use a screwdriver to loosen and remove the cover (see illustration).
4. Note the location of the wiring and hoses, then disconnect them from the fuel level sensor (see illustration).

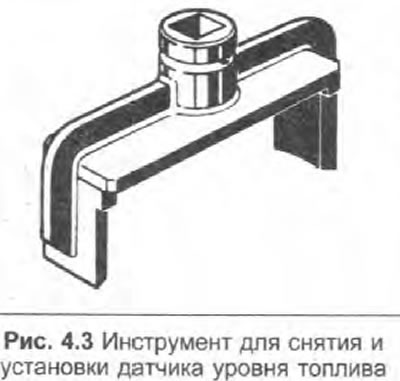
5. Release the sensor blocking ring by turning it counterclockwise using a Skoda tool (MP8-502) (see fig. 4.3).
6. Remove the sensor, noting the O-ring; it must be replaced if worn or damaged.
Installation
7. Install in the reverse order of removal. The float lever must be perpendicular to the axis of the car and deflected to its left side.
Examination
8. The supply voltage to the fuel gauge installed in the dashboard is supplied from the power wire of the dashboard (through the ignition switch). It connects with the control lamp «low fuel level».
9. If the pointer does not work, first check the operation of other instruments; if they don't work at all, check the dashboard power wire. If readings are unstable, there may be a problem that requires replacement of the printed circuit (Section 12). If only the pointer is not working, check it as follows.
10. With the ignition on, disconnect the yellow wire: the instrument reading should drop to zero. Connect the yellow wire, and disconnect the blue one: the meter reading should rise to the maximum.
11. If the device behaves as just described, but its readings remain incorrect, the sensor is probably defective. If the arrow of the device does not move, then the device or its wiring is not working, and the sensor is most likely in order.
12. With the ignition on, disconnect the black wire. If the low fuel warning light was on, it should now turn off. Ground the black wire, the test lamp should light up.
13. If the control lamp behaves as just described, but does not light up during normal operation, the switch in the sensor is probably faulty. If the control lamp does not light up at check, the lamp or electroconducting is faulty.