
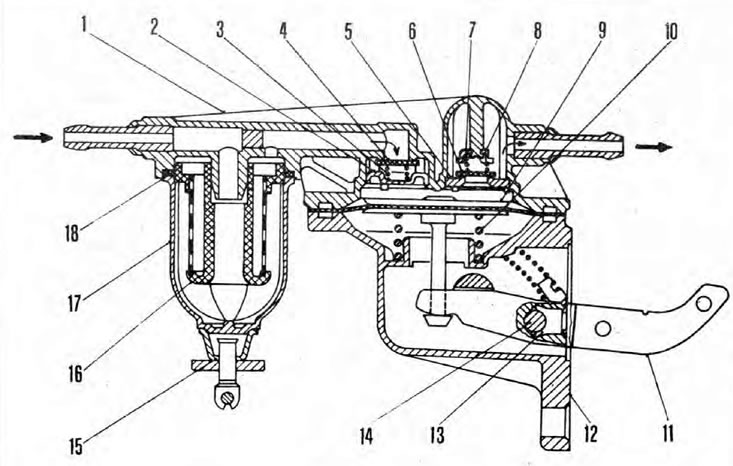
Pic. 4.2 Fuel pump and filter
1. Upper case; 2. Intake valve cover; 3. Inlet valve spring; 4. Inlet valve plate; 5. Exhaust valve seat; 6. Exhaust valve plate; 7. Exhaust valve spring; 8. Exhaust valve stop; 9. Diaphragm; 10. Diaphragm spring; 11. Manual paging lever; 12. Lower case; 13. Gasket; 14. Rotary axis of the lever; 15. Filter bracket; 16. Filter element; 17. Filter housing; 18. Filter housing seal.
Note: Please refer to the warning in the Chapter 1.
Examination
1. To check the fuel priming pump on the engine, it is necessary to temporarily disconnect the outlet hose from the pump (going to the carburetor).
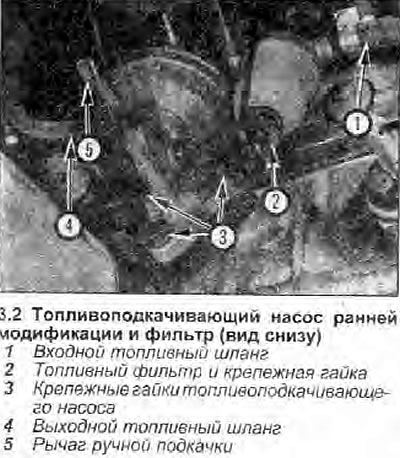
2. On early models, the priming pump is equipped with a manual priming lever. To check the serviceability of such a pump, close the pump outlet with a lump of rags and actuate the lever (see illustration).
3. The fuel priming pump on late models does not have a lever, and to check it, the engine must be cranked with a starter. To prevent the engine from starting, disconnect the high voltage wire from the center of the distributor cap and ground it.
4. When the pump is running, fuel should splash out of its outlet. If the pump works satisfactorily, connect the fuel line and high voltage wire. If the pump is defective, remove it for inspection or replacement.
Removing
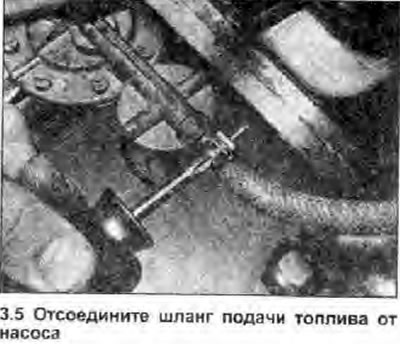
5. Mark the pump inlet and outlet hoses, then loosen the mounting brackets, disconnect the hoses from the pump (see illustration) and seal them up.
6. Loosen the nuts securing the pump to the motor and remove the washers.
7. Remove the fuel priming pump from the engine, and remove the seal (see illustration).
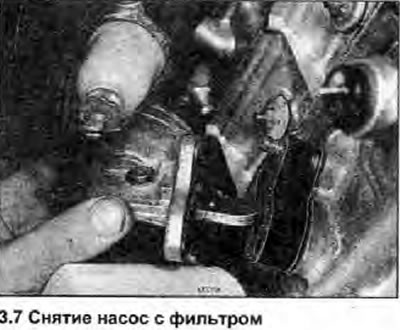
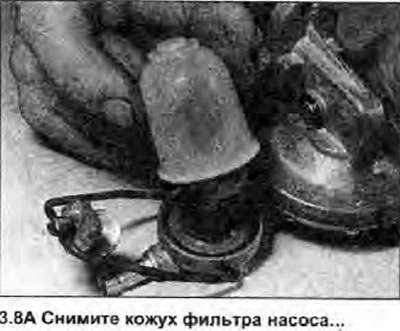
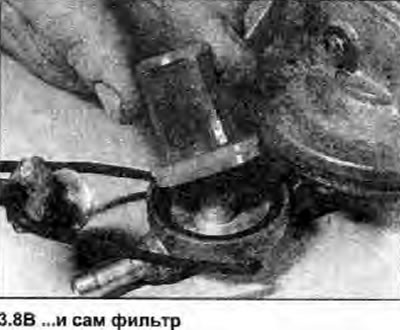
8. On a fuel priming pump with manual priming and a fuel filter, remove the filter from the pump by unscrewing the fixing nut, then remove the filter housing and the filter itself (see illustrations).
 |  |
9. The late modification pump cannot be disassembled and must be replaced if it fails. With an early type pump, the upper housing can be removed and the diaphragm and inlet and outlet valves can be inspected. Make a mark on the alignment of the upper and lower pump housings, unscrew the fastening screws and separate the parts.
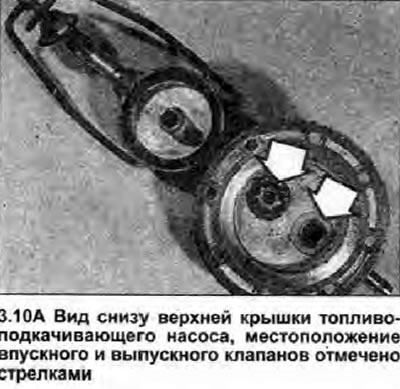
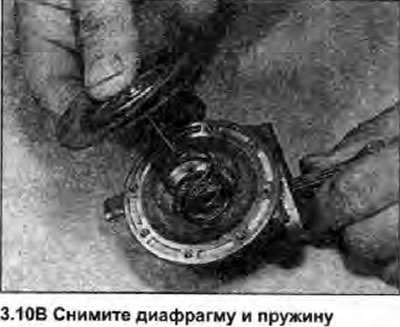
10. Check the valves on the back of the top cover. If they are suspected to be defective, the top cover must be replaced. Check the diaphragm and its spring for dirt and replace as needed (see illustrations).
 |  |
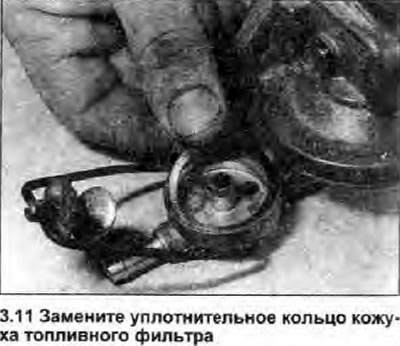
11. On an early type pump, replace the fuel filter if it is clogged (see section 1). Also replace the fuel filter housing seal if it is in poor condition (see illustration).
Installation
12. Install in the reverse order of removal. Make sure all contact surfaces are clean and replace the seal. Tighten the pump mounting nuts with a tightening torque specified specifications.