
Health check
1. The reversing light circuit is controlled by a plunger-type switch screwed into the bottom wall of the transmission case. If there is a malfunction in its circuit, first check for blown lamps or circuit fuse.
2. To check the health of the switch itself, disconnect its wires. Use a multimeter (it must be switched to resistance measurement mode) or a test circuit consisting of a battery and a 12V lamp to ensure that current is only flowing between the switch terminals when reverse is selected. If it is not, the switch is defective and must be replaced.
Removing
3. Block the rear wheels, apply the handbrake, then jack up the front of the vehicle and place it on axle stands. Drain the gear oil as described in Section 1 or be prepared for some oil to come out when you unscrew the switch.
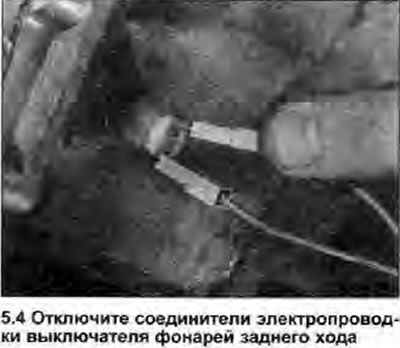
4. Disconnect the negative cable from the battery and disconnect the reversing light switch harness connectors (see photo).
5. Unscrew the switch from the transmission and remove it, then plug the opening to prevent dirt from entering the block. If the transmission has not been drained of oil, work quickly to minimize oil loss.
Installation
6. Wipe clean the threads of the switch and the holes in the transmission. If a sealing washer is installed on the switch, replace it after each removal to prevent leakage. If the sealing washer is missing, apply a small amount of sealant to the switch threads.
7. Set the switch to working position. Work quickly if the gear oil has not been drained. Clamp the circuit breaker with a tightening torque specified specifications. Connect the wiring connectors and check the operation of the circuit.
8. Lower the vehicle to the ground, then fill or top up the transmission with oil as described in Section 1.