
Drive shaft oil seal
1. Block the rear wheels of the vehicle, apply the handbrake, then jack up the front of the vehicle and place it on axle stands. Remove the front wheel.
2. Drain the gear oil as described in Section 1.
3. Disconnect the tie rod ball joint from the steering knuckle arm (see Section 10).
4. Remove the pinch bolt and disconnect the ball joint of the lower suspension arm from the steering knuckle (Section 10).
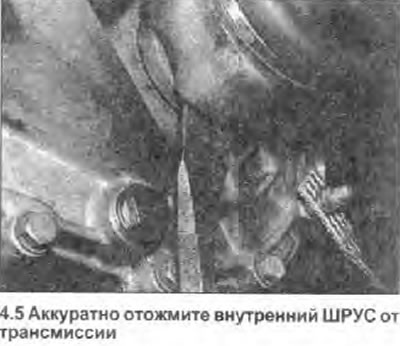
5. Push a suitable flat bar between the inner CV joint and the transmission case. Carefully press the hinge out of its working position. taking care not to damage the transmission housing or the metal flange of the CV joint (see photo).
6. Remove the inner CV joint from the transmission and support the drive shaft so as not to damage the CV joints or their protective covers. If both drive shafts must be removed, block the differential side gear by inserting a clean metal rod or wooden pin approximately 24 mm in diameter into the transmission (see photo).

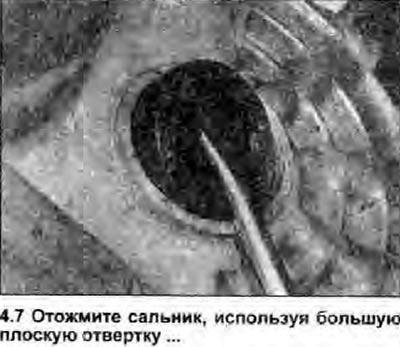
7. Gently pry the oil seal out of the transmission with a large flathead screwdriver (see photo).
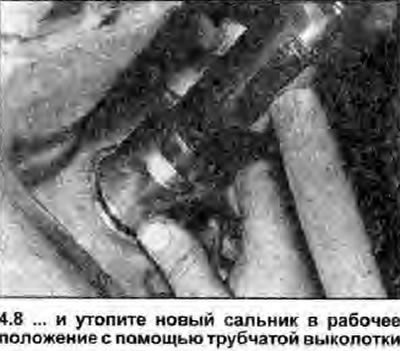
8. Clean any dirt from the area around the gland bore, then apply a small amount of grease to the outer sealing lip of the new gland. Install a new seal in the transmission opening and drive it into position using a suitable tubular drift (socket type), which rests only on the hard outer edge of the stuffing box. Make sure the seal is not twisted. Continue to work with a drift until the gland rests on the installation shoulder (see photo).
9. Before installing the drive shaft, make sure that the shoulder of the inner CV joint is smooth, free of burrs and scratches. Minor damage of this nature can be removed with an emery cloth; the presence of serious defects requires the replacement of the hinge. Inspect the retaining ring that is fitted to the groove machined in the grooves of the inner CV joint for damage and replace it if there is any doubt as to its condition.
10. Thoroughly clean the grooves of the drive shaft, then apply a thin layer of grease to the sealing lips of the stuffing box and the grooves/shoulder of the inner CV joint. Remove the pin blocking the differential side gear.
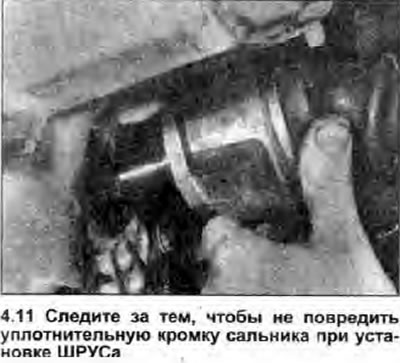
11. Make sure the retaining ring is securely seated in its groove. Insert the grooves of the CV joint into the grooves of the differential side gear, being careful not to damage the oil seal (see photo). Push the joint into the transmission until it stops and make sure that it is securely held by the retaining ring To do this, grab the CV joint housing and try to pull the drive shaft out of the differential side gear.
12. Install the lower control arm ball joint into the steering knuckle, then connect the tie rod ball joint to the steering knuckle arm (see Section 10).
13. Install the wheel, lower the vehicle to the ground and tighten the wheel bolts to the specified torque (see Section 1 Specifications).
14. Fill the transmission with the correct amount of oil of the correct type (see section 1).
Epiploon of the roller of a leash of the mechanism of a choice of transfer
15. Park your car on level ground (not slanted), turn off the ignition, make sure the transmission is in neutral and apply the handbrake. Jack up the front of the vehicle and place it securely on axle stands.
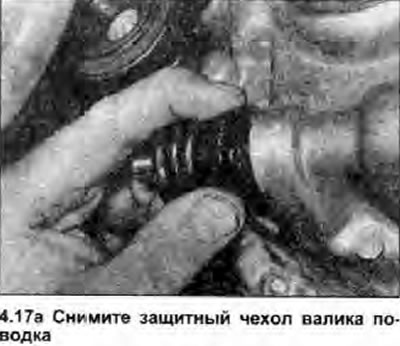
16. Use a hammer and punch to drive the roll pin out of the movable link and disconnect the link from the transmission. Discard the roll pin - it must be replaced.
17. Remove the protective cover of the driver roller. Using a screwdriver or long nose pliers, carefully pry the gland out of the casing and remove it from the end of the roller (see photo).
 | 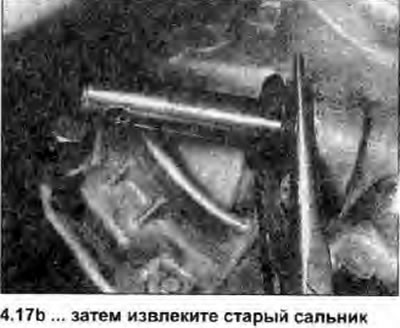 |
18. Before installing a new oil seal, check the surface of the driver roller that is in contact with the oil seal for burrs, scratches, and other damage that could damage the lips of the oil seal during installation. It is sometimes possible to grind off minor defects of this nature using a fine-grained emery cloth. The presence of more serious damage requires replacement of the leash roller.
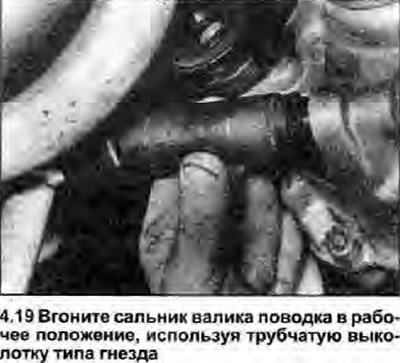
19. Apply a small amount of grease to the outer edge and sealing lip of the new oil seal, then carefully place it over the shaft and slide it into the transmission. Push the oil seal fully into the operating position in the gearbox housing and install the protective cover, making sure that it is correctly positioned against the oil seal shoulder (see photo).
20. Connect the movable link to the driver shaft and align the roll pin holes. Drive the new roll pin into position using a hammer and punch, then lower the vehicle to the ground.
Input shaft seal
21. Remove the transmission as described in Chapter 6, then remove the release fork (see Section 6).
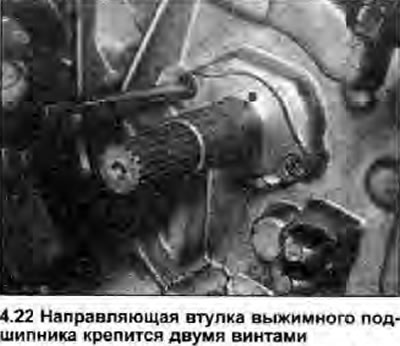
22. Remove the two screws holding the release bearing guide bushing in position (see photo), then remove the bushing from the input wadding. Carefully pry the oil seal out of the guide bushing using a suitable flat head screwdriver.
23. Before installing a new oil seal, inspect the oil seal mating surface of the input shaft for burrs, scratches, or other damage. which could damage the lip of the seal during installation. It is sometimes possible to grind off minor defects of this nature using a fine-grained emery cloth. More severe damage requires replacement of the input shaft. Make sure the input shaft is clean and lubricated to protect the packing lips during installation.
24. Dip a new oil seal in clean oil and install it in the guide bush, remembering that when the bush is installed, the sealing lip of the stuffing box must face inward. Carefully place the guide bush in the working position, then install the fastening screws and tighten them with the tightening torque specified specifications.
25. Reassemble and lubricate the clutch release mechanism as described in Section 6, then remove any excess oil or grease and install the transmission on the engine.