Contents: Introduction ⬇ Petrol models 1.3 l ⬇ Petrol models 1.6 l ⬇ Diesel models 1.9 l ⬇ Checking the engine oil level ⬇ Checking the coolant level ⬇ Checking the brake fluid level ⬇ Checking the condition and inflation…⬇ Visual inspection of tread wear ⬇ Measuring the remaining tread depth…⬇ Checking tire inflation pressure ⬇ Typical examples of tread wear ⬇ Checking the windshield washer fluid…⬇ Checking the Power Steering (PAS)…⬇ Checking the condition of the…⬇ Checking the battery status ⬇ Checking the condition of lighting…⬇
Introduction
The mandatory regular maintenance procedures for a vehicle include a set of simple checks that take a minimum of time but allow you to avoid unexpected expenses for sometimes expensive repairs.
These checks should be performed weekly and do not require any special skills or ability to use special tools from the performer.
- Monitor the condition and inflation pressure of your tires - timely detection of defects will not only increase the service life of the treads, but also avoid getting into an emergency situation.
- A large number of failures are related to electrical equipment malfunctions. The most typical are failures related to the state of the battery.
- Remember that the first sign of brake fluid leaks is a malfunction of the car's braking system. Regularly checking the fluid level will help you avoid getting into an emergency situation.
- Remember that damage caused by insufficient engine oil or coolant may require very expensive repairs. Check the levels of the mentioned working fluids regularly. Try to detect leaks in time and eliminate their cause.
The illustrations show the main check points of the engine compartment of each of the Skoda Felicia models considered in this manual.
Petrol models 1.3 l
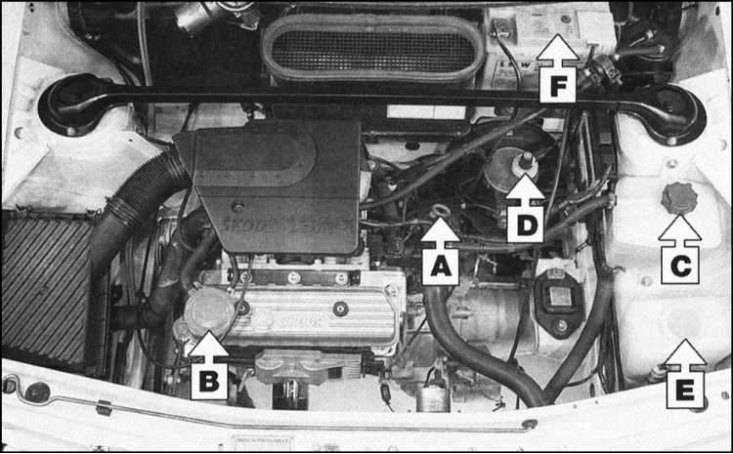
A - Engine oil dipstick; B - Engine oil filler cap; C - Expansion tank of the cooling system; D - Brake fluid reservoir; E - Windscreen washer fluid reservoir; F - Battery
Petrol models 1.6 l
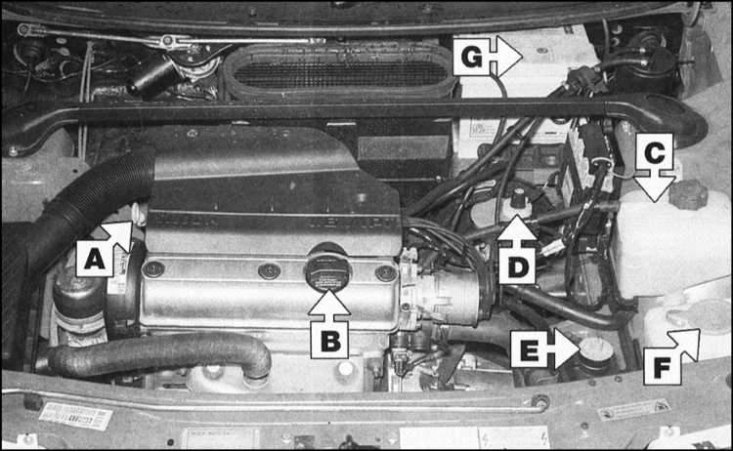
A - Engine oil dipstick; B - Engine oil filler cap; C - Expansion tank of the cooling system; D - Brake fluid reservoir; E - Power steering fluid reservoir; F - Windshield washer fluid reservoir; G - Battery
Diesel models 1.9 l
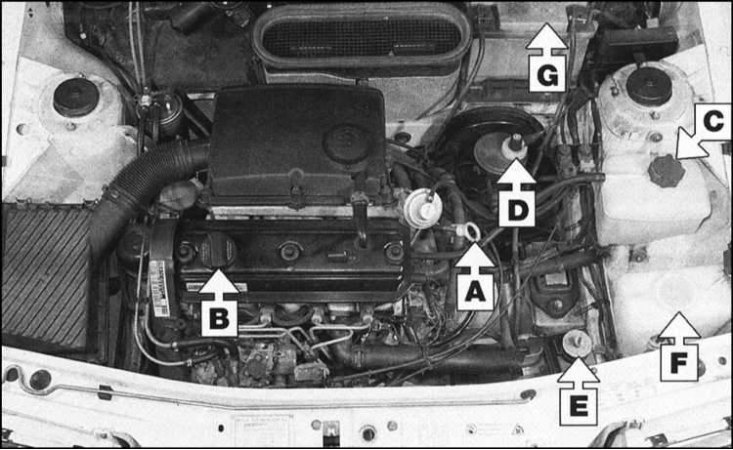
A - Engine oil dipstick; B - Engine oil filler cap; C - Expansion tank of the cooling system; D - Brake fluid reservoir; E - Power steering fluid reservoir; F - Windshield washer fluid reservoir; G - Battery
Checking the engine oil level
Note. This should be done before driving or at least 5 minutes after turning off the engine. Otherwise, some of the oil will be distributed over the surface of the lubricated engine components and the test will give an underestimated result. The car should be parked on a flat horizontal surface, if possible with a hard surface.
Modern cars are very sensitive to the choice of engine oil poured into the engine. Try to follow the recommendations given in the relevant Section of the Introduction to this Manual.
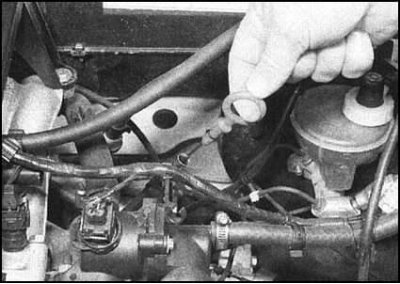
1. Remove the engine oil dipstick, the handle of which is usually painted in a bright color.
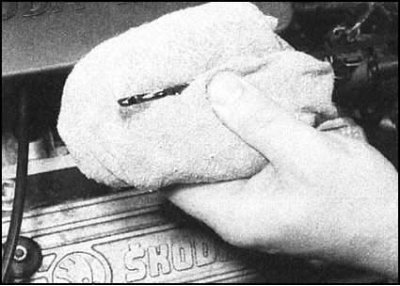
2. Wipe the dipstick blade dry with a clean, lint-free cloth, insert the dipstick back into the guide tube (until it stops) and remove it again.
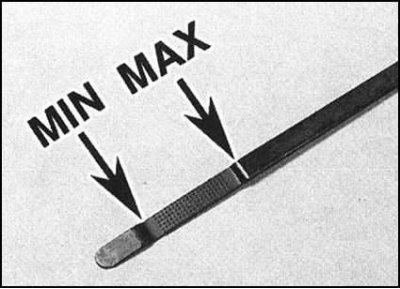
3. The oil level should be between the MIN and MAX marks on the dipstick blade. If the wetted edge of the blade is near the MIN mark, add the appropriate amount of engine oil of the same grade that is already in the engine.
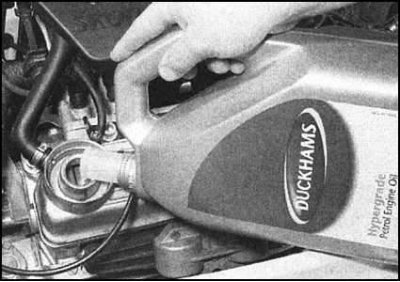
4. Oil is poured into the engine through a special neck, from which it is necessary to remove the cover beforehand. Pour oil in small portions, each time checking its level on the dipstick and holding pauses sufficient for the poured portion to flow into the oil pan. Continue the procedure until the oil level is between the marks on the dipstick blade.
5. If the need to adjust the engine oil level occurs too often, the unit should be checked for signs of leaks. The easiest way to detect leaks is to leave a clean sheet of cardboard under the car parked overnight. If there are no leaks, the reason for oil consumption may be its burnout (see section Diagnostics of faults in vehicle components and systems).
6. Try to maintain the oil level between the marks on the dipstick blade (see above). If the level drops too much, the internal engine components may be damaged due to oil starvation. If the level exceeds the norm, the crankshaft seals will usually fail.
Checking the coolant level
Note: To avoid getting burned by steam, never remove the filler cap of the expansion tank when the engine is hot!
Remember that coolant is highly toxic - do not leave open containers of antifreeze!
To prevent internal corrosion of components, the cooling system should be filled with a mixture of antifreeze and water throughout the year, not just during the winter months. Try to avoid diluting the coolant by using clean water to adjust its level.
1. The fluid level in the expansion tank of the cooling system may vary depending on the engine temperature. The norm is for the level to be between the MIN and MAX marks on the translucent wall of the tank when the engine is cold. During engine warm-up, the fluid level may rise slightly above the MAX mark.
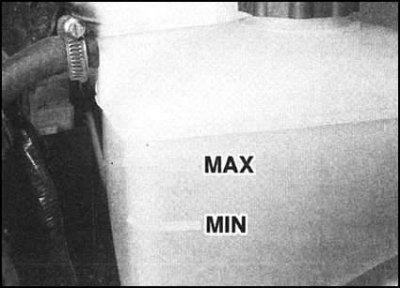
2. If it is necessary to adjust the coolant level, wait until the engine has cooled down completely. Slowly unscrew the tank cap to release the residual internal pressure in the system.
Note: To completely avoid the risk of scalding, it is better to wrap the lid in a rag before unscrewing.
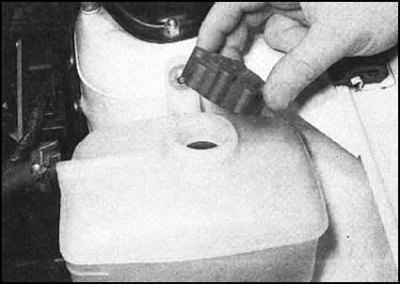
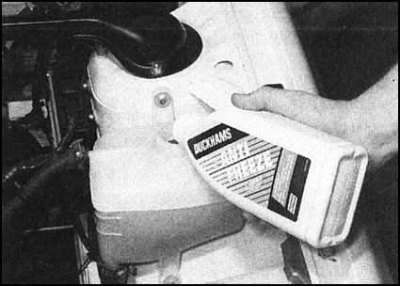
3. Add a properly mixed antifreeze and water mixture to the tank. Continue adding fluid until the level is between the MIN and MAX marks on the tank walls.
4. In the typical sealed cooling systems of most modern cars, the need to adjust the coolant level arises only in the event of leaks. The most typical sources of leaks are the radiator housing, hoses and joints of mating components of the power unit. Try to eliminate the causes of detected leaks without delay.
Checking the brake fluid level
Note: Remember that brake fluid is highly toxic and aggressive towards paintwork - take appropriate precautions.
Brake fluid is also highly hygroscopic, i.e. it has the ability to absorb moisture from the atmosphere. Do not use fluid that has been stored in a loosely sealed container for a long time to adjust the level - the presence of moisture in it leads to a dangerous decrease in braking efficiency.
Note: As the brake pads wear, the fluid level in the master cylinder reservoir drops slightly due to the gradual extension of the caliper pistons and wheel cylinders. However, do not allow the fluid level to drop below the MIN mark on the reservoir wall.
1. The translucent brake fluid reservoir is located on the left bulkhead of the engine compartment. The fluid level marks are on the front wall of the reservoir.
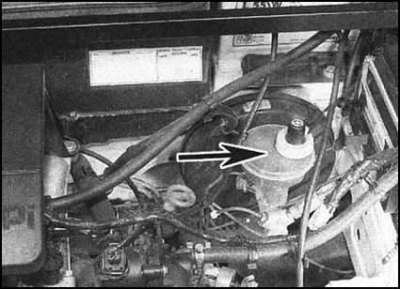
2. The brake fluid level must be maintained between the marks on the tank wall at all times. Before making any adjustments (if there is a need for such) wipe the reservoir filler cap and surrounding area thoroughly to prevent dirt from entering the hydraulic system.
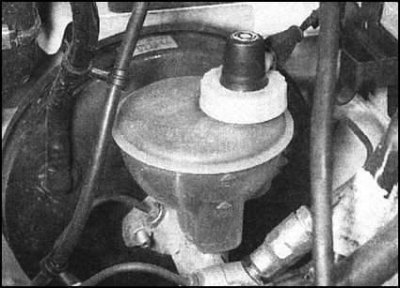
3. Unscrew the cap and carefully remove it from the reservoir neck. Try not to damage the float of the brake fluid level indicator light sensor-switch mounted in the cap. Place the cap assembly with the float on a clean sheet of cardboard or a rag, then carefully inspect the reservoir from the outside. If signs of brake fluid contamination are detected, the hydraulic system should be emptied and filled with fresh fluid.
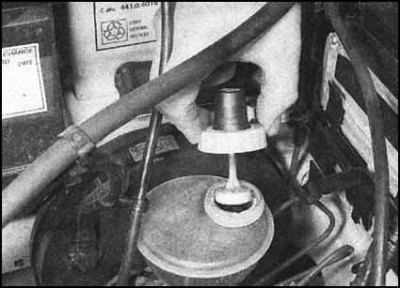
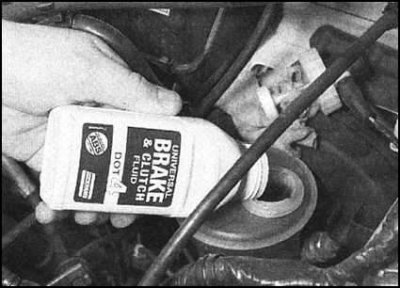
4. Carefully add fresh fluid from a freshly opened container to the reservoir. Try to avoid splashes on the surfaces of nearby components and the paintwork of body panels. To adjust the level, use only the required grade of fluid. Remember that mixing different grades of fluid is never allowed!
5. If the need to adjust the brake fluid level occurs too often, the hydraulic system should be checked for leaks, the causes of which should be eliminated without delay.
Warning! If you suspect brake fluid leaks, do not operate the vehicle until the system has been thoroughly checked.
Checking the condition and inflation pressure of tires
It is extremely important to keep your tires in good condition and inflated to the correct pressure at all times - tire failure while driving (at any speed) is extremely dangerous. The rate of wear of tire treads is primarily determined by driving style - frequent sharp braking and acceleration, making turns without reducing speed, etc. factors significantly contribute to the reduction of tire service life. As a rule, the treads of the front wheels wear out somewhat earlier than the rear ones, so timely rotation of the car wheels allows for more even wear of the tires and, as a result, an extension of their service life. It should be noted, however, that with even wear of the treads, the car owner is faced with the need to perform a one-time replacement of four wheels at once, which not every car owner can afford. In this case, it is better to neglect wheel rotation and replace the tires in pairs, thereby distributing expenses.
Regularly inspect the treads of all wheels on your vehicle, removing small stones, nails and other foreign objects from the grooves of the tread pattern before they cause a puncture. If a puncture is discovered when removing a nail, reinsert the nail into the hole, thereby marking the defect, then change the wheel and take it to a tire shop for repair.
Pay attention to such defects as cracks, cuts, swellings ("eggs"), etc., which most often form on the side surface of the tire. Regularly remove the wheels to thoroughly clean the disks from dirt both on the outside and on the inside. Check the rims of the disks for signs of corrosion, deformation and other damage. Remember that disks made of light alloy easily fail when driving over curbs and deep defects in the coating. Stamped disks in such situations usually only deform and can be restored by rolling on a special machine, which is available in almost any tire repair shop. In case of severe damage, the disks cannot be restored, and their only alternative is to replace them.
Each time the tires are changed, the wheels must be balanced as a whole. The need for rebalancing the wheels may arise when the treads wear out, or when the counterweights are lost. Wheel imbalance reduces the service life of the treads by accelerating their wear. In addition, when driving, the vibration load on the suspension and steering components increases significantly. The first sign of wheel imbalance is the occurrence of noticeable vibrations, especially noticeable at certain driving speeds (usually around 80 km/h [50 mph]). If the vibration is transmitted mainly to the steering wheel, then only the front wheels are imbalanced. In case of body vibration, all wheels of the car should be balanced. Wheel balancing should be performed in a tire shop.
Visual inspection of tread wear
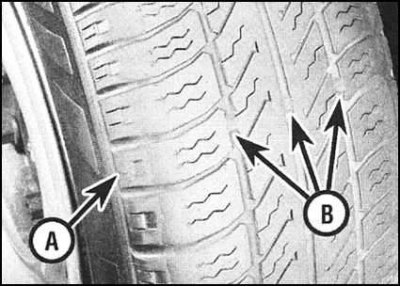
The wheels included in the standard equipment of Skoda Felicia cars are usually equipped with built-in tread wear indicators. The indicators are colored rubber stripes (B) mounted in the middle part of the tread and appear when the latter is worn to a residual pattern depth of less than 1.6 mm. The location of the indicators on the tread is determined by triangular marks applied to the side surface of the tire (A).
Measuring the remaining tread depth manually
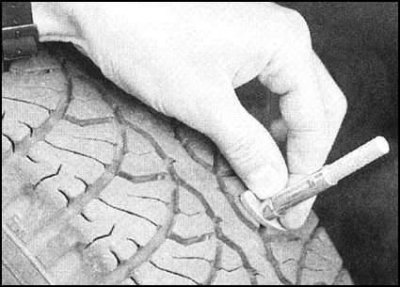
Alternatively, the degree of tread wear can be determined by measuring the remaining depth of its pattern using a special feeler gauge, which can be purchased relatively inexpensively at almost any car accessory store.
Checking tire inflation pressure
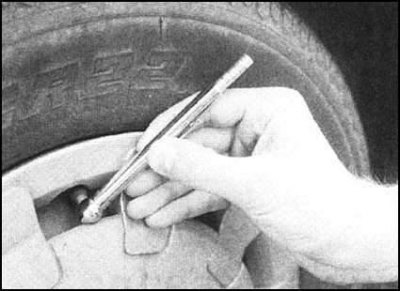
Checking the tire inflation pressure should be done regularly and on cold wheels. Adjusting the pressure immediately after the end of the trip, when the wheel has not yet cooled down, will only lead to a violation of the required parameters.
Typical examples of tread wear
Shoulder wear
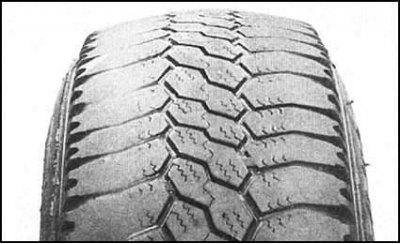
Even shoulder tread wear (the same on both sides) is usually defined by excessive deflection of the tire as a result of too little inflation pressure and is accompanied by overheating of the tire, decreased traction and shortened wheel life, not to mention the increased risk of tire failure while driving. Check and adjust the inflation pressure of the tires.
One-sided shoulder wear of the tread is most often associated with a violation of the wheel installation angles. It is necessary to immediately check the geometric parameters of the suspension and make the appropriate corrections.
Another reason for shoulder tread wear is excessively aggressive driving style - reduce speed on turns!
Central wear
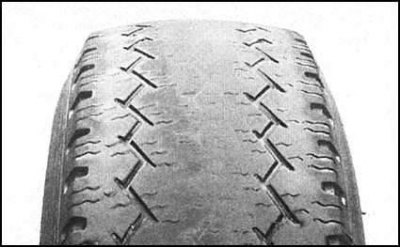
Excessive tire inflation pressure results in tighter contact with the road surface of the central part of the tread, which leads to accelerated wear of the latter. Among the side effects, it is necessary to note the decrease in the wheel grip on the road surface, the increase in the vehicle's ride stiffness, not to mention the increased risk of unexpected tire rupture. Check and adjust the tire inflation pressure.
Sometimes it may be necessary to temporarily increase the tire pressure, such as when transporting heavy loads, driving for long periods at high speeds, etc. Remember to reset the tire pressure to normal when returning to normal vehicle operating conditions.
Uneven wear
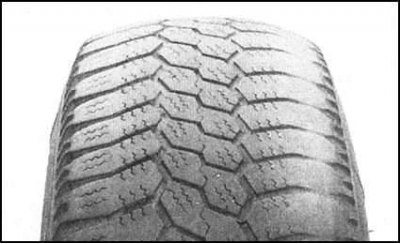
Uneven wear of the front tire treads may be due to the violation of the installation angles of the latter. You can check and adjust the geometry of the front suspension of the car for a relatively small fee at almost any tire shop.
If the wheel alignment or run-out is disturbed, the necessary repairs should be made or the faulty suspension components should be replaced.
Be sure to check and properly adjust your wheel balance.
If the wheel alignment is not correct, it is also necessary to make the appropriate adjustments.
Note: Flaky tread wear, which usually accompanies wheel misalignment, is most easily detected by touch.
Checking the windshield washer fluid level
Note: The reservoir located in the engine compartment is used to wash both the windshield and rear window of the vehicle.
Adding patented windshield wipers to the washer fluid not only makes it easier to clean the glass in rainy weather, but also increases the freezing point of the mixture. Do not add plain water to the windshield washer reservoir, as this will dilute the mixture and lower its freezing point.
Warning! Using antifreeze used in the engine cooling system as an additive to the windshield washer fluid may damage the paintwork of nearby body panels!
1. Windshield washer fluid reservoir (and where necessary, the rear one too) the glass is located on the left in the front part of the engine compartment.
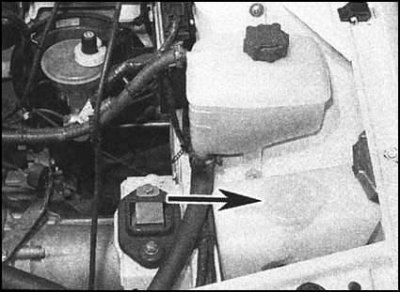
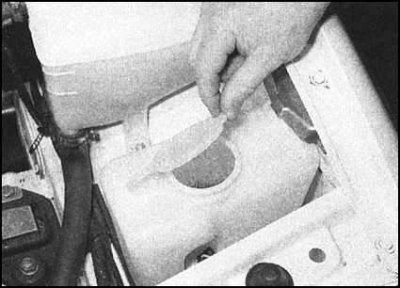
2. Check the liquid level through the translucent walls of the tank. If adjustments are necessary, remove the tank cover.
Checking the Power Steering (PAS) Fluid Level
Preparation
- Park the car on a level, horizontal surface, if possible with a hard surface.
- With the engine idling, slowly turn the steering wheel from lock to lock two or three times, then return it to the straight-ahead position and turn off the engine.
- The hydraulic fluid level is checked with the engine off. The system must be preheated to normal operating temperature.
Note: To ensure accurate readings, do not turn the steering wheel after the engine has stopped.
1. The PAS reservoir is located on the left in the front part of the engine compartment of the car. Before removing the filler/inspection cap, carefully wipe the surface of the reservoir. Unscrew the cap using a suitable tool inserted into a specially provided groove.
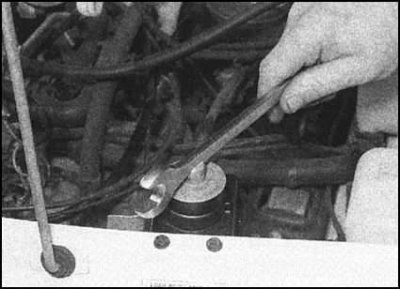
2. After unscrewing the cap, carefully wipe the blade of the built-in feeler gauge with a clean, lint-free cloth. Replace the cap, tightening it by hand, then remove it again.
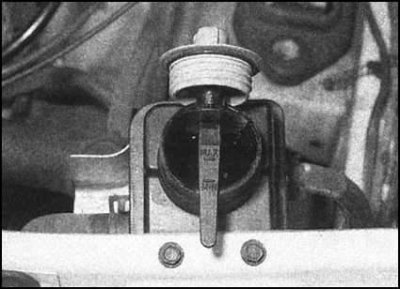
3. Determine the hydraulic fluid level by the size of the wetted area of the dipstick blade. When the engine is cold, the fluid level should be near the MIN mark; when the engine is hot, it should be between the upper (MAX) and lower (MIN) marks on the dipstick blade. If necessary, add the appropriate amount of hydraulic fluid of the required grade to the reservoir. Finally, tighten the reservoir cap tightly.
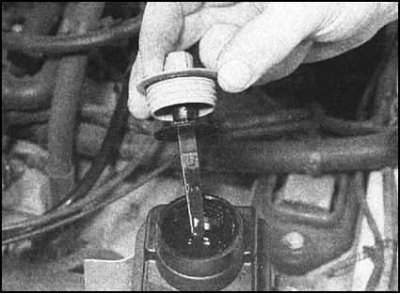
4. The need for frequent regular topping up of PAS fluid indicates the presence of leaks in the system, the causes of which must be immediately identified and eliminated.
Checking the condition of the windshield wipers
Note: The following description of the blade replacement procedure applies only to factory-fitted wiper blades on Skoda Felicia vehicles.
If replacing the brushes does not stop the smearing of dirt, you should try simply wiping the glass using one of the special cleaning agents.
1. Check the condition of the rubber working elements of the wipers. If cracks or signs of aging of the material are detected, or if the wiper does not clean the glass surface well, replace it. The wipers should be replaced annually, regardless of the condition of their working elements.
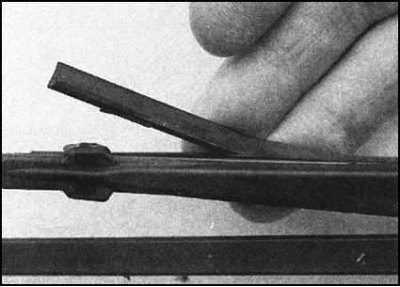
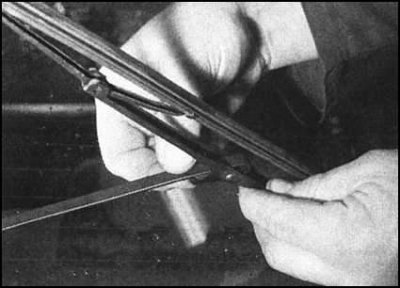
2. To replace the wiper blade, move the lever away from the glass to its extreme position. Turn the blade 90°, then press the locking tab and remove the blade from the lever. When installing a new blade, make sure it is securely fixed to the lever. Also make sure the blade is positioned correctly on the glass.
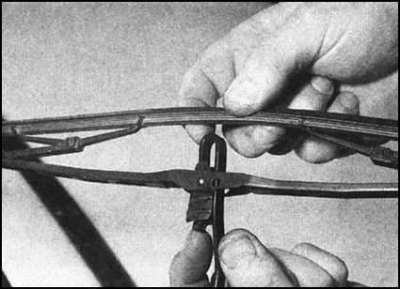
3. Don't forget to check the condition of the rear window wiper blade.
Checking the battery status
Note: Do not forget about the need to observe special precautions when servicing the battery! Be aware of the dangers associated with the possibility of electric shock, short circuit, contact with eyes, skin and painted surfaces of body panels of chemically aggressive electrolyte!
- Make sure the battery tray is in good condition. Check that the battery is securely fixed to the tray with the clamping bar. Traces of corrosion from the tray, clamping bar and battery case can be removed with a solution of baking soda. After finishing, rinse the treated surfaces thoroughly with clean water. Corroded metal surfaces should be coated with a special zinc-based primer and then painted.
- Regularly (approximately once every three months) check your battery level.
- If the battery is low, the engine can be started from an external power source.
Note: Treating terminals and terminal clamps with acid-free petroleum jelly will help stop the development of corrosion.
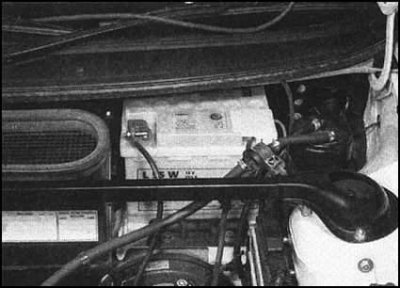
1. The battery is located in the rear of the engine compartment of the car. The external inspection of the battery case for cracks and other damage should be carried out regularly.
2. Check the strength of the battery wire clamps to ensure reliable electrical contact. The clamps should not rotate freely on the terminals. At the same time, check the condition of the wire insulation.
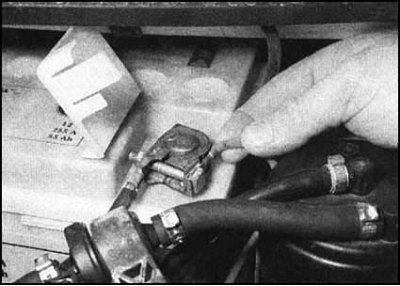
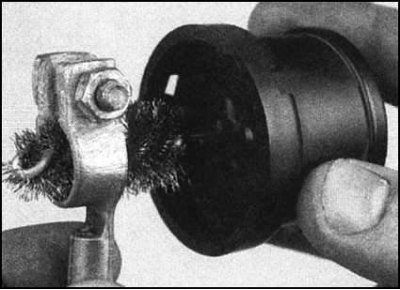
3. If traces of corrosion in the form of white powdery deposits are detected on the terminals, remove the clamps from the terminals and thoroughly clean the damaged surfaces with a stiff brush. Replace the clamps and tighten them securely.
Note: Special tools for stripping battery terminals are available at automotive accessory stores.
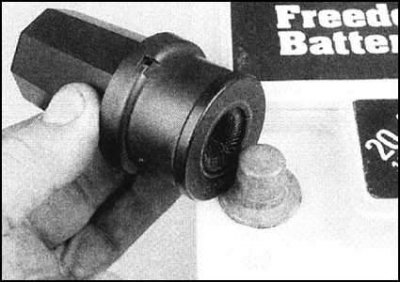
4. Special hard brushes are also produced for cleaning the internal surfaces of terminal clamps.
Checking the condition of lighting fixtures and fuses in electrical circuits
Make sure that all external lighting devices and the horn are functioning properly. If faults are detected, check the condition of the electrical circuits (see the relevant Sections in Chapter On-board electrical equipment).
Perform a visual inspection of accessible electrical wiring, its contact connections and intermediate fasteners.
Note: To check the correct operation of the brake lights and turn signals alone, drive the car close to the garage wall and use the reflections as a guide.
1. Failure of one of the brake lights or turn signals is most often associated with the burnout of the corresponding lamp. Detailed information on replacing the lamps of lighting devices is provided in Chapter 12. A simultaneous failure of both brake lights is most likely explained by a failure of the sensor switch (see Chapter Brake system).
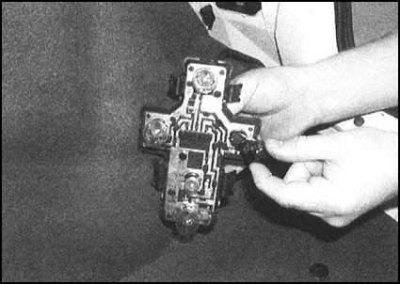
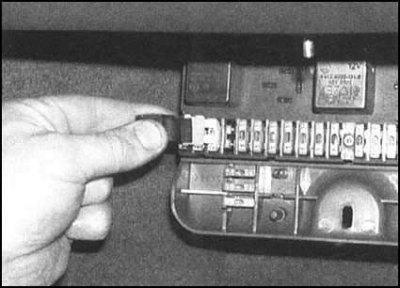
2. If more than one of the direction indicators or rear side lights fails, the condition of the corresponding fuse and the wiring of the circuits it protects should be checked (see Chapter On-board electrical equipment). The main part of the fuses is collected in a mounting block equipped with a cover, installed under the dashboard of the car on its passenger side. Additional (built-in) fuses can be located directly on the component being protected.
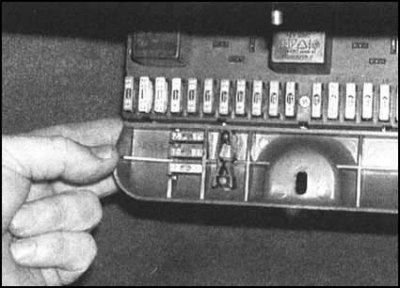
3. Using a special device made of plastic and fixed to the cover of the mounting block, remove the suspected fuse from its socket and carefully examine its condition. The knocked out fuse should be replaced with one of the corresponding current strength. Note that simply replacing the fuse is not always enough to correct the situation - you should try to identify and eliminate the cause of the circuit overload (see Chapter On-board electrical equipment).