
Removing
1. Disconnect the negative cable from the battery.
2. In the passenger compartment under the instrument panel, disconnect the auxiliary spring from the clutch drive cable. Remove the retainer and disconnect the cable end from the clutch pedal assembly.
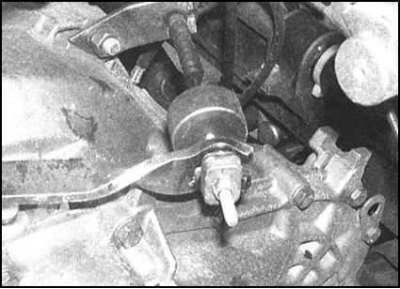
3. Return to the engine compartment and locate the transmission end of the clutch drive cable.
4. On right-hand drive models, remove the retaining clip from the cable core, then loosen the adjusting nut and remove the tip and rubber spacer from the cable. Release the cable sheath from the support bracket and thread the cable through the rubber boot, guide cage, rubber spacer and washer.
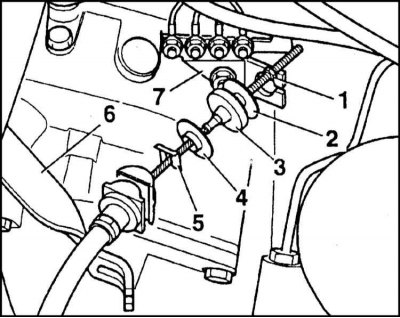
1 - Nut; 2 - Washer; 3 - Rubber spacer; 4 - Washer; 5 - Retainer; 6 - Clutch release lever; 7 - Holder
5. On left-hand drive models, remove the cable core retainer, then loosen the adjusting nut and remove the washer, rubber spacer and guide clip from the end of the cable assembly. Release the cable sheath from the clutch release lever and remove the tip, rubber spacer and guide clip from the cable.
6. On all models, move back along the cable, release it from the intermediate clamps. Try to remember the route of laying the cable in the engine compartment more precisely. Pull the cable through the bulkhead of the engine compartment and remove it from the vehicle. Remove the guide cage and bushing from the bulkhead-facing end of the cable.
7. Carefully inspect the cable for signs of wear on the tips and mechanical damage to the sheath. Check if the core is worn somewhere. Make sure that the rope is functioning properly - the core must move freely inside the sheath. Do not forget that the cable removed from the car may seem to be quite serviceable, while, when installed in a regular place, it turns out to be inoperative. A rope that is in doubtful condition must be replaced.
Installation
1. Lightly lubricate the ends of the cable with universal grease, then put on the end of the cable facing the bulkhead of the engine compartment with a rubber bushing and a guide clip.
2. Pass the cable through the bulkhead, making sure the grommet and cage guide fit correctly.
3. In the car, attach the tip of the cable to the clutch pedal. Check for a secure fit of the latch.
4. Return to the engine compartment and, following the correct laying of the cable, secure it in the intermediate guide clamps.
5. On RHD models, fit the washer, rubber spacer, guide cage, and rubber boot onto the transmission end of the cable. Ensure that the guide cage is properly seated in the support bracket, then slide the inner lug, rubber spacer, and outer lug onto the cable.
6. On left-hand drive models, fit the cable guide, rubber spacer, and lug onto the cable, then attach the cable to the clutch release lever. Fit the guide cage, rubber spacer and washer onto the cable, check that the components are correctly positioned, then screw on the adjusting nut.
7. Connect the negative wire to the battery, then hook the auxiliary spring to the clutch pedal. Now you can start adjusting the drive cable.
Adjustment
1. The clutch cable is adjusted by checking the height of the pedal position in relation to its bracket. When properly adjusted, the clutch pedal should be level with the brake pedal (± 3 mm), and there is no play in the cable assembly.
2. To perform the adjustment, find the end of the cable located on the gearbox housing in the engine compartment.
3. Remove the retainer from the cable core and adjust the position of the pedal by turning the adjusting nut on the threaded part of the lug. When you have achieved the desired result, reinstall the retainer and make sure it is firmly seated in the release lever/support bracket.