
Company vehicles Hyundai Company vehicles Kia Company vehicles Lada Company vehicles Mazda Company vehicles Mercedes-Benz Company vehicles Opel Company vehicles Mitsubishi
English Русский
Български
Беларускі
Український
Српски
Hrvatski
Română
Polski
Slovenský
Magyar
Articles   
Bookmark Contacts Sitemap
SkodaBook.ru


Fabia Rapid Octavia Superb Kodiaq Yeti Others
Octavia 1 (1996-2004) Octavia 3 (2013-2019)

Checking and replacing the fuel pressure regulator «N276» (Skoda Octavia 5E)

  • Main
  • Octavia
  • 5E (2013-2019)
  • Diesel engines 1.6/2.0 l
  • Supply system
  • Checking and replacing the fuel pressure regulator «N276»
0
Contents: Replacing the fuel pressure…⬇ Installation ⬇
Remove the upper engine casing. Loosen the clamp "arrow" and remove the return fuel line hose from the fuel rail. Close the hole in the return fuel line with a plug.
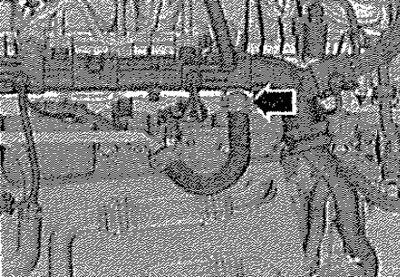
Remove the upper engine casing. Loosen the clamp…


Connect auxiliary hose "3" to the return fuel line of fuel rail "2". Connect this hose "3" to a suitable container to measure the fuel consumption in the return fuel line.
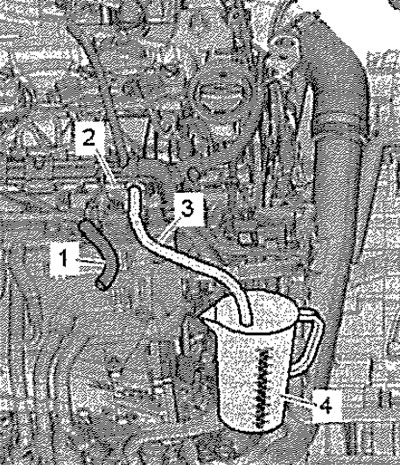
Connect auxiliary hose «3» to the return fuel…


1. Check with the engine running

Start the engine and let it idle. Nominal value: after 30 seconds more than 75 ml. If the nominal value is not reached, the fuel pressure control valve "N₂76" is defective.

2. Checking with the engine running

If the condition of point (1) is met, increase the engine speed to 2000 rpm. Specified return volume: 0 ml. Drip leakage is permissible. If the nominal value is not reached, the fuel pressure control valve "N₂76" is defective.


3. If the engine does not start

Carry out a test at starter speed. Specified return volume: 0 ml. Drip leakage is permissible. If the nominal value is not reached, the fuel pressure control valve "N₂76" is defective. Replace the fuel pressure regulator "N₂76".

Replacing the fuel pressure regulator "N₂76"


[Information published on the website: SkodaBook]

The fuel pressure regulator "N₂76" is located in the fuel rail and serves to maintain constant pressure in the fuel rail and high-pressure lines (high pressure fuel circuit). When the pressure in the high-pressure fuel circuit is too high, the pressure regulator valve opens and some of the fuel from the fuel rail flows back into the fuel tank through the return fuel line. When the pressure in the high-pressure fuel circuit becomes too low, the pressure regulator closes and separates the high-pressure and low-pressure circuits.

Note: The fuel pressure regulator "N₂76" cannot be reused.


Remove the upper engine cover. Release the fuel return hose "1". Open the fastening brackets "arrows", disconnect and remove the guide well "2". Before removing, clean the threaded area around the fuel pressure regulator "N₂76". Do not allow dirt to get into the fuel rail opening. Work carefully - do not allow the cleaner to get on the electrical connector. Dry the fuel pressure regulator "N₂76".
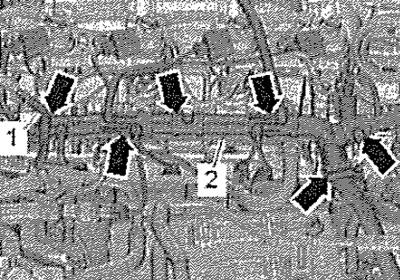
Remove the upper engine cover. Release the fuel…


Disconnect connector "2". Loosen union nut "1". To do this, hold it against turning by the hexagon on the fuel rail. Then unscrew the regulator by hand. Pump out dirt from the pressure accumulator hole (clean the threads and sealing surface). Do not use mechanical tools for this. Close the open fuel rail nipple with a clean plug.
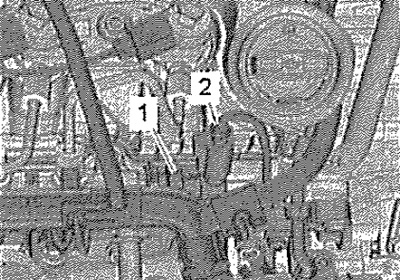


Disconnect connector «2». Loosen union nut «1».…


Installation


Note: Replace the fuel pressure regulating valve "N₂76" after each removal. Moisten the threaded part and the crushing edge of the fuel pressure regulator "N₂76" with diesel fuel.


Tighten the union nut by hand. Install the new fuel pressure regulator so that the wiring harness is not stretched after connecting the connector. Hold the pressure regulator in this position by the hexagon of the housing using an open-end wrench or, for example, a pipe wrench. To tighten the union nut, use a suitable torque wrench with a socket attachment - a 30 mm open-end wrench. Fill the fuel system with fuel / remove air from the fuel system.
This article is available at russian, bulgarian, belarusian, ukrainian, serbian, croatian, romanian, polish, slovak, hungarian
Article verified: Anatoly Ovchinnikov
Share with friends:
◀ Previous
Skoda Octavia 3: Supply system
Next ►

Removal and installation the air flow meter «G70»
Removal and installation the fuel temperature sensor «G81»
Removal and installation the intake air temperature sensor «C42» / the…
Removal and installation the high pressure fuel pump
Parts and components of the high pressure fuel pump
Removal and installation the fuel pressure sensor «G247»
Intake manifold parts and components
Removal and installation the throttle control unit «J338»
Removal and installation the intake manifold
Air filter parts and components
Read similar articles on other Skoda models

➧ Replacing the fuel radiator Skoda Fabia 1 (1999-2007)
➧ Electronic engine control unit, fuel pressure regulator valve Skoda Rapid 1 (2012-2022)
➧ Removal and installation of fuel injection system parts, except for… Skoda Superb 2 (2008-2015)
➧ Fuel pressure regulator valve Skoda Kodiaq 1 (2016-2024)
➧ Fuel pressure sensor, boost pressure regulator, its position sensor,… Skoda Yeti (2009-2017)
➧ Checking and adjusting the injection phase setting of the… Skoda Felicia (1994-2001)
Link to this article in various formats
Reviews and comments of visitors
No comments yet


Add two numbers: 14 + 40


Octavia 3 (2013-2019) 
  • General information
  • User manual
  • Car driving
  • Maintenance
  • Petrol engines 1.2 l
  • Engine repair
  • Cooling system
  • Supply system
  • Petrol engines 1.4 l
  • Engine repair
  • Supply system
  • Petrol engines 1.8/2.0 l
  • Engine repair
  • Cooling system
  • Supply system
  • Diesel engines 1.6/2.0 l
  • Engine repair
  • Cooling system
  • Supply system
  • Transmission
  • Mechanical gearbox 02S
  • Automatic gearbox 0CW
  • Automatic gearbox 0D9
  • Chassis (running gear)
  • Front suspension
  • Rear suspension
  • Brake system
  • Steering
  • Body and interior
  • Doors, locks and windows
  • Exterior (external elements)
  • Interior (internal elements)
  • Ventilation and air conditioning
  • Electrical equipment
  • Equipment and devices
  • Headlights and lighting
  • Wiring diagrams (basic)
  • Wiring diagrams (comfort)
Octavia 1 (1996-2004) 
  • General information
  • Vehicle details
  • Maintenance
  • Power unit
  • Petrol engines 1.6 l AEE
  • Petrol engines 1.8 l AGN
  • Diesel engines 1.9 l AGR
  • Fuel system
  • Exhaust system
  • Cooling system
  • Transmission
  • Clutch
  • Car gearbox
  • Gearbox repair 02J
  • Gearbox repair 02K
  • Chassis (running gear)
  • Wheels and tires
  • Suspension and axles
  • Brake system
  • Body and interior
  • Exterior (external elements)
  • Interior (internal elements)
  • Doors, locks and windows
  • Electrical equipment
  • Equipment and devices
  • Electrical circuits
SkodaBook.ru © 2018–2026 | Mobile version | Articles on Skoda | Sitemap EN BG BY UA RS HR RO PL SK HU | Feedback | Site search | Bookmark
Fabia 1 (1999-2007) | Fabia 2 (2007-2014) | Rapid 1 (2012-2022) | Octavia 1 (1996-2004) | Octavia 3 (2013-2019) | Superb 2 (2008-2015) | Kodiaq 1 (2016-2024) | Yeti (2009-2017) | Favorit (1987-1994) | Felicia (1994-2001) |
By continuing to use the site, you agree to the use of cookies.