



Contents: Examination ⬇ Replacement ⬇
Examination
1. Jack up the front of the car and place it on supports.
2. Check the rubber support pads for cracks, signs of hardening, rubber peeling off the metal base and other mechanical damage. If such defects are detected, the faulty support must be replaced.
3. Using a torque wrench, check that the threaded connections of the supports are tightened correctly.
4. Using a large screwdriver or crowbar as a lever, assess the degree of wear on the supports (if possible, use the help of an assistant by asking him to rock the power unit from side to side). If excessive play is detected, the worn support should be replaced, after first checking the reliability of its fastening.
Replacement
Right support
1. Disconnect the negative cable from the battery.
2. Raise the engine using a winch or support it with a jack (a wooden block should be placed between the jack head and the oil pan to distribute the load).
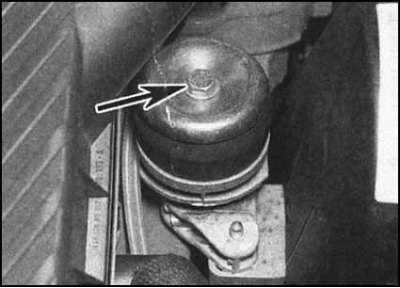
3. Unscrew the upper tie bolt and disconnect the support...
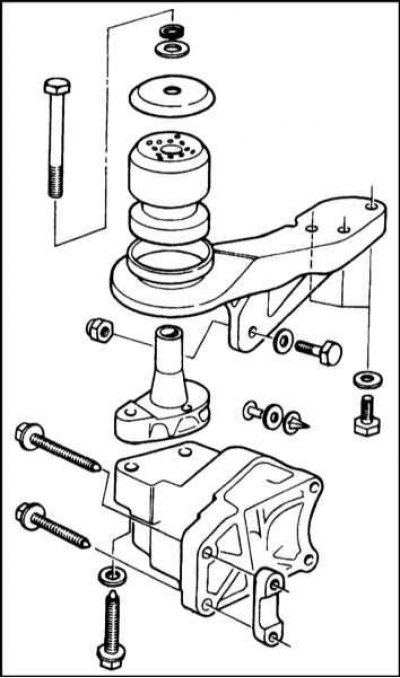
...trying to remember the installation position of the components being removed, remove the rubber cushion from the assembly.
4. Now the remaining bolts can be unscrewed and the support itself can be removed from the wheel arch mudguard.
5. If necessary, the lower part of the support can be separated from the engine block after first removing the timing belt covers (see section Removal and installation the timing belt and its covers).
6. Installation is carried out in the reverse order. Do not forget to replace the mounting bolts and lightly lubricate them with machine oil before installation. Tighten all fasteners to the required force.
Left support
See Section Checking the condition and replacing the rubber cushions of the powertrain suspension mounts.
Rear support
See Section Checking the condition and replacing the rubber cushions of the powertrain suspension mounts.