



Generator drive parts (a car without air conditioning)
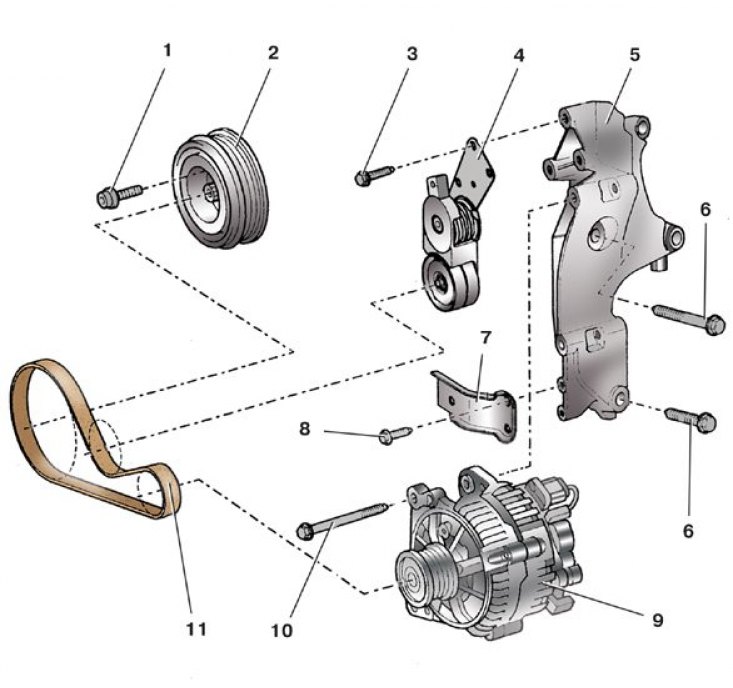
1 – crankshaft pulley mounting bolt; 2 – pulley with torsional vibration damper; 3 – tensioner mounting bolt; 4 – tensioner; 5 – generator bracket; 6, 8 – bracket mounting bolts; 7 – lower air duct bracket; 9 – generator; 10 – generator mounting bolt; 11 – generator drive belt
Generator drive parts (a car with air conditioning)
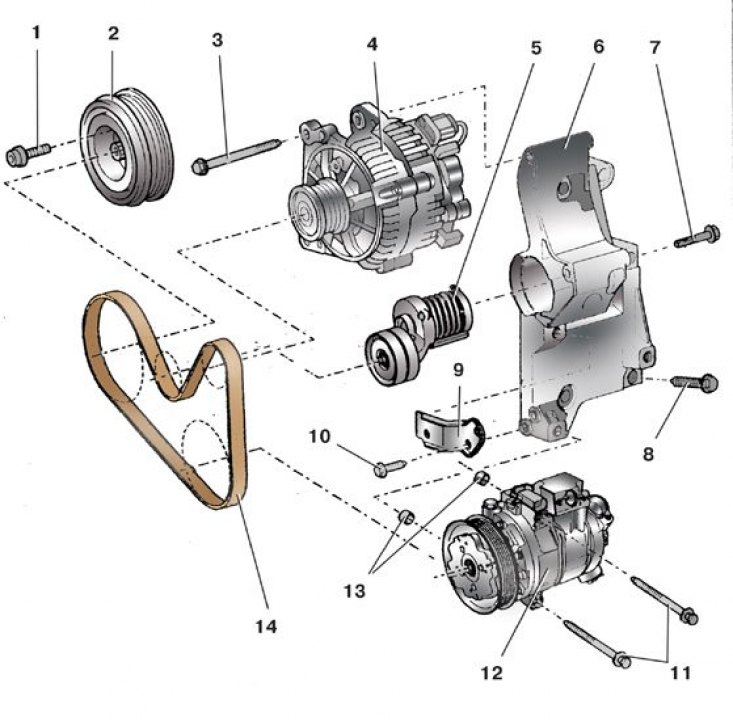
1 – crankshaft pulley mounting bolt; 2 – pulley with torsional vibration damper; 3 – generator mounting bolt; 4 – generator; 5 – tensioner; 6 – generator bracket; 7 – tensioner mounting bolt; 8, 10 – bracket mounting bolts; 9 – lower air duct bracket; 11 – compressor mounting bolt; 12 – air conditioning compressor; 13 – compressor mounting bushings; 14 – generator drive belt
Engine compartment
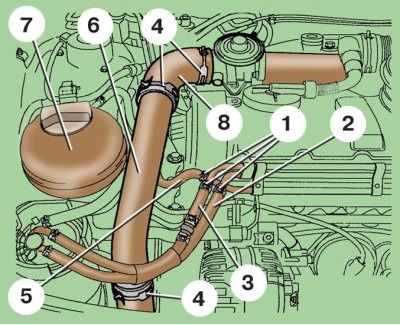
1, 4 – clamps; 2 – fuel return hose; 3 – fuel supply hose; 5 – coolant supply hose; 6 – upper boost air duct; 7 – expansion tank; 8 – hose
Engine mudguard
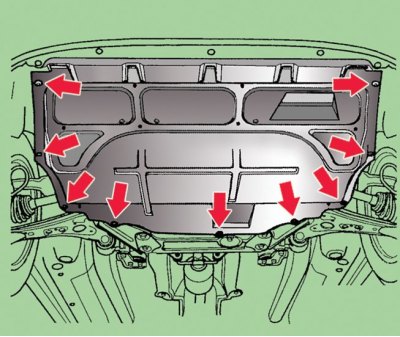
The shield mounting screws are shown by arrows.
Bottom charge air duct
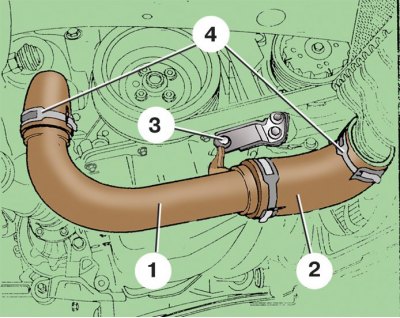
1 – air duct; 2 – hose; 3 – bolt; 4 – clamp
Caution! If the belt is not being removed for replacement, mark its direction of rotation before removing it, as changing the direction of rotation will cause the belt to wear out quickly.
The belt is replaced in the following order.
Models without air conditioning
1. Remove the upper engine cover (see subsection 2.1).
2. For turbocharged engines, remove clamps 4 and upper air duct 6 with hose 8 from the engine compartment (see the picture Engine compartment).
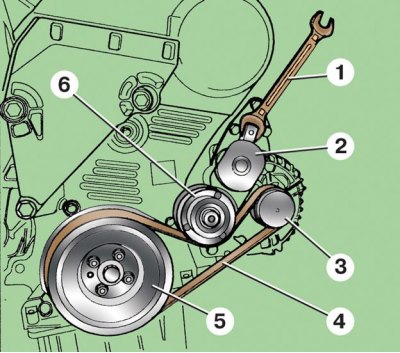
3. Using key 1, turn tension roller 6 clockwise to loosen the belt tension. While holding the roller, remove the belt (2 – tensioner; 3 – generator pulley; 4 – generator drive belt; 5 – crankshaft pulley).
4. Check the tightening of the generator and tensioner mounting bolts. Check the ease of rotation of tension roller 6 and pulley 3 of the generator; they should rotate easily, without jamming.
5. Holding tensioner 2, put new belt 4 on crankshaft pulleys 5 and generator 3 and release tensioner. The tensioner will automatically tighten the belt.
6. Start the engine and check the operation of the belt.
Models with air conditioning
7. Remove the engine mudguard by unscrewing the screws that secure it, as shown by the arrows in the figure (see the picture Engine mudguard).
8. Unscrew bolt 3, remove clamps 4 and then lower air duct 1 with hose 2 (see picture Lower boost duct).
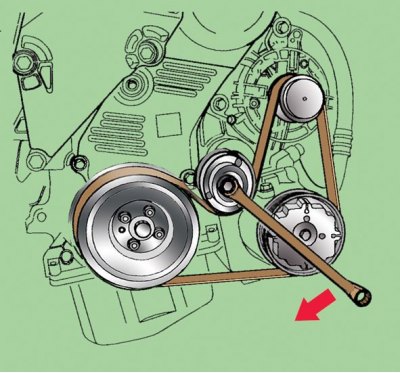
9. Using the wrench as shown in the figure, turn the tension roller clockwise to loosen the belt tension. While holding the roller, remove the belt.
10. Check the tightening of the generator, air conditioning compressor and tensioner mounting bolts. Check the ease of rotation of the tension roller and the generator and compressor pulleys; they should rotate easily and without jamming.
11. While holding the tensioner pulley, place the new belt on the crankshaft, alternator and compressor pulleys, then release the pulley. The tensioner will automatically tighten the belt.
12. Start the engine and check the operation of the belt.