



Contents: Removal ⬇ Installation ⬇
Removal
Note: After disconnecting and then reconnecting the wire connecting the battery terminal to the vehicle ground (body), additional work must be performed.
1. With the ignition off, disconnect the wire connecting the battery terminal to the ground (body) of the vehicle.
2. Remove the lower engine protective cover.
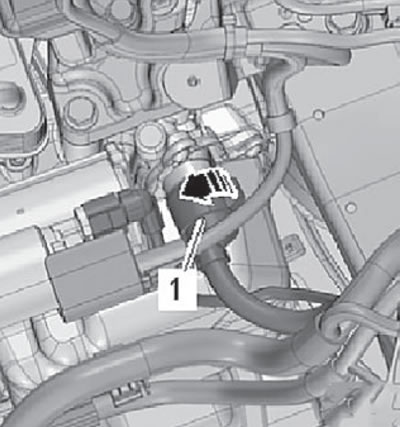
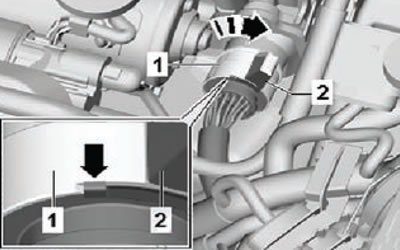
3. Turn the wiring harness connector (1) counterclockwise to disconnect it from the mechatronics module, as shown in the figure below.
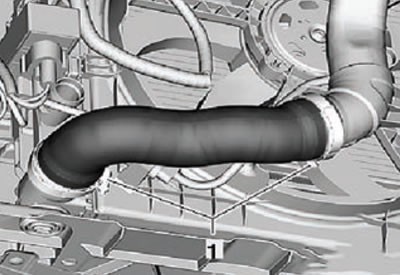
4. Loosen the clamps and disconnect the connecting hose between the discharge pipe and the intercooler as shown in the figure below.
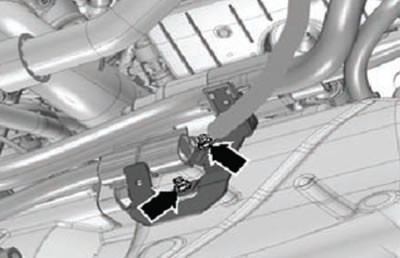
5. Unscrew the mounting nuts from the holder on the oil pan, remove the holder from the threaded pins, as shown in the figure below.
Note: Threaded pins are welded to the front of the transmission to the oil pan.
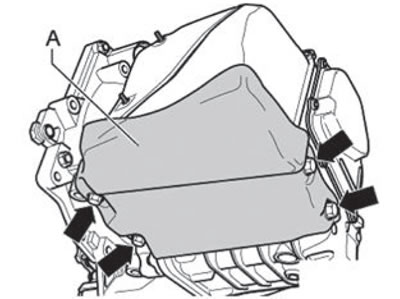
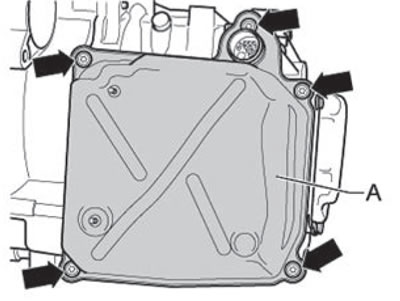
6. Remove the protective sheet (A) from the bottom of the gearbox (arrows) as shown in the figure below if it is installed.
7. Place a catch container under the gearbox to collect the transmission oil.
Caution: Wear protective glasses.
8. Unscrew the level control screw located near the rocking support.
9. Touch the ground (body) of the car with your bare hand, which will discharge the electrostatic charge.
Attention. It is allowed to touch and remove the mechanical electronics of the DSGU "J743" automatic transmission only after removing the electrostatic charge by touching a grounded object, such as a "mass" (body)with your bare hand a car.
Do not touch the contacts in the gearbox connector with your hands, as the electrostatic charge may damage the control unit and, consequently, the mechatronics.
10. Loosen the oil pan mounting screws (arrows) (A) crosswise and unscrew them as shown in the figure below.
Note: There is still oil in the oil pan, as it is possible that not all of it was drained.
11. Remove the oil pan together with the seal.
12. The oil pan seal should always be replaced.
Installation
1. Installation is carried out in the reverse order of removal. In this case, the following instructions must be observed:
2. Replace both O-rings (arrows) on the mechatronics input as shown in the figure below.
3. Lubricate both O-rings with DSG automatic transmission fluid.
4. Clean the sealing surfaces and remove any remaining oil.
5. Ensure that the new oil pan seal is installed correctly.
6. Install the oil pan. Be careful not to pinch any of the wiring harnesses.
7. After installing the new oil pan bolts, tighten them in several steps crosswise, applying the appropriate tightening torque.
8. The mechatronics wiring harness connector should be installed as follows:
- The arrows on the mechatronics and on the wiring harness connector, as well as the protrusion, must be in a straight line and pointing upwards, as shown in the figure below.
- The wiring harness connector should be carefully pushed in until it stops and the locking mechanism should be locked by turning it to the right - in the direction of the arrow, as shown in the figure below.
9. Replace the transmission oil filter (for more details, see the relevant section in this chapter).
10. Fill the gearbox with transmission oil (for more information, see the corresponding section in this chapter).
Note: After disconnecting and then reconnecting the wire connecting the battery terminal to the vehicle ground (body), some additional work must be performed.
[The original article can be found on the resource SKODABOOK.ru]
11. Connect the wire connecting the battery terminal to the ground (body) of the vehicle.