



Mounting the dashboard on the center tube
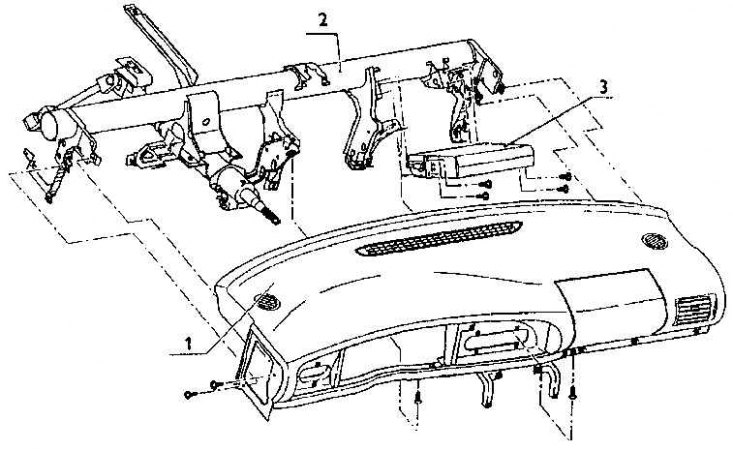
1 - dashboard; 2 - central tube; 3 - airbag assembly (in case of installation)
Mounting the central part of the dashboard
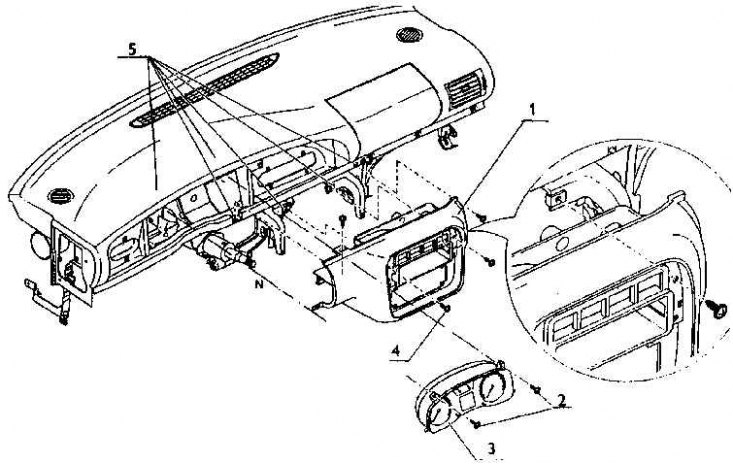
1– the central part of the dashboard; 2 - bolt 4.2x16; 3 - combined instrument; 4 - bolt 4.2x16; 5 - nut 4.2x12x16
Instrument panel mounting
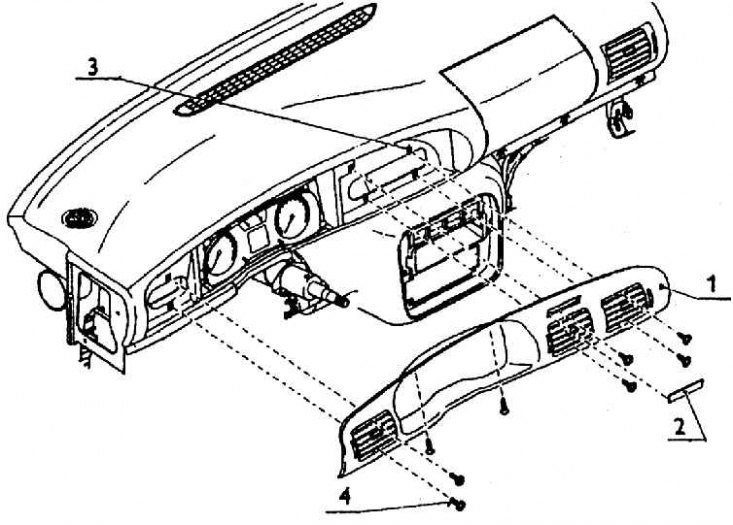
1 - instrument panel assembly; 2 - cover; 3 - nut ST 4.2x16x12; 4 - bolt 4.2x16
Installation of switches in the central part of the board, casing and plugs
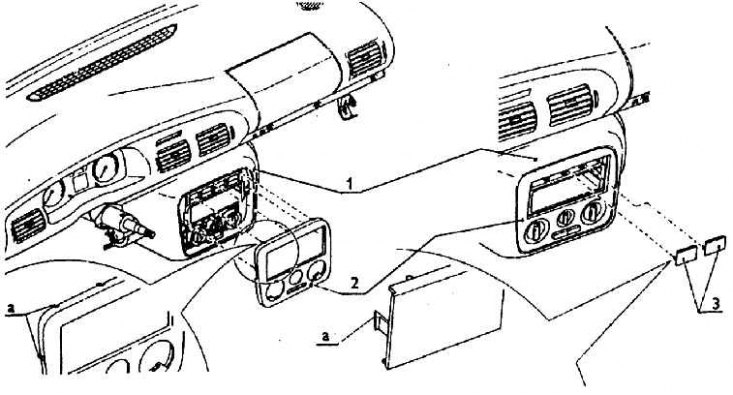
1 - the central part of the dashboard; 2 - central casing; 3 - plug; a - just snaps on
Installing the dashboard assembly in the body - side view
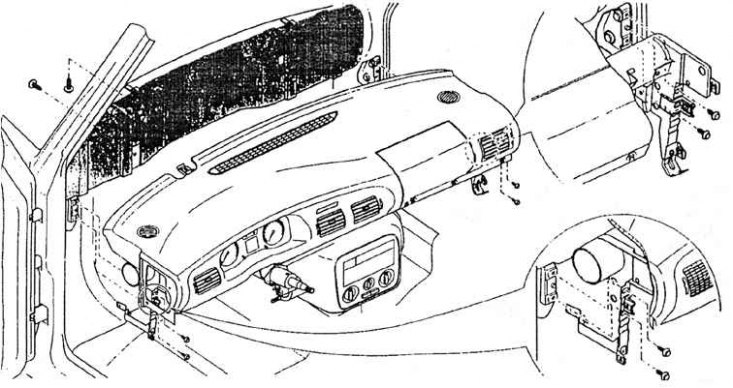
In this description, the dashboard assembly will mean all parts of the dashboard installed on the preparatory (pre-installation) workplace on the central carrier tube. The steering column assembly and the passenger airbag assembly are already installed on the center tube before the dashboard is installed. Felt insulating tape is preliminarily glued to the places on the brackets where the dashboard fits.
Then installed and attached (six bolts) the dashboard itself. In the upper part of the board in the middle there is a grill for air access to the windshield, and on the sides there are lattice circles (see fig. Mounting the dashboard on the center tube).
Place on the dashboard (gap contoured), under which the passenger airbag assembly is fixed, moves up when the airbag is activated. If there is no airbag, the surface of the board is smooth, without cracks. Parts of the dashboard are also the air distribution for the front of the cabin.
Given the thematic continuity, it is necessary to add that to the aforementioned wiring (after installing the central tube with the dashboard in the back) a two-part air distribution is connected to the rear floor. It fits under the mat on the sides of the central frame spar and is a flat plastic tube of rectangular cross section coming out of the mat behind the front seats.
After fixing the main part of the dashboard, the installation of its central part, as well as the combined (combined) instrument with speedometer, tachometer and other indicators (see fig. Mounting the central part of the dashboard). On the front, on the central part, then the upper casing is fixed on a plastic elastic spike. Then there is the installation of switches, plugs, if necessary, radio (see fig. Instrument panel mounting). The dashboard is different for cars without an airbag in front of the passenger and cars with an airbag. The center tube either has brackets for attaching the airbag assembly or is missing.
All switches located on the dashboard are secured only by snapping into elastic clamps.
The instrument panel, which contains three adjustable grilles for changing the direction of air flow, is fixed with eight bolts (see fig. Installation of switches in the central part of the board, casing and plugs). The steering column has a multi-purpose switch. The fuse panel is located on the left side of the dashboard.
The instrument panel thus completed is screwed - on each side with two bolts - to brackets fixed to the inner surfaces of the A-pillars (frame) (see fig. Installing the dashboard assembly in the body - side view).