
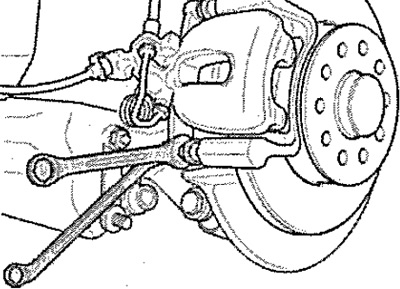
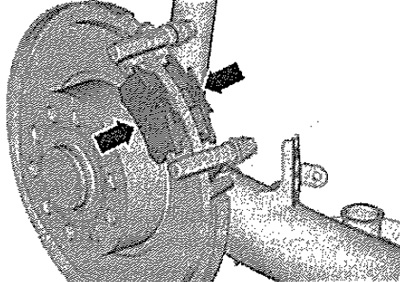
Remove brake pads -arrows-.
Note: Follow the instructions for replacing pads. Use only alcohol to clean the brake caliper housing. The surface of the brake pad to be bonded must be free of adhesive and free from grease.
Clean the brake caliper.
Installation
Note: Before depressing the piston, suck off the brake fluid from the hydraulic brake reservoir. Otherwise, brake fluid, if topped up, may leak out and cause damage. When the piston is returned to its original position using a tool, the automatic adjustment in the brake caliper is violated. Screw in the piston by turning the knurled wheel of the resetting tool -T10165-, taking care not to damage the protective cap. Use special tool -T10165/1- for screwing in. In the event of a tight piston stroke, you can use an open-end wrench by installing it on the flats intended for this - see. arrow A-.
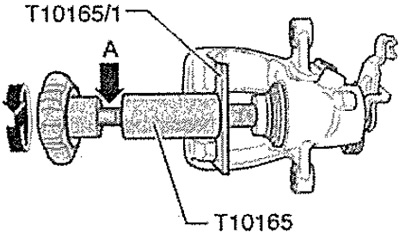
Note: To depress the piston, simultaneously turn the resetting tool -T10185- to pressurize the piston.
Fit new brake pads -arrows- into the brake shield. Remove the protective film from the base plate of the outer brake pad. Carefully install the brake caliper onto the brake shield.
Note: The repair kit contains four self-locking screws that must be installed.
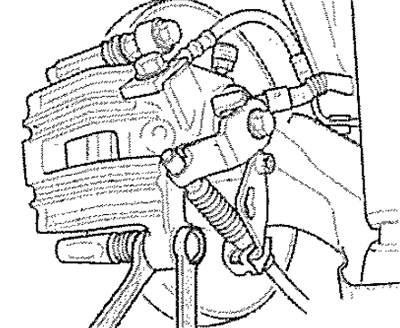
Fasten the brake caliper with new self-locking screws to the brake shield. When tightening the screws, hold the guide pin against turning. Connect the connector of the signaling device for the maximum permissible wear of the brake pads (if the vehicle is equipped with them - only on the right side of the vehicle).
Note: After each brake pad change, depress the brake pedal firmly several times with the vehicle stationary so that the brake pads return to their working position. After replacing the brake pads, check the brake fluid level and add brake fluid if necessary.
Press the brake pedal firmly several times while the vehicle is stationary. Adjust parking brake. Install the wheel.