
Cleaning
1. For a complete cleaning, remove the liners (see paragraph 19 below), lube port plugs, and all external components and electrical switches/sensors.
2. Clean the cylinder block and crankcase of gasket residue, being careful not to damage the surfaces.
3. If any part of the crankcase is extremely clogged, steam clean it.
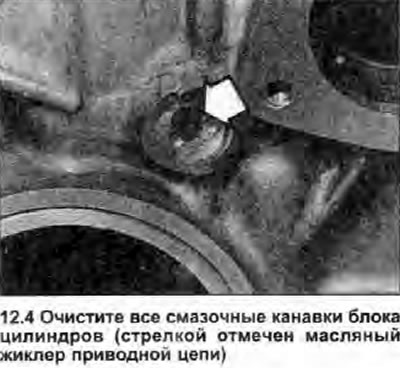
4. Then clean all lubrication holes and channels again. Rinse all internal passages with warm water, then dry thoroughly and apply a light coat of oil to all surfaces to prevent corrosion. Use compressed air to speed up the drying process and blow out all oil holes and channels (see illustration).
5. If the crankcase is not very dirty, you can clean it with hot soapy water and a stiff brush.
6. All tapped holes must be clean to ensure accurate tightening torques during reassembly. Use an appropriately sized tap to clean and renew threads. If possible, use compressed air to blow out the debris from the holes after passing the tap.
7. Install new sealing washers on the oil port plugs. then install the plugs in the cylinder block and tighten them with a tightening torque regulated specifications.
8. If the engine is not assembled immediately, cover it with a large plastic bag and protect the liners from corrosion as described above.
Inspection
9. Check crankcase for cracks and corrosion. Look for stripped threads in the tapped holes. If an internal coolant leak is observed, it is recommended to contact a specialist for a comprehensive check of the cylinder block and crankcase using special equipment. If defects are found, repair them if possible or replace the unit.
10. Remove the cylinder liners as described in paragraph 19, and check each cylinder, liners for notches and notches. By size, the sleeves are divided into three classes; The size group is printed on the side of each.
11. Measure the diameter of the cylinder liners just below the wear ridge at the top of the cylinder, in the middle and at the base of the cylinder. Take measurements parallel and perpendicular to the axis of the crankshaft.
12. Compare results with specifications according to the size class of the sleeve; if any measurement exceeds the tolerances specified in the Specifications, the cylinder liner must be replaced.
13. To determine the clearance between the piston and the cylinder wall, measure the cylinder and piston skirt diameters as described in Chapter 13, and subtract the skirt diameter from the cylinder diameter. You can also use another method. Insert each piston into the corresponding cylinder liner, select a feeler gauge and insert it into the space between the cylinder and the piston on one of the thrust surfaces in the base.
14. If the clearance is large, a new piston will be required. If the piston gets stuck at the bottom end of the cylinder and is released on the upward stroke, the cylinder is tapered. If the piston and feeler gauge get stuck as they rotate in the cylinder, then there is an ovality.
15. Repeat this procedure for the remaining pistons and cylinder liners.
16. If the cylinder liner walls are severely damaged or excessively worn, oval or tapered, purchase new cylinder liners and new pistons. Skoda states that all pistons and liners installed in the engine must be of the same size class. The class of the sleeve is imprinted on its outer surface, and the class of the piston is imprinted on its head (see Chapter 13).
17. If the cylinders are in good condition and not worn to the specified Specifications limit values, and if the clearances between the piston and the cylinder wall are within acceptable limits, then only the piston rings will need to be replaced.
18. Before assembling the engine, it is necessary to honing the cylinder channels. This will require a special tool. As a result of honing, the bearing surface of the piston rings increases, and the tightness between the piston and cylinder is improved accordingly. There are two types of honing tools. powered by an electric drill. «bottle brush» - a rigid, cylindrical brush with hard stones glued to the bristles. And a more conventional brush with hard stones mounted on spring-loaded supports. For the inexperienced mechanic, satisfactory results can be obtained using «bottle brush». Honing is done as follows; You will need the tool described above, a wrench, a drill, a clean rag, hoiing oil, and safety glasses. Install the tool in the drill. Lubricate the cylinder channels with honing oil, insert the tool into the hole, squeezing the stones. Turn on the drill and move it up and down in the hole. Ideally, the honing lines should intersect at a 60°angle, although some piston ring manufacturers may specify a different angle. Use oil when honing. Do not remove more material than necessary. At the end of the work, do not remove the tool from the hole while it is rotating; slide it down until the tool stops, then remove the tool by turning it by hand in the normal direction.
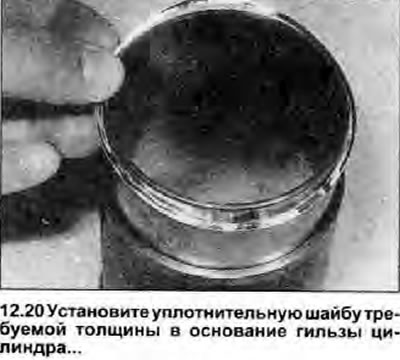
19. To remove the liners, turn the cylinder block/crankcase over and place it on blocks of wood, then use a wooden drift on the crankshaft side to knock out the liners. When all liners are loose, tip the cylinder block/crankcase on its side and remove the liners from the cylinder head side. Remove the sealing washers from the base of the sleeve, and measure its thickness. The washers are available in various sizes and are used to adjust the height of the liner protrusion above the cylinder block (see paragraph 22); For each sleeve, purchase new washers of the appropriate thickness. If the sleeves do not require replacement, stick on their right sides (facing the drive chain) pieces of sticky tape on which you need to write the cylinder numbers.
20. Before installing the cylinder liners, carefully clean the contact surfaces, using fine-grained emery cloth, remove burrs or sharp edges that could damage the sealing washer. Clean and dry all sleeves, then install new sealing washers of the required thickness in the base of each (see illustration). Apply a thin coat of engine oil to the cylinder bore.
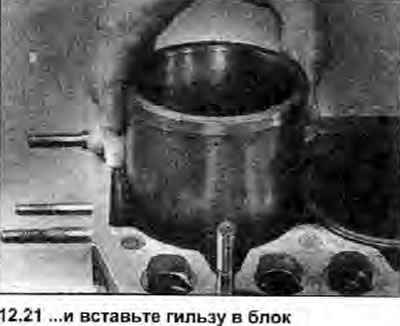
21. If old liners are being installed, use the marks made before removal so they can be correctly oriented and installed in the old cylinders. Insert the liners into the cylinder block/crankcase, being careful not to disturb the washer, and press them as far as possible by hand (see illustration). Using a hammer and block of wood, tap each sleeve lightly to seat them on the mounting shoulder.
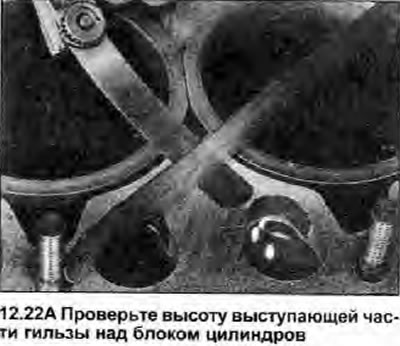
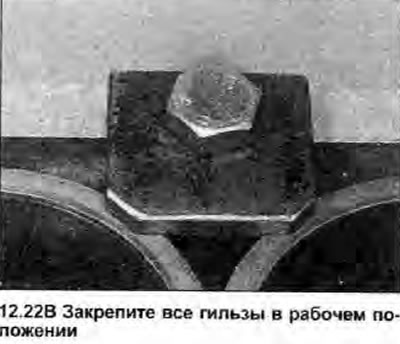
22. After all four sleeves are installed, use a micrometer or ruler and feeler gauge to check that their protrusion above the surface of the cylinder block does not exceed the limits given in the Specifications. and that the maximum difference between any two cases is not exceeded. If this is not the case, you must remove the appropriate sleeve and purchase another sealing washer of the required thickness. There are three classes of washers depending on the thickness: 0.10 mm, 0.12 mm and 0.14 mm. Install the required washer, then insert the liner into the cylinder block and recheck the protrusion height. When everything is in order, securely fasten the sleeves in working position (see illustrations).
 |  |