



Contents: Removal ⬇ Installation ⬇
Note: See the warnings given in Section General information and precautions.
Removal
Relieve the pressure in the fuel tank (see section Relief of residual pressure in the fuel system), then disconnect the negative cable from the battery.
Models 1.3 l
1. Remove the throttle body and air cleaner upper covers (see section Removal and installation the air cleaner assembly).
2. Disconnect the accelerator cable from the throttle actuator lever (see section Removal, installation and adjusting the accelerator cable). Release the cable from the support clamp and move it to the side.
3. Disconnect the wiring from the throttle position module and the intake air temperature/pressure sensor.
4. Disconnect the hose from the charcoal canister and the small vacuum hose from the cylinder head cover to the throttle body.
5. After carefully labeling the wires, disconnect the electrical connectors. Release the wiring harness from the clips on the top of the fuel line and move it to the side.
6. Disconnect the vacuum hose from the front of the fuel pressure regulator
7. Place an old rag under the fuel supply and return line unions on the fuel line. Loosen the clamps and disconnect the line hoses from the line. Try to remember the installation position of the hoses - the supply hose is located closer to the throttle body.
Text obtained from the website: Skodabook.ru
8. "Walk" along the vacuum hose from the brake booster servo unit mounted on the engine compartment bulkhead to the fitting on the left side of the intake manifold. Remove the hose from the fitting.
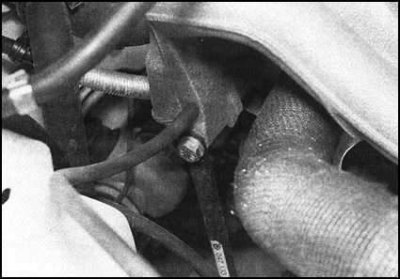
9. Unbolt the support stand from the right wall of the intake manifold.
10. Make sure that nothing remains connected to the pipeline and does not interfere with its removal.
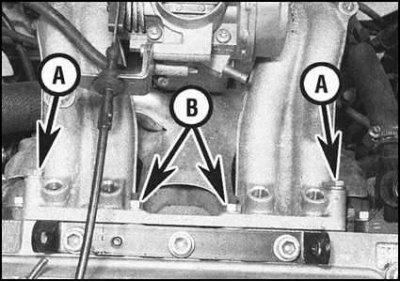
11. Loosen the six mounting nuts and bolts in several stages (four of them can be accessed from above, two from below). Try not to confuse the intake manifold fasteners with the exhaust manifold fasteners. Separate the pipeline from the cylinder head and remove it from the engine compartment - try not to allow any remaining fuel to leak out of the fuel line. Remove and discard the two gaskets - they must be replaced during assembly.
1.6L models
1. Remove the throttle body and air cleaner upper covers (see section Removal and installation the air cleaner assembly).
2. Disconnect the accelerator cable from the throttle actuator lever (see section Removal, installation and adjusting the accelerator cable). Release the cable from the support clamp and move it to the side.
3. Disconnect the wiring from the throttle position module and the intake air temperature/pressure sensor. Disconnect the hose from the charcoal canister from the front wall of the throttle body.
4. After carefully labeling the wires, disconnect the electrical connectors. Release the wiring harness from the clips on the top of the fuel line and move it to the side.
5. Disconnect the vacuum hose from the fitting on the bottom of the fuel pressure regulator
6. Place an old rag under the fuel supply and return line unions on the fuel line. Loosen the clamps and disconnect the line hoses from the line. Try to remember the installation position of the hoses - the supply hose is located closer to the throttle body.
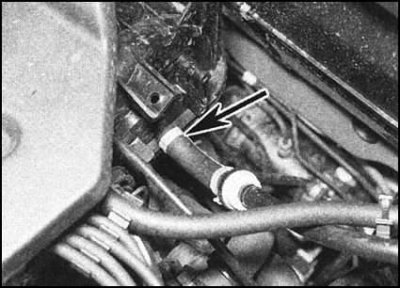
7. Disconnect the vacuum hose coming from the brake booster servo from the fitting on the left wall of the intake manifold.
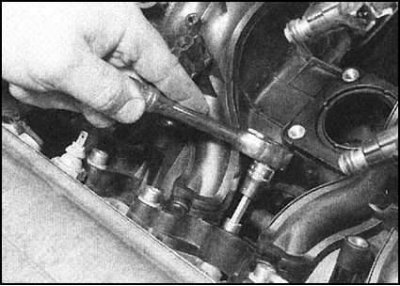
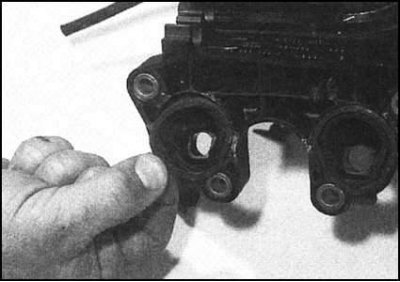
8. Loosen and remove the bolts securing the intake manifold to the cylinder head in several steps. Separate the manifold from the head and remove it from the engine compartment - try to prevent any remaining fuel from leaking out of the fuel line. Remove and discard the two sealing rings - they must be replaced during assembly.
 |
 |
Installation
Installation is carried out in reverse order. Please note the following points:
- a) Sealing gaskets/rings must be replaced without fail;
- b) All fasteners must be tightened to the required torque;
- c) Check the quality of all hose and electrical connections;
- d) Do not forget to adjust the accelerator cable (see section Removal, installation and adjusting the accelerator cable);
- e) Before operating the vehicle, thoroughly check the fuel system for signs of leaks.