
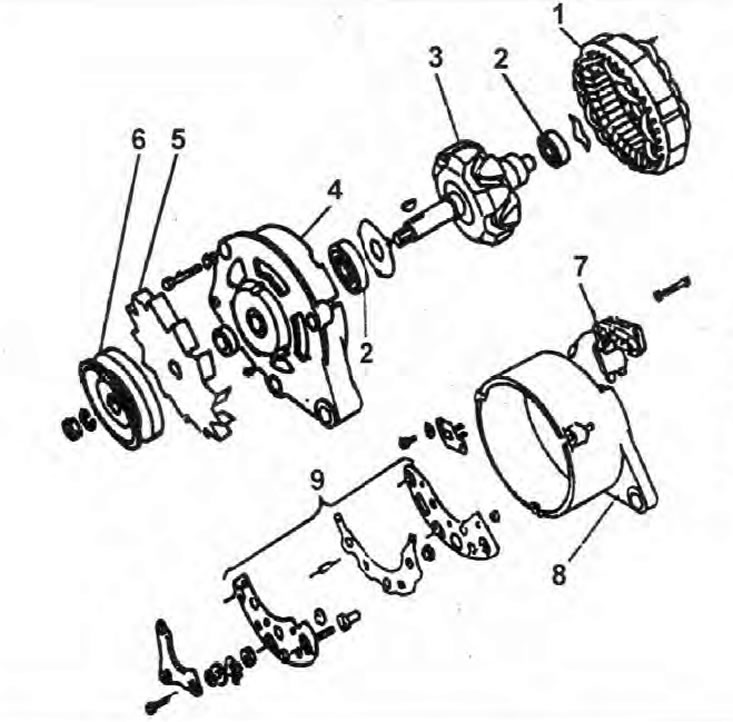
Pic. 12.1. Generator
1. Stator frill; 2. Bearing; 3. Assembly of the rotor; 4. Body - front; 5. Generator fan; 6. Pulley; 7. Assembling the voltage regulator and brush holder; 8. Case - back; 9. Rectifier assembly.
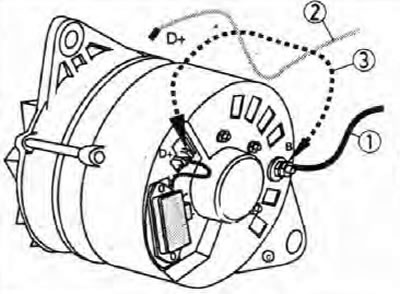
Pic. 12.3. Changing the polarity of the generator rotor connection
1. Wire B+ of the main harness; 2. D+ wire of the main harness; 3. Connect for one second.
Note: Most alternator failures are due to the voltage regulator or brushes. If after replacing any of these assemblies the malfunction remains, consult a specialist; In most cases, the best solution is to replace the alternator.
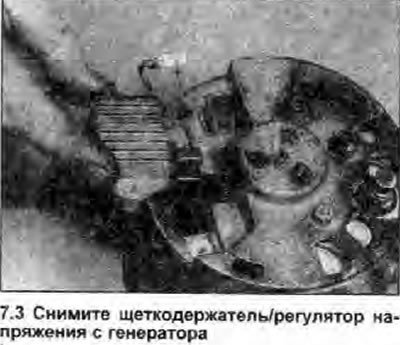
1. Although it is possible to remove the voltage regulator and brush holder assembly without removing the alternator from the vehicle, it is still recommended to remove the alternator (Chapter 6).
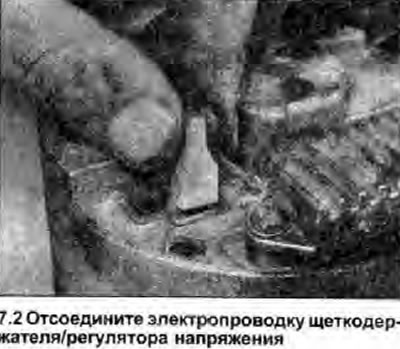
2. Disconnect the brush holder/voltage regulator wiring (photo).
3. Unscrew the two screws, and remove the voltage regulator and brush holder assembly from the generator (photo).
4. In most cases, brushes have wear limit marks in the form of grooves engraved on them; if these marks are no longer visible, the brushes are considered worn. If there are no marks, measure the height of the brush protruding from the brush holder. No values are specified by the manufacturer, but roughly the height should be at least 5 mm. If the brush is worn to the limit above, replace the brush holder and voltage regulator assembly.
5. If the brushes are still serviceable, clean them with a cloth dampened with solvent. Make sure the brushes are evenly spring loaded and firmly pressed against the generator rings. If there is any doubt about the condition of the brushes and springs, compare them with new components.
6. Inspect the rings through the brush holder window in the generator. Clean the rings if they are dirty. If the rings are damaged or severely burnt. the generator must be replaced or contact a specialist for restoration.
7. Install in the reverse order of removal. But note, if the voltage regulator has been replaced, it may be necessary to reverse the polarity of the rotor connection, as described in the following paragraphs.
Changing the polarity of the rotor connection after replacing the voltage regulator
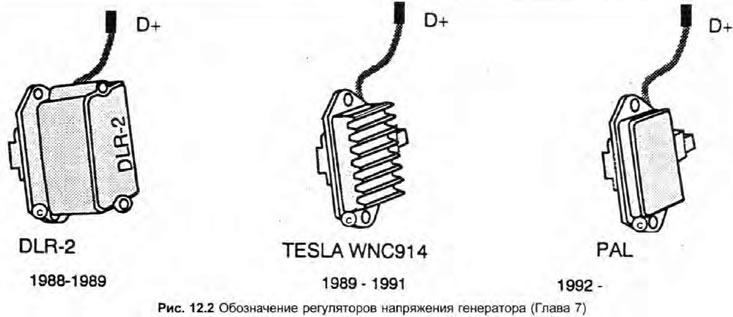
8. Three types of voltage regulator can be used on generators. Installed on early models (before 1991) labeled «DLR-2» or «Tesla». Installed on later models (since 1992) labeled «RAE» (Pic. 12.2).
9. Regulators «DLR-2» and «Tesla» interchangeable without problems. If a regulator is installed on the early type generator «PAL», or vice versa, it is necessary to change the polarity of the generator rotor connection as follows.
10. After installing the assembled generator on the engine, connect the main wire of the generator (B+) and connect the battery. Connect the D+ wire of the regulator to the alternator, but do not connect the D+ wire of the wiring harness yet.
11. Using a jumper wire, connect the B+ and D+ terminals on the generator for one second (Pic. 12.3). Be careful not to touch the bare horse wire to another metal. Remove jumper wire.
12. Connect the old D+ wire to the generator.
13. Start the engine and check that the alternator is producing the correct voltage.
14. If the polarity reversal process is not done, no harm will be done, but the alternator will not charge the battery.