



Front suspension
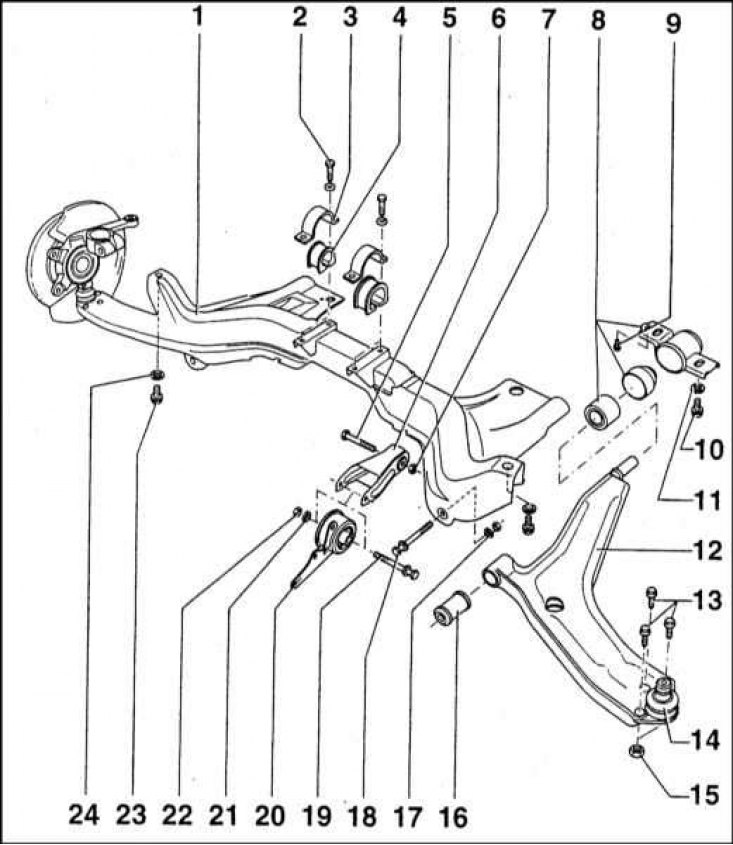
1 - Cross beam; 2 - Bolt (25 Nm); 3 - Bracket; 4 - Rubber bushing; 5 - bolt; 6 - Holder with rubber-metal sleeve; 7 - Self-locking nut (100 Nm); 8 - Rear wishbone cushion; 9 - Bolt M6 (7 Nm); 10 - Bolt (70 Nm); 11 - Washer; 12 - Suspension wishbone; 13 - Bolts; 14 - Ball joint; 15 - Nut (25 Nm); 16 - Front wishbone cushion; 17 - Self-locking nut (90 Nm); 18 - Bolt; 19 - Bolt; 20 - Bracket for mounting the reaction rod with rubber cushion; 21 - Washer; 22 - Self-locking nut (5 Nm); 23 - Bolt (45 Nm); 24 - Washer
Note: When reassembling, you will need a new tent pinch bolt nut and a new front axle bolt nut. Also have new spring washers for the arm mounting bolts.
Removal
1. Chock the rear wheels, set the parking brake, then jack up the front of the vehicle and place it on stands. Remove the corresponding front wheel.
2. On models equipped with an anti-roll bar, loosen the nut securing the stabilizer bar to the lower arm, remove the washer and the lower rubber insert. The lower arm mounting components are shown in the illustration.
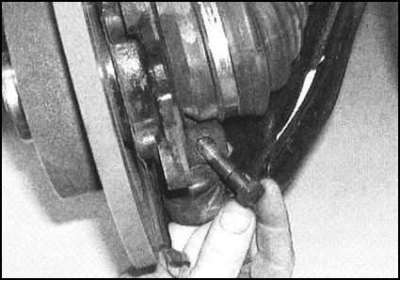
3. On all models, loosen the nut and remove the clamp bolt securing the hub assembly to the lower arm...
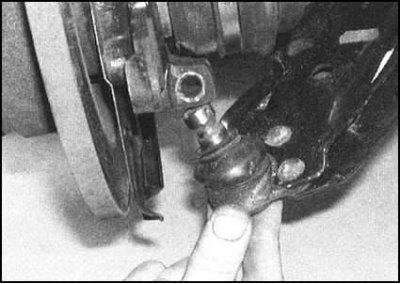
...using a pry bar, carefully lower the lower control arm, freeing the ball joint from its mounting clamp at the base of the hub assembly. On models equipped with an anti-roll bar, be careful not to allow the rubber cushion and washer of the upper stabilizer bar mount to fall out.
Note: The ball joint tie bolt nut must be replaced without fail.
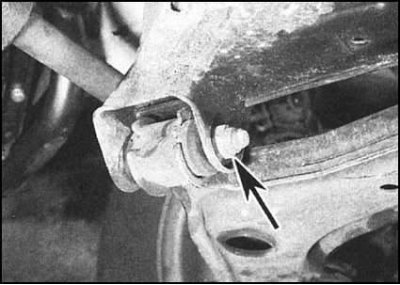
4. Loosen the nut of the front axle bolt of the lower arm, remove the washer.
Note: The nut must be replaced during assembly.
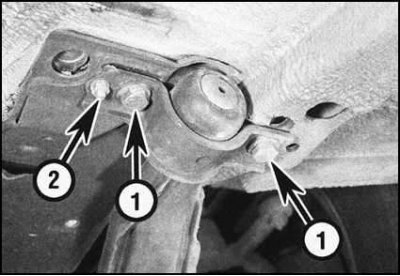
5. Remove the nut and bolts securing the rear axle bushing of the lower arm to the bottom of the car...
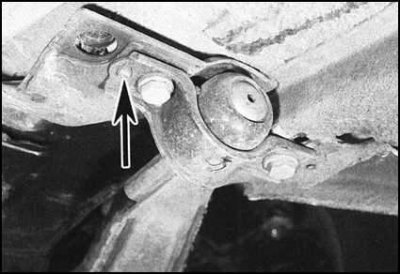
...remove the spring washers from the bolts - they must be replaced during assembly.
Note: On some models, the bushing mounting nut may be replaced with a rivet.
6. Remove the master bolt from the front support bushing and remove the control arm assembly from under the vehicle.
Major repairs
1. Carefully wipe the lever and the mounting surfaces of its supports, removing all traces of dirt and anti-corrosion coating of the bottom. Carefully inspect the assembly for cracks, deformations and other mechanical damage. Pay special attention to the condition of the axle bushings. Replace defective components.
2. To replace the axle bushings, you will need a hydraulic press, a bearing puller, and several spacer bushings. In view of the above, it would be better to entrust this work to car service specialists who have all the necessary equipment. The procedure is described below.
3. To replace the front bushing, first try to remember its correct installation position. Then firmly support the lever and squeeze the bushing out of it. Carefully wipe the walls of the socket under the bushing. Before installing the new bushing, moisten it with a soap solution.
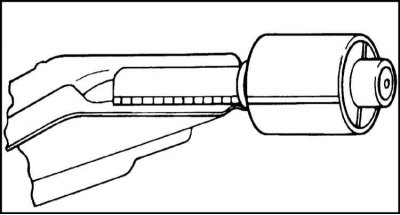
4. The rear bushing must also be installed in a strictly defined manner in relation to the lever. Otherwise, during operation of the car, the bushing will be subject to excessive loads. Squeeze the lever assembly out of the bracket, then squeeze the bushing out of the end of the lever. Carefully wipe the walls of the socket under the bushing. Before installing a new bushing, moisten it with a soap solution. When assembling, make sure that the bushing is correctly turned with its groove relative to the lever.
Installation
1. Place the lower control arm in its proper location and insert the ball joint tail into the clamp at the base of the hub assembly. On models equipped with an anti-roll bar, position the stabilizer bar strut on the control arm, making sure the rubber insert and upper support washer are seated correctly.
2. Insert the front axle bolt, install the washer, screw on the new nut and tighten it only by hand for now.
3. Screw on the fastening nut (with appropriate equipment) rear axle hub bracket. Screw in the bolts (don't forget to replace the spring washers). Tighten the bolts to the required torque, then tighten the nut. If so equipped, replace the nut with a new rivet.
4. Make sure the tie rod is seated correctly in the hub assembly. Install a new nut and tighten it to the specified torque.
5. Where required, install the rubber insert and washer of the lower support of the stabilizer bar, screw on the nut and tighten it to the required force.
6. Replace the wheel, then lower the vehicle to the ground and tighten the wheel bolts to the required torque.
7. Rock the vehicle to settle the control arm components, then tighten the front axle bolt nut to the specified torque.